Wrapping your car's hood is a fantastic way to personalize your vehicle, protect its paint, and even experiment with different aesthetics without the commitment of a full paint job. Whether you're aiming for a sleek matte finish, a vibrant color change, or a unique textured look, wrapping offers a cost-effective and relatively simple alternative. However, achieving a professional-looking result requires patience, precision, and the right techniques.
This guide will walk you through each step of the process, from preparing your hood to applying the vinyl wrap and finishing the edges. We'll cover essential tools, preparation methods, and application techniques, along with common pitfalls to avoid. By following these instructions carefully, you can achieve a smooth, bubble-free finish that will turn heads.
Remember, wrapping is as much an art as it is a science. Don’t be discouraged if your first attempt isn't perfect. With practice, you'll develop the skills and confidence to tackle more complex wrapping projects.
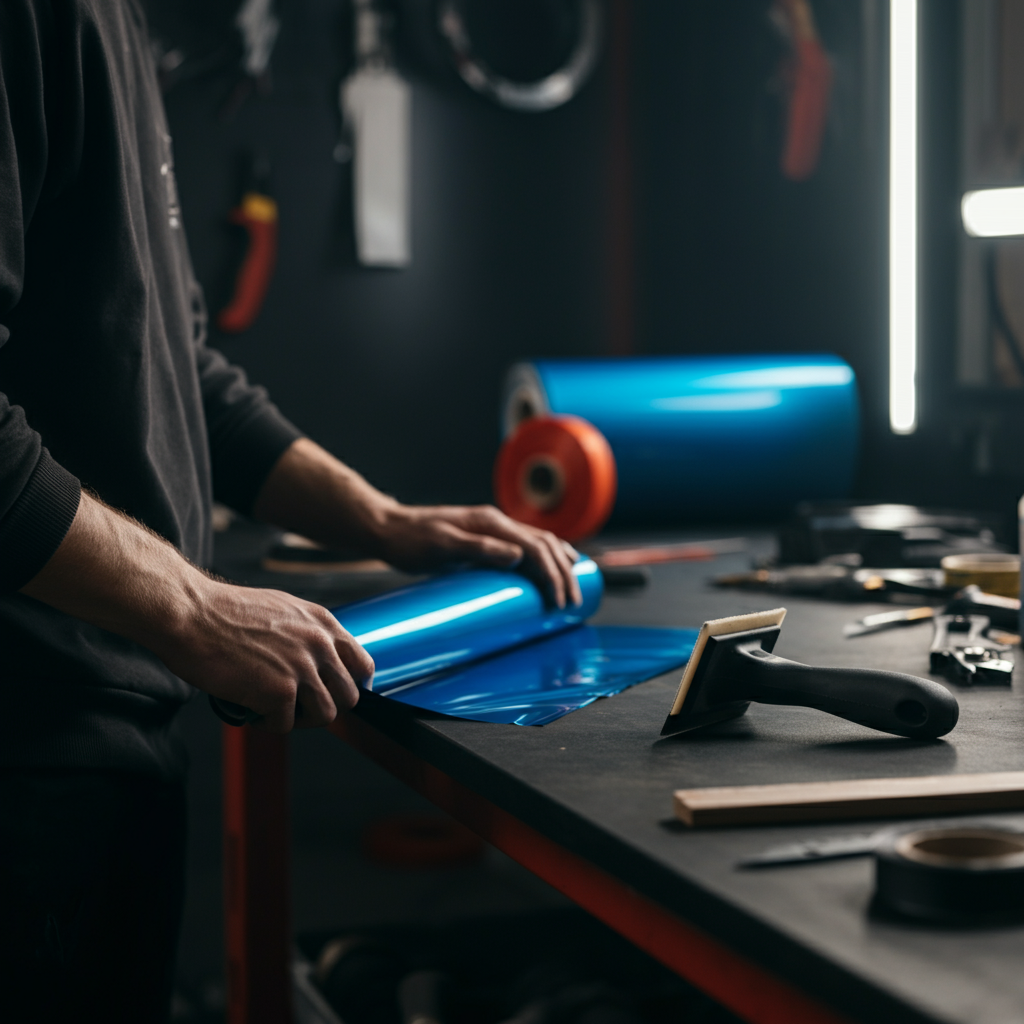
Step 1: Gather Your Tools and Materials
Before you even think about touching your car with vinyl, you need to assemble the necessary tools and materials. Having everything on hand will streamline the process and prevent frustrating interruptions.
- Vinyl Wrap Film: Choose a high-quality automotive-grade vinyl in your desired color and finish. Purchase more than you think you'll need to account for mistakes and complex curves.
- Squeegee: A hard card squeegee with a felt edge is essential for smoothing the vinyl and removing air bubbles.
- Heat Gun: A heat gun helps to make the vinyl more pliable and conform to curves and edges.
- Cutting Tools: A sharp blade knife or trimming knife is needed to cut the vinyl to size and trim excess material. Always use a fresh blade to avoid tearing the vinyl.
- Measuring Tape: Accurate measurements are critical for cutting the vinyl to the correct size.
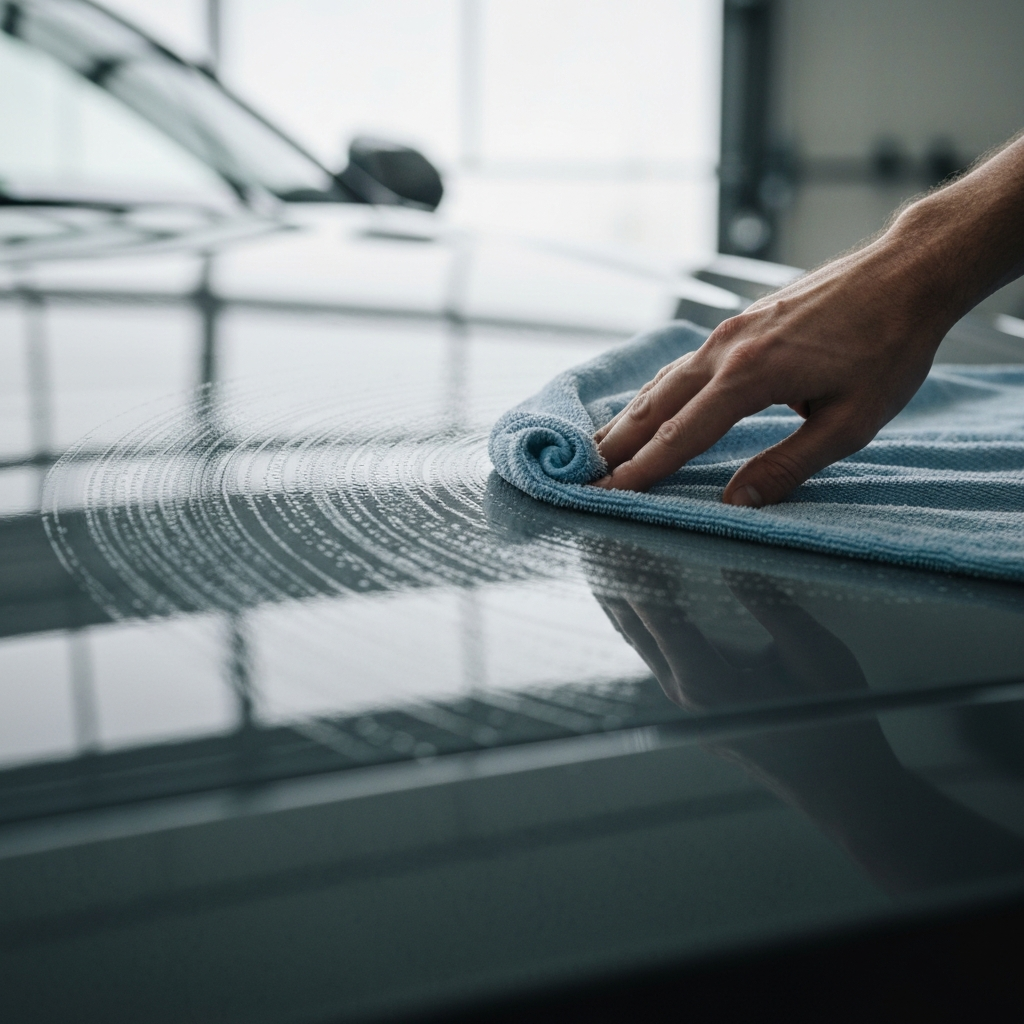
- Isopropyl Alcohol (70%): This is used to clean and degrease the hood surface.
- Microfiber Towels: Clean microfiber towels are necessary for wiping down the hood and applying the alcohol.
- Surface Cleaner: Use a high-quality automotive surface cleaner to remove any contaminants before applying the vinyl.
- Masking Tape: Helpful for temporarily holding the vinyl in place during the application process.
- Gloves: Vinyl gloves will prevent the oils from your hands from contaminating the vinyl adhesive.
Step 2: Prepare the Hood Surface
Proper surface preparation is paramount to achieving a successful vinyl wrap. Any imperfections on the hood surface will show through the vinyl, so it's essential to start with a clean, smooth base.
First, thoroughly wash the hood with soap and water to remove any dirt and grime. Next, use a clay bar to remove any embedded contaminants, such as tree sap or tar. Clay barring is crucial for a smooth finish. After clay barring, wipe down the hood with isopropyl alcohol to remove any remaining residue. Ensure the surface is completely dry before proceeding.
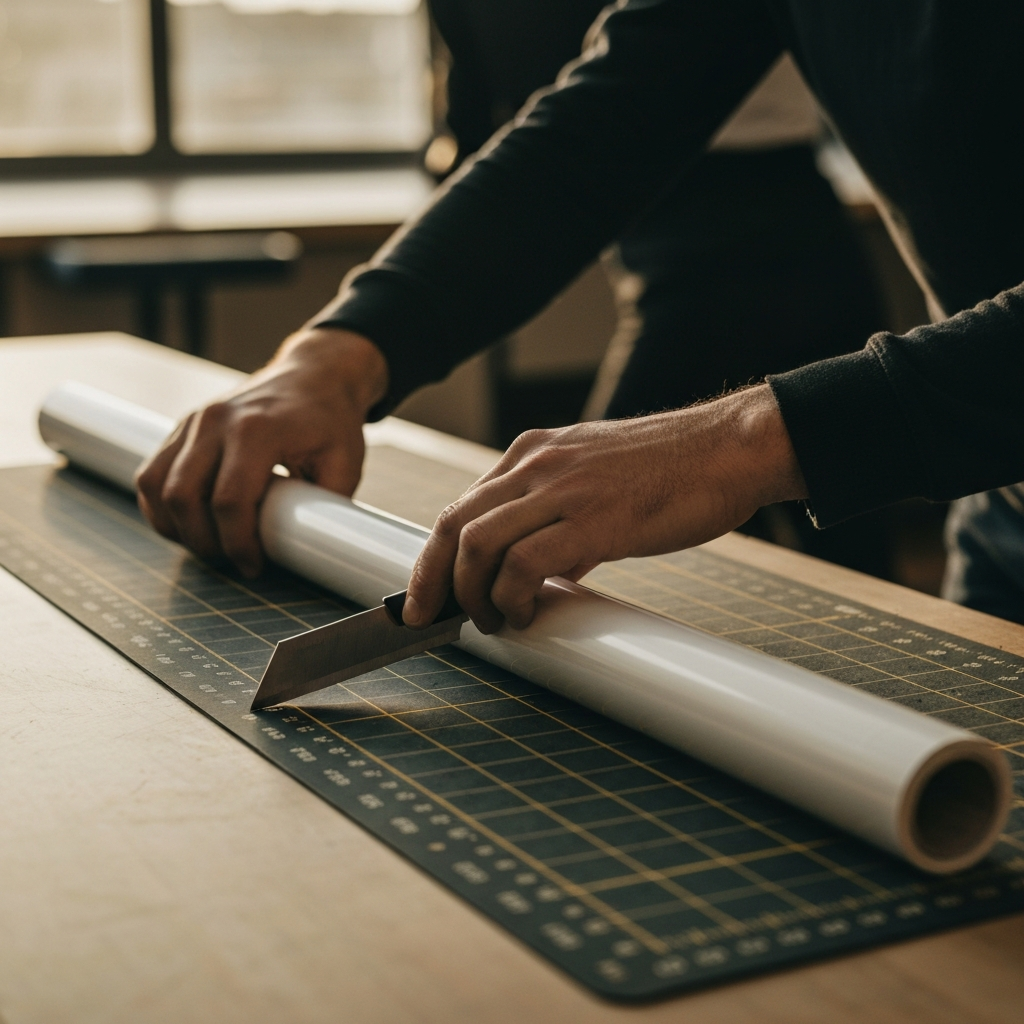
Step 3: Measure and Cut the Vinyl Wrap
Carefully measure the length and width of your hood. Add several inches to each dimension to allow for overlap and adjustments. It's always better to have too much vinyl than not enough.
Lay the vinyl wrap flat on a clean, smooth surface and use your measuring tape and cutting tool to cut it to the required size. Use a straight edge to ensure a clean, straight cut. Double-check your measurements before cutting to avoid wasting vinyl.
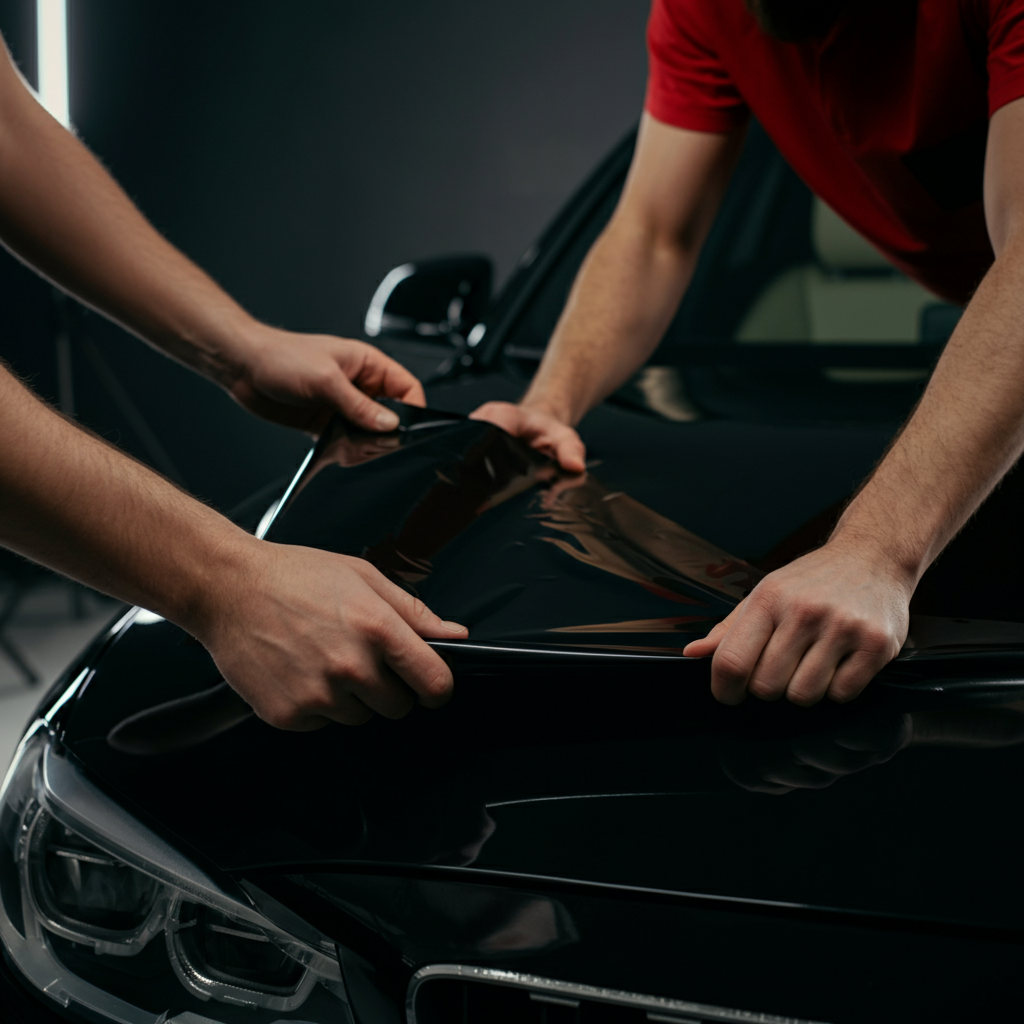
Step 4: Position and Tack the Vinyl
Carefully position the vinyl wrap over the hood, ensuring it's centered and aligned. Use masking tape to temporarily hold the vinyl in place.
Starting from the center of the hood, peel back a small section of the vinyl backing and tack the exposed adhesive to the hood. This is called "glassing" the vinyl. Work slowly and carefully to avoid wrinkles or bubbles.
Step 5: Squeegee the Vinyl
Using your squeegee, begin smoothing the vinyl from the center outward, working towards the edges. Apply firm, even pressure to remove air bubbles and ensure the vinyl adheres properly to the hood surface. Overlap each squeegee stroke slightly to avoid leaving any gaps.
If you encounter any wrinkles or bubbles, gently lift the vinyl and use the heat gun to soften it. Then, re-squeegee the area, working the air bubbles towards the edges.

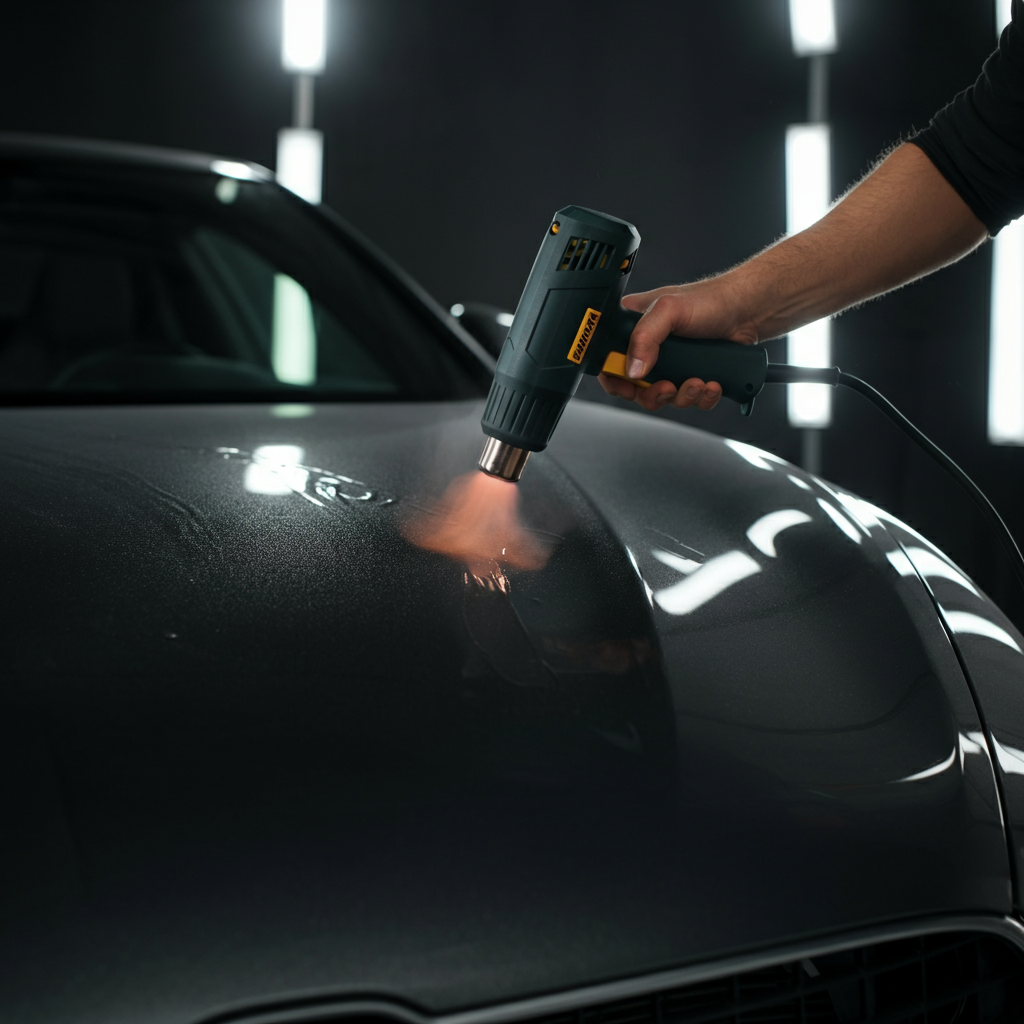
Step 6: Heat and Conform the Vinyl
Use the heat gun to carefully heat the vinyl, paying particular attention to curved areas and edges. The heat will make the vinyl more pliable and allow it to conform to the contours of the hood.
Be careful not to overheat the vinyl, as this can damage it. Keep the heat gun moving and maintain a safe distance from the surface. Use your squeegee to smooth the vinyl as you heat it.
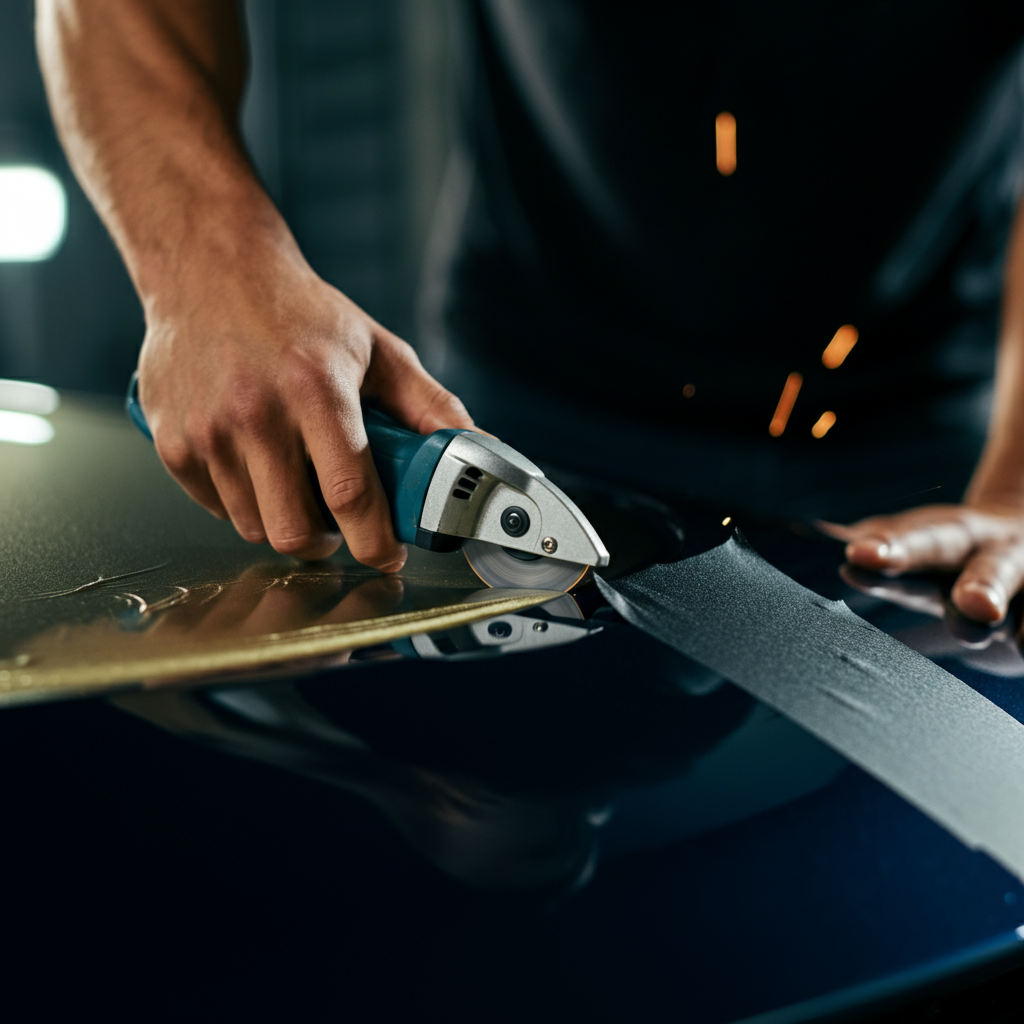
Step 7: Trim Excess Vinyl
Once the vinyl has been fully applied and conformed to the hood, use your cutting tool to trim the excess material around the edges. Leave a small overlap to wrap around the edges for a clean, professional finish.
Use a sharp blade and work carefully to avoid scratching the paint. A steady hand is crucial for this step.
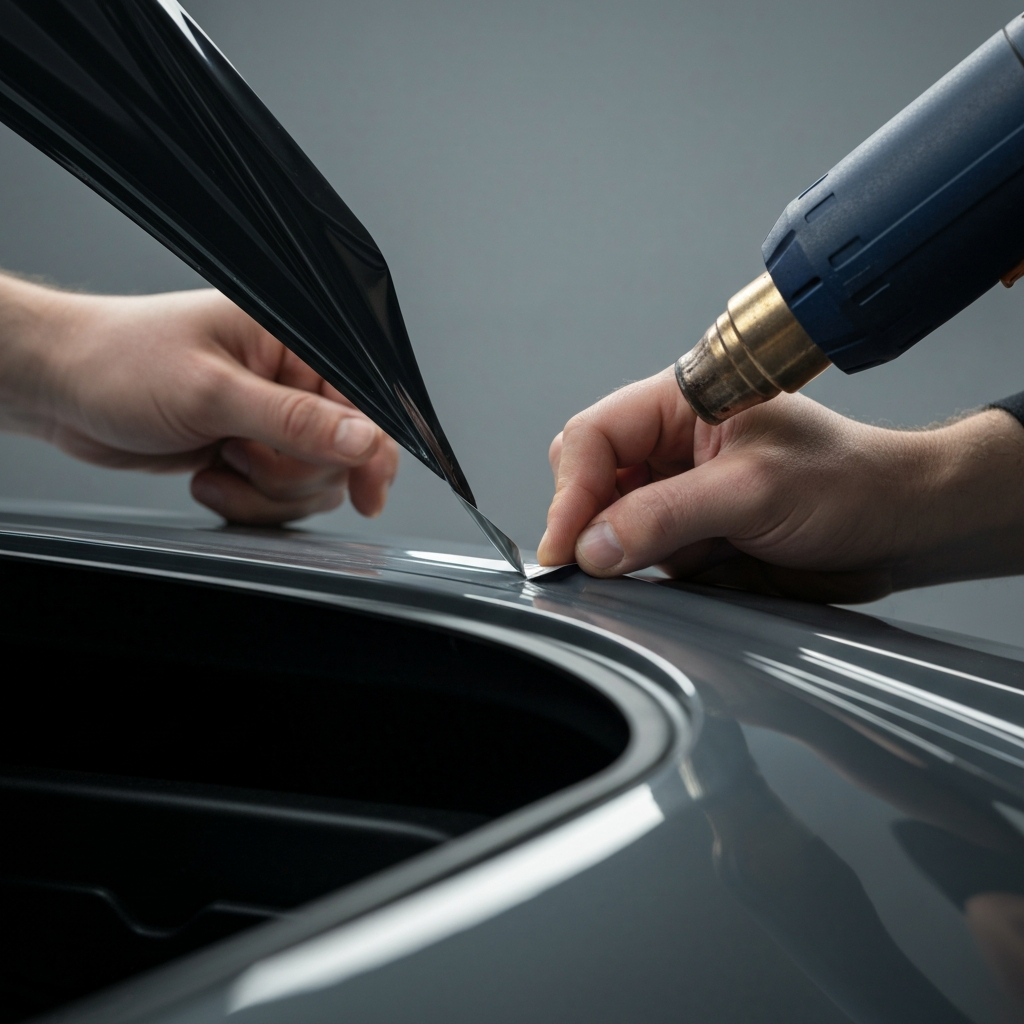
Step 8: Wrap the Edges
Use your heat gun to soften the overlapping vinyl and carefully wrap it around the edges of the hood. Use your squeegee to smooth the vinyl and ensure it adheres properly to the underside of the hood.
This step requires patience and attention to detail. Ensure all edges are securely wrapped to prevent the vinyl from lifting or peeling.
Step 9: Final Inspection and Finishing Touches
Thoroughly inspect the wrapped hood for any remaining air bubbles, wrinkles, or imperfections. Use your squeegee and heat gun to address any issues.
Once you're satisfied with the result, wipe down the hood with a clean microfiber towel to remove any fingerprints or smudges. Admire your handiwork!
Common Mistakes to Avoid
- Insufficient Surface Preparation: Failing to properly clean and prepare the hood surface is the most common cause of wrapping failure.
- Overheating the Vinyl: Overheating can cause the vinyl to stretch excessively or even melt.
- Using a Dull Blade: A dull blade will tear the vinyl and leave jagged edges.
- Applying Too Much Pressure: Applying too much pressure with the squeegee can damage the vinyl.
- Rushing the Process: Wrapping a car hood takes time and patience. Rushing the process will likely result in mistakes.
Pro Tips
- Work in a clean, well-lit environment.
- Use a high-quality vinyl wrap.
- Take your time and be patient.
- Don't be afraid to ask for help.
- Practice on a smaller, less visible area first.
FAQ Section
Q: How long does it take to wrap a car hood?
A: The time required can vary depending on your experience level and the complexity of the hood's shape. Generally, it can take anywhere from 2 to 4 hours.
Q: How long will the vinyl wrap last?
A: A high-quality vinyl wrap can last for several years if properly maintained. Exposure to sunlight and harsh weather conditions can shorten its lifespan.
Q: Can I wash my car after wrapping it?
A: Yes, but avoid using harsh chemicals or abrasive brushes. Hand washing with a mild soap is recommended.
Safety Considerations
- Always wear gloves to protect your hands and prevent contamination of the vinyl.
- Work in a well-ventilated area when using cleaning products or heat guns.
- Use caution when handling sharp blades.
- Never point a heat gun at yourself or others.
Conclusion
Wrapping your car's hood is a rewarding project that can transform the look of your vehicle. By following the steps outlined in this guide and taking your time, you can achieve a professional-quality finish. Remember to prioritize surface preparation, use the right tools, and practice patience. With a little effort, you can enjoy a custom look that sets your car apart from the crowd.