Wheel loaders, also known as front-end loaders, are indispensable workhorses on construction sites, farms, mines, and in various other industries. Their ability to efficiently move massive amounts of materials makes them a crucial asset. Mastering the operation of a wheel loader isn't just about driving; it's about understanding the machine's capabilities, safety protocols, and best practices for optimal performance.
This comprehensive guide will provide you with a step-by-step approach to safely and effectively operate a wheel loader. We'll cover everything from pre-operation checks to maneuvering the machine and utilizing its bucket and boom functions. Remember, proper training and adherence to safety guidelines are paramount before operating any heavy machinery.
Whether you're a beginner looking to learn the basics or an experienced operator seeking to refine your skills, this guide offers valuable insights and practical tips to help you excel in your work.
Step 1: Pre-Operation Inspection
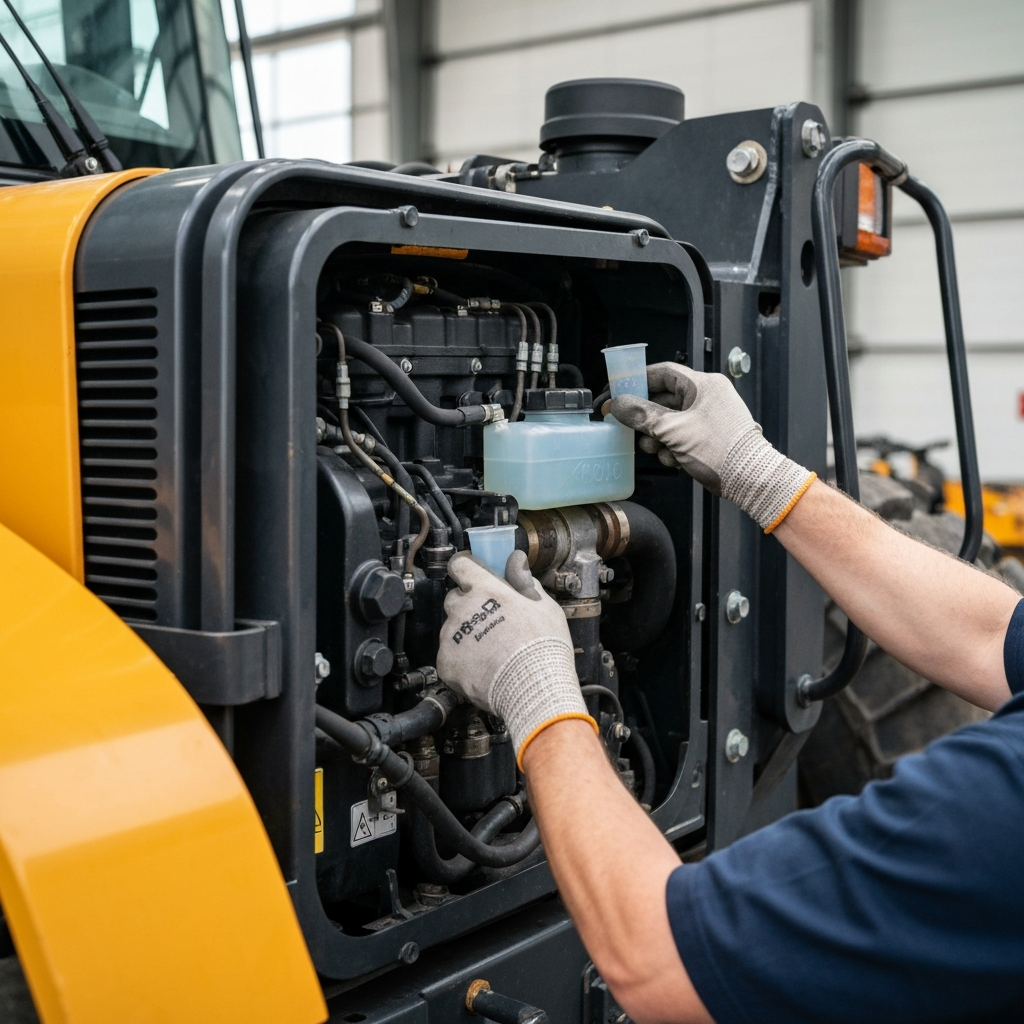
Before starting the engine, a thorough pre-operation inspection is critical. This involves checking fluid levels, looking for any visible damage, and ensuring all safety features are functioning correctly. Neglecting this step can lead to equipment failure, accidents, and costly downtime. Specifically, check the engine oil, coolant, hydraulic fluid, and fuel levels. Walk around the machine and inspect tires, hoses, and connections for leaks or wear. Ensure the bucket and boom are free from obstructions and that all guards and shields are in place.
Step 2: Entering the Cab and Safety Procedures
Once the pre-operation inspection is complete, carefully enter the cab. Ensure the steps and handholds are clean and free from debris. Always maintain three points of contact when climbing in and out of the machine. Once inside, adjust the seat and mirrors for optimal visibility. Fasten your seatbelt – this is non-negotiable. Familiarize yourself with the location and operation of all controls, including the emergency shutdown switch and any other safety equipment, such as a glass breaker.

Step 3: Starting the Engine
With the seatbelt fastened and controls identified, insert the key into the ignition. Turn the key clockwise to the "start" position and release it once the engine starts. Avoid prolonged cranking, as this can damage the starter motor. If the engine fails to start after several attempts, consult the operator's manual or a qualified mechanic. Allow the engine to idle for a few minutes to warm up before operating the machine, especially in cold weather.

Step 4: Adjusting Lighting and Visibility
Depending on the operating conditions, adjust the lighting and visibility. Most wheel loaders have switches for headlights, work lights, and other auxiliary lights. Use these to ensure adequate visibility, especially in low-light conditions. Rotate the knob on the right of the steering column to operate the windshield wipers at the desired speed. Push the button on the end of the knob to activate the washer fluid if the windshield is dirty.Never operate a wheel loader in conditions where visibility is severely impaired.
Step 5: Understanding Gear Selection and Movement Controls
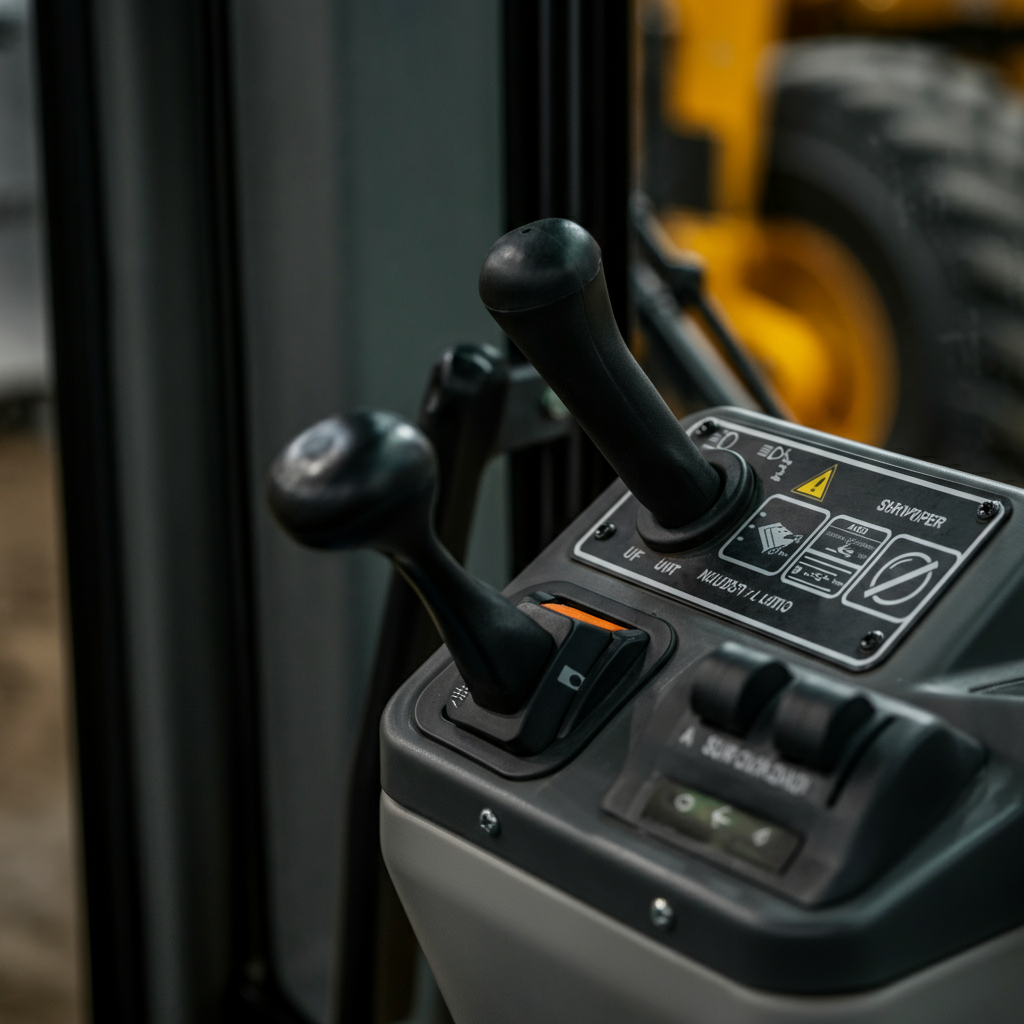
Wheel loaders typically have a gear selector knob or lever that allows you to choose the desired gear range (usually 1-4) and direction (forward, neutral, and reverse). Familiarize yourself with the location of this control and how it operates. The accelerator pedal controls the engine speed and therefore the driving speed of the wheel loader. The brake pedals are typically connected, allowing you to brake with either your right or left foot. Practice using these controls in a safe, open area before operating the machine in a work zone.

Step 6: Releasing the Parking Brake
Before moving the wheel loader, ensure the parking brake is disengaged. The parking brake is usually controlled by a lever or switch located on the dashboard or center console. Always ensure the parking brake is fully released before attempting to move the machine. To release the parking brake, push the red tab on the switch while simultaneously depressing it. Consult the operator's manual if you are unsure of the parking brake's location or operation.
Step 7: Moving Forward and Backward
To move the wheel loader forward, push the gear selector lever to the (F) position. Gently depress the accelerator pedal to increase speed. To move in reverse, pull the lever to the (R) position and use the accelerator pedal to control your speed. Always look in the direction of travel before moving the machine and be aware of your surroundings. Avoid sudden starts and stops, as this can cause instability and potential hazards.

Step 8: Steering the Wheel Loader
Wheel loaders are articulated, meaning they steer by pivoting in the middle rather than by turning the wheels. To turn, rotate the steering wheel in the desired direction. Counter-clockwise rotation turns the wheel loader to the right, while clockwise rotation turns it to the left. Practice steering in a safe, open area to get a feel for the machine's turning radius. Be mindful of the machine's rear swing when making turns, as the rear of the loader can extend beyond the front.

Step 9: Stopping the Wheel Loader
To stop the wheel loader, gently depress either of the brake pedals. The brake pedals are connected to each other and both will depress regardless of which one is pressed. Avoid sudden or harsh braking, as this can cause the load to shift and potentially tip the machine. Allow ample stopping distance, especially when carrying a load. In emergency situations, use the parking brake to bring the machine to a complete stop.
Step 10: Familiarizing Yourself with Bucket and Boom Controls
Wheel loaders have two main controls for operating the bucket and boom: a joystick or lever for raising and lowering the boom, and another for tilting the bucket. There is also often a switch to lock/unlock the hydraulic functions of the wheel loader. Spend time familiarizing yourself with these controls and how they affect the movement of the bucket and boom. Understanding these controls is essential for efficient and safe operation.
Step 11: Lifting and Lowering the Boom
To lift the boom, pull the far right joystick backwards. To lower the boom, push the joystick forward. Always maintain a safe distance from overhead obstacles when raising the boom. When carrying a load, keep the boom as low as possible to maintain stability. If you release the joystick it will return to the center and the boom will hold its position.
Step 12: Tilting and Dumping the Bucket
To tilt the bucket forward and dump its contents, push the middle joystick forward. To tilt the bucket back and scoop material, pull the joystick back. Avoid overfilling the bucket, as this can reduce visibility and increase the risk of spillage. When dumping material, ensure the area is clear of personnel and obstacles. If you release the joystick it will return to the center and the bucket will remain in its current position.
Step 13: Parking and Shutdown Procedures
When finished operating the wheel loader, park it on a level surface away from traffic and hazards. Put the gear selector lever in the (N) neutral position. With the wheel loader in neutral, press the parking brake button to set the parking brake. Engaging the parking brake is critical to prevent the machine from rolling. Lock the hydraulic functions of the machine. Shut off the engine by turning the key all the way counterclockwise and remove the key from the ignition switch for safekeeping.
Step 14: Post-Operation Inspection
Before leaving the machine, conduct a brief post-operation inspection. Check for any new leaks, damage, or other issues that may have occurred during operation. Document your findings and report them to the appropriate personnel. Addressing potential problems early can prevent more serious issues down the line. Also ensure the bucket is on the ground.
Safety Considerations
- Always wear appropriate personal protective equipment (PPE), including a hard hat, safety glasses, and steel-toed boots.
- Be aware of your surroundings and maintain a safe distance from other workers and equipment.
- Never operate a wheel loader under the influence of drugs or alcohol.
- Ensure the work area is properly lit and free from hazards.
- Follow all safety regulations and procedures.
- Never allow unauthorized personnel to operate the machine.
Common Mistakes to Avoid
- Failing to perform a pre-operation inspection.
- Not wearing a seatbelt.
- Operating the machine at excessive speeds.
- Overloading the bucket.
- Making sudden or jerky movements.
- Ignoring warning signs or alarms.
Pro Tips
- Practice operating the wheel loader in a safe, open area to develop your skills and confidence.
- Communicate effectively with other workers on the job site.
- Maintain a smooth and consistent operating style.
- Use the machine's features and attachments to their full potential.
- Regularly inspect and maintain the wheel loader to ensure optimal performance and longevity.
FAQ Section
- How often should I perform a pre-operation inspection?
- You should perform a pre-operation inspection before each shift or each time you operate the wheel loader.
- What should I do if I notice a leak during the pre-operation inspection?
- If you notice a leak, do not operate the machine. Report the leak to the appropriate personnel and have it repaired before using the wheel loader.
- What is the maximum load capacity of the wheel loader?
- The maximum load capacity varies depending on the model of the wheel loader. Consult the operator's manual or the machine's specifications to determine the maximum load capacity.
- How do I properly clean the wheel loader?
- Refer to the operator’s manual for the proper cleaning procedure. Usually, you will need to use a pressure washer to remove mud, dirt, and debris from the machine. Be careful not to damage any sensitive components.
Conclusion
Operating a wheel loader safely and efficiently requires a combination of knowledge, skill, and attention to detail. By following the steps outlined in this guide, adhering to safety protocols, and continuously practicing your skills, you can become a proficient and valuable wheel loader operator. Always prioritize safety and never hesitate to ask for help or clarification when needed. Remember that ongoing training and a commitment to best practices are essential for long-term success.