That rattle, squeal, or clunk coming from your car can be more than just annoying. It's often a sign that something's amiss, and ignoring it can lead to costly repairs down the road. Early diagnosis is key to preventing minor issues from snowballing into major mechanical failures. But how do you pinpoint the source of the noise, especially if you're not a seasoned mechanic? This guide provides a step-by-step approach to identifying and understanding common car noises, saving you time, money, and potential headaches at the repair shop.
Before rushing to a mechanic, take some time to investigate the noise yourself. This not only gives you a better understanding of the problem but also allows you to provide the mechanic with more accurate information, potentially speeding up the repair process and reducing diagnostic costs. Remember, a well-informed customer is a savvy customer.
This guide will empower you to become a more proactive car owner, capable of identifying potential problems early on and communicating effectively with your mechanic. Let's get started and silence those unsettling sounds!
Step 1: Gather Information About the Noise
Before you even pop the hood, start by collecting as much information as possible about the noise. Note when the noise occurs: Is it constant, or only during specific conditions? Does it happen when you start the engine, accelerate, brake, turn, or drive over bumps? What does it sound like – is it a squeal, a grinding noise, a rattle, a clunk, or something else entirely? Where does it seem to be coming from – the engine, the wheels, under the car, or inside the cabin? The more details you can gather, the easier it will be to narrow down the possible causes.

Step 2: Identify the Location of the Noise
Determining the general area of the noise is crucial. Have a friend help you pinpoint the location while you recreate the conditions that trigger the sound. Is it coming from the front of the car, the rear, or underneath? Listen carefully near each wheel, the engine bay, and the exhaust system. If the noise is intermittent, try driving slowly in a quiet area with the windows down to better isolate the sound. Be mindful of safety and avoid distractions while driving.

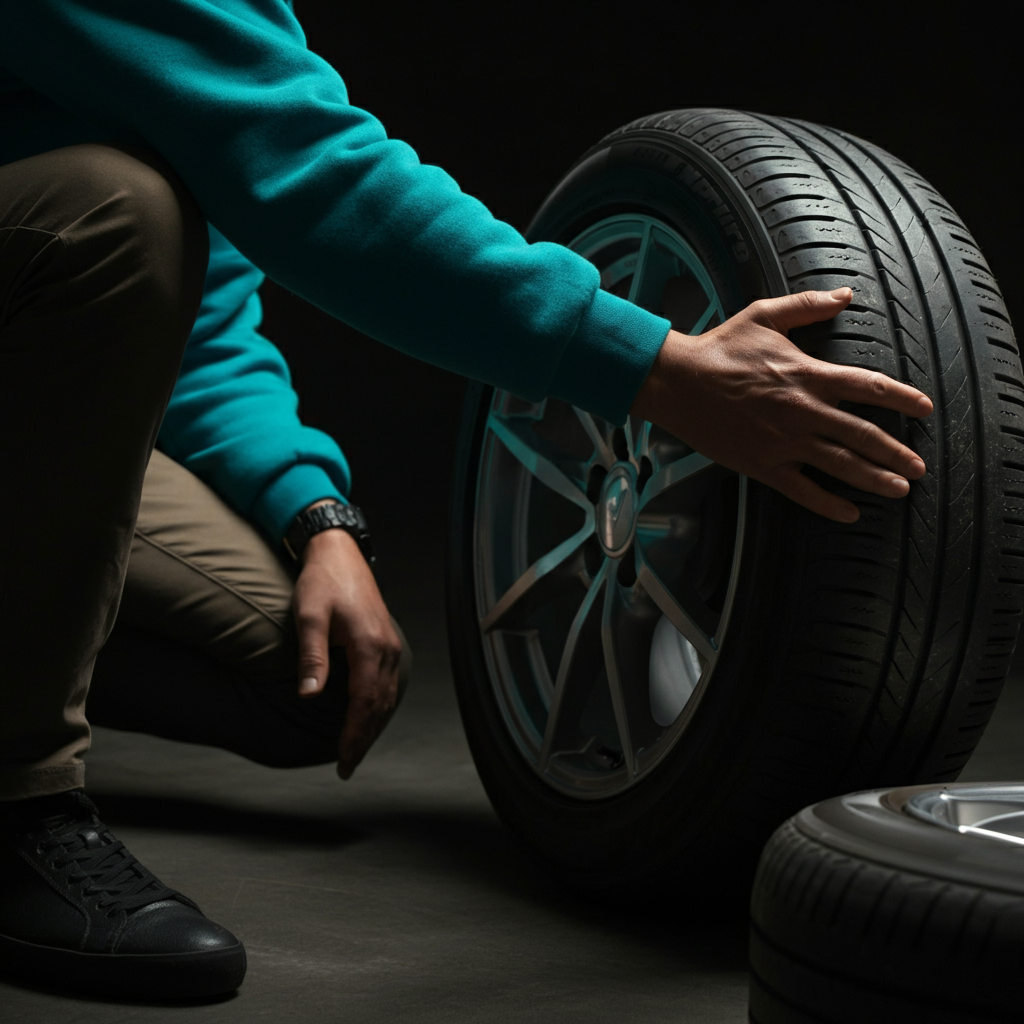
Step 3: Check the Easy Suspects: Tires and Brakes
Many noises are related to worn tires or brakes. Examine your tires for uneven wear, bulges, or embedded objects. Check the brake pads for wear by looking through the wheel spokes – if they're thin, they may be the source of a squealing noise. A grinding noise while braking almost always indicates worn brake pads that need immediate replacement. Also, check the tire pressure. Underinflated tires can cause a humming sound and affect handling.
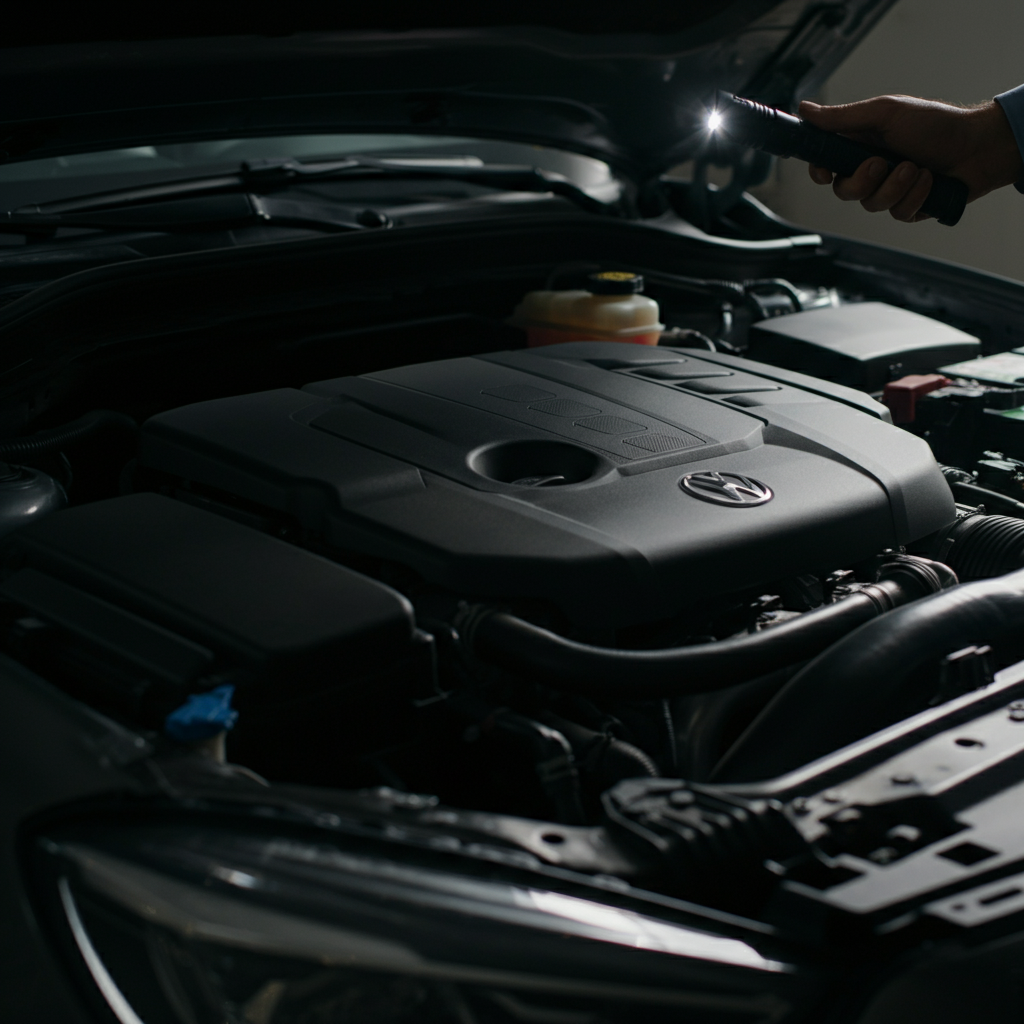
Step 4: Inspect the Engine Bay
With the engine off, carefully inspect the engine bay for any obvious signs of damage or loose components. Look for fluid leaks, frayed belts, or loose hoses. Start the engine and listen for unusual noises coming from the engine itself or any of its accessories, such as the alternator, power steering pump, or air conditioning compressor. Be extremely careful around moving parts and hot surfaces. If you suspect a belt is slipping, visually inspect it for cracks or damage.
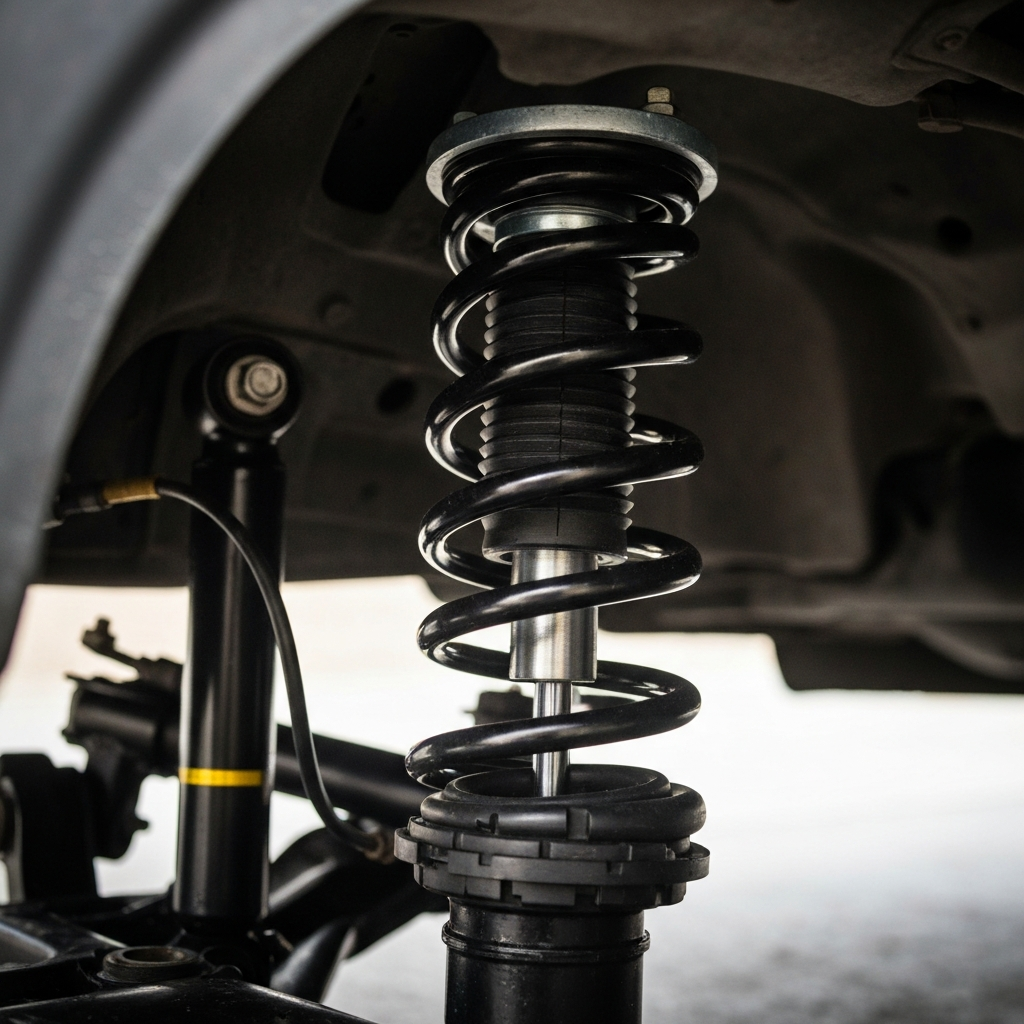
Step 5: Pay Attention to Suspension Components
Noises coming from the suspension, like clunking or rattling, often indicate worn-out shocks, struts, or ball joints. These noises are usually more pronounced when driving over bumps or uneven surfaces. Visually inspect the suspension components for any signs of damage or wear, such as cracked bushings or leaking shocks. A bouncing sensation after going over a bump can also indicate worn shocks or struts.
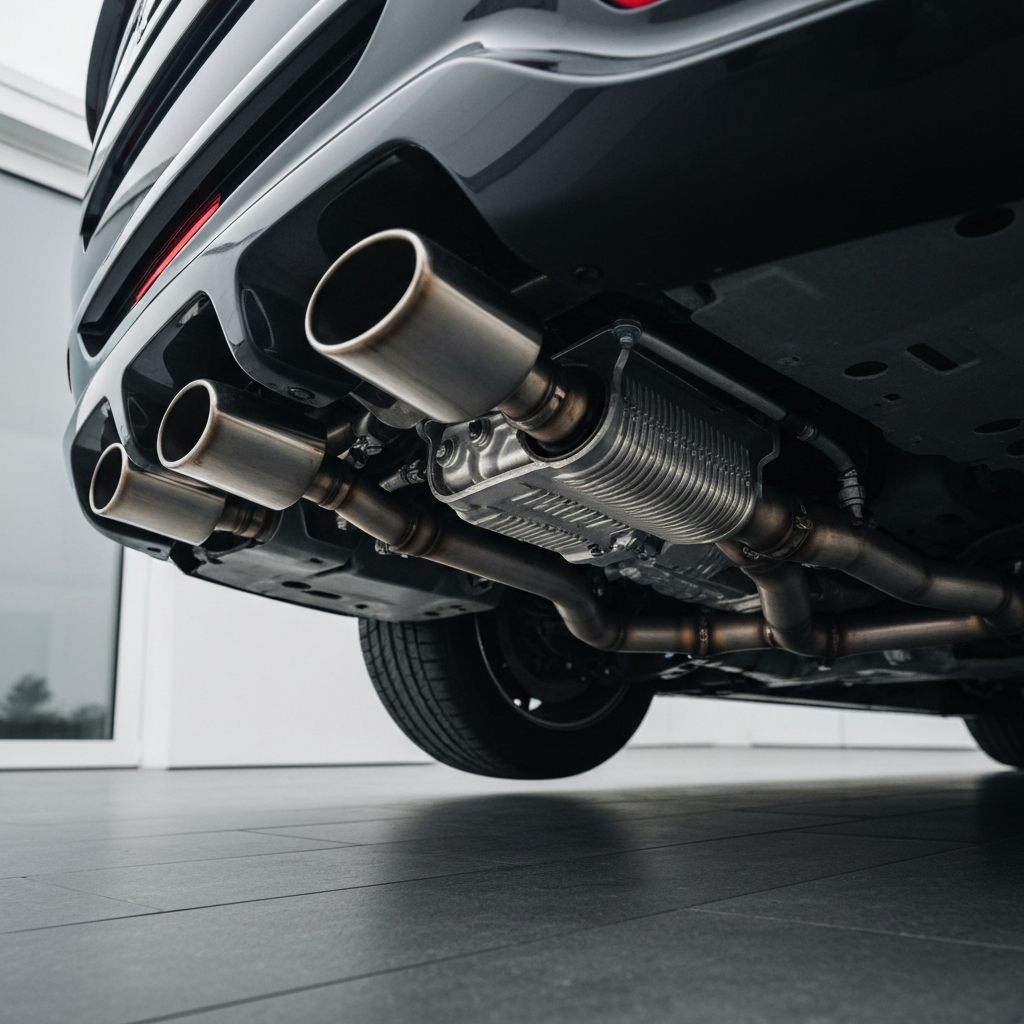
Step 6: Consider the Exhaust System
A rattling or hissing noise coming from under the car could be related to the exhaust system. Check for loose heat shields, rusted pipes, or a damaged muffler. Exhaust leaks can be dangerous, as they can allow harmful gases to enter the cabin. Have any suspected exhaust leaks repaired promptly.
Tools or Materials Required
- Jack and Jack Stands (for safely lifting the vehicle)
- Wheel Chocks
- Flashlight
- Gloves
- Safety Glasses
- Screwdrivers and Wrenches (assorted sizes)
- Pen and Notepad
Safety Considerations
- Always use jack stands when working under a vehicle. Never rely solely on a jack.
- Wear safety glasses to protect your eyes from debris.
- Disconnect the negative battery terminal before working on electrical components.
- Be careful around hot engine parts and moving components.
Pro Tips
- Record the noise with your phone to help the mechanic diagnose the issue.
- Provide the mechanic with a detailed description of when the noise occurs.
- Don't be afraid to ask questions – understanding the repair process can save you money in the long run.
FAQ Section
- Q: What if I can't identify the noise myself?
- A: If you're unable to pinpoint the source of the noise, it's best to take your car to a qualified mechanic for a professional diagnosis.
- Q: Can I ignore a car noise if it's not very loud?
- A: It's generally not a good idea to ignore any unusual car noises, as they can indicate a developing problem. Even a seemingly minor noise can eventually lead to a more serious and expensive repair.
- Q: How much does it cost to diagnose a car noise?
- A: Diagnostic costs vary depending on the mechanic and the complexity of the problem. Be sure to ask for an estimate before authorizing any work.
Conclusion
Diagnosing car noises can seem daunting, but by following these steps, you can become a more informed and proactive car owner. Remember, early detection is crucial for preventing costly repairs. While this guide provides a general overview, it's always best to consult with a qualified mechanic if you're unsure about the source of a noise or how to fix it. By taking the time to investigate and understand your car's sounds, you can keep it running smoothly and safely for years to come.