A rusted trailer hitch ball can be a real headache. What was once a simple task of swapping out balls for different trailer sizes or removing the hitch entirely can turn into a frustrating battle against corrosion. Rust binds the threads, making it incredibly difficult, if not impossible, to loosen the nut securing the ball. But don't despair! With the right tools, some patience, and a methodical approach, you can conquer that rust and get your hitch ball off.
This guide provides a comprehensive breakdown of the steps involved in removing a rusted trailer hitch ball. We'll cover everything from initial rust penetration to more aggressive methods like heating and cutting. Remember to prioritize safety throughout the process, as dealing with tools and potentially compromised metal can be hazardous. Before you start, assess the severity of the rust and choose the method that best suits your situation. Let's get started!
Before attempting any removal process, ensure the trailer is properly secured and the vehicle is in park with the parking brake engaged. A stable environment is crucial for safety.
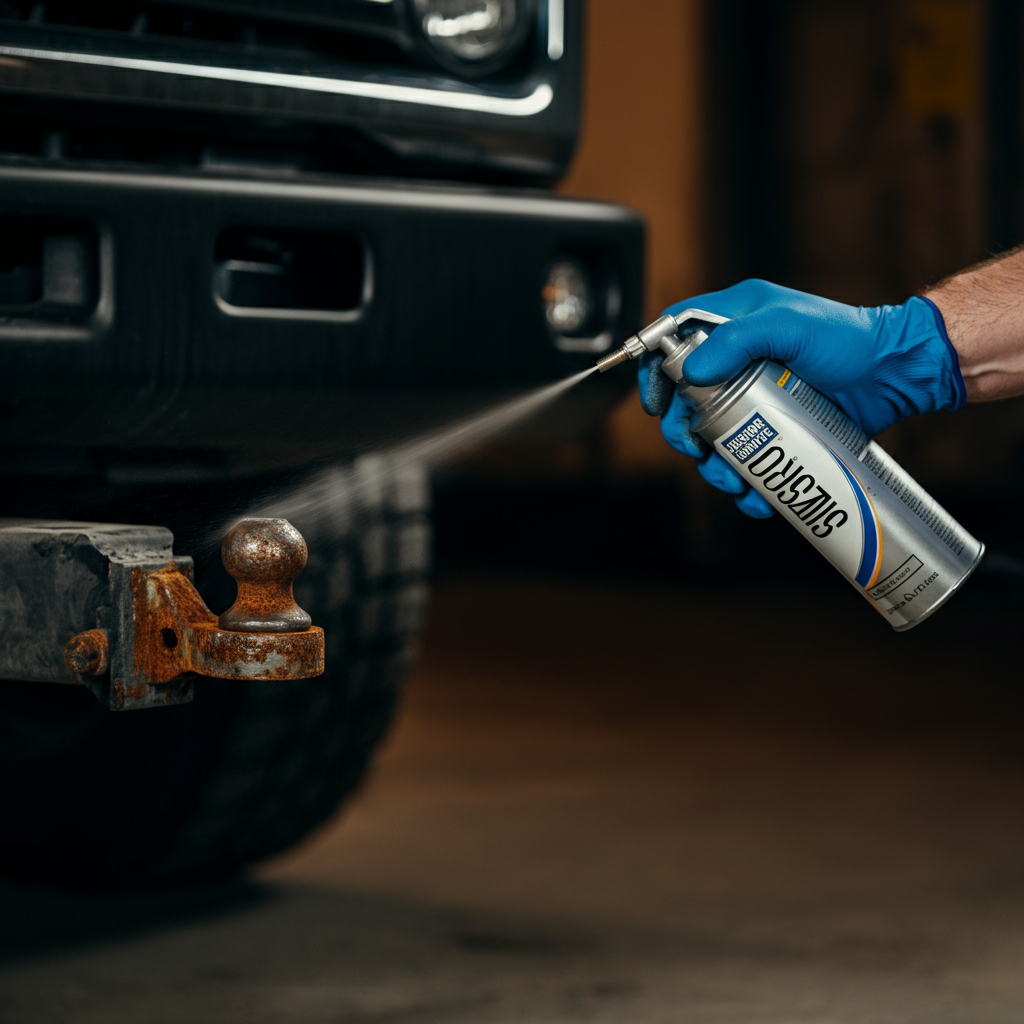
Step 1: Penetrating Fluid Application
The first line of defense against rust is a quality penetrating fluid. Apply the fluid liberally to all threaded areas, especially where the nut meets the hitch and around the base of the ball. Allow ample time for the fluid to work its way into the rust; ideally, let it soak overnight. Reapply the fluid periodically during the soaking period to maximize its effectiveness. The penetrating fluid acts as a lubricant, breaking down the rust and allowing the nut to turn more easily. Many experts prefer a penetrating oil specifically formulated for rust, as it tends to have better creeping ability than general lubricants.
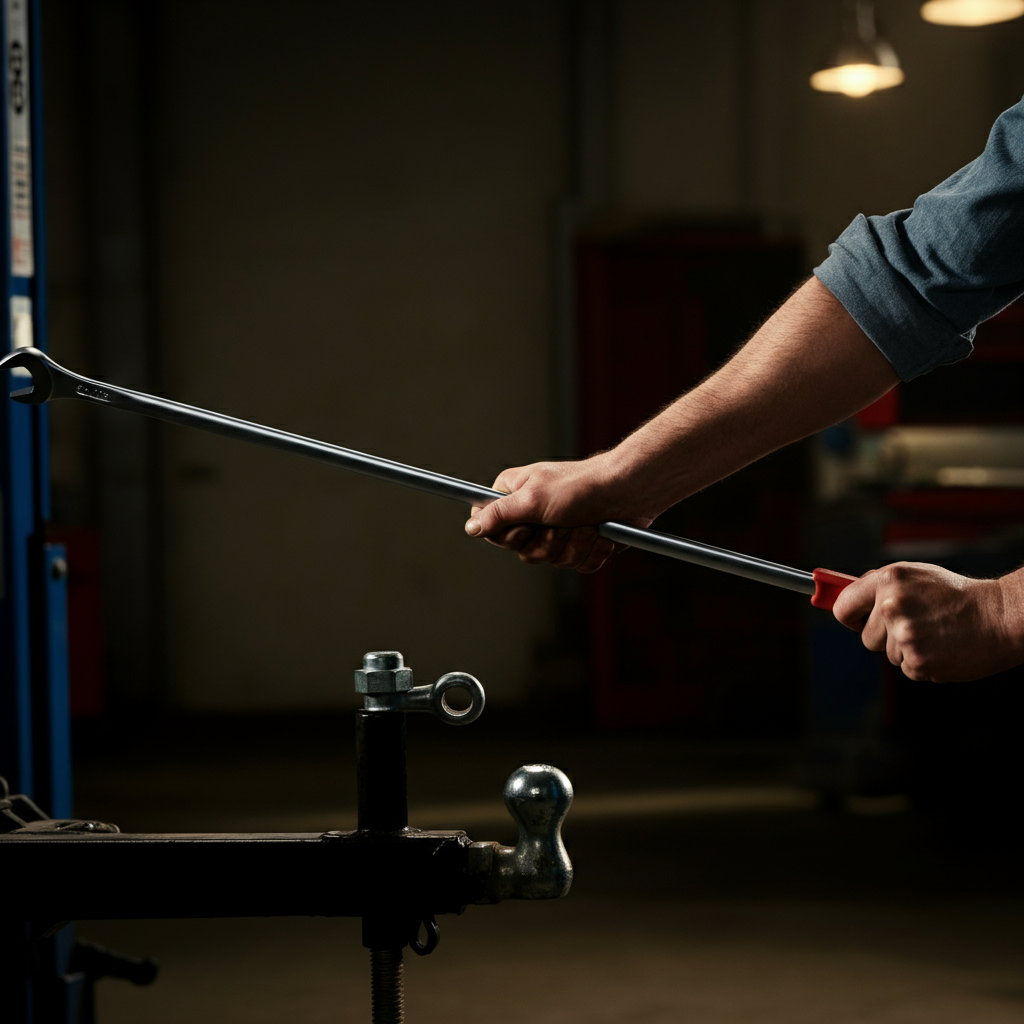
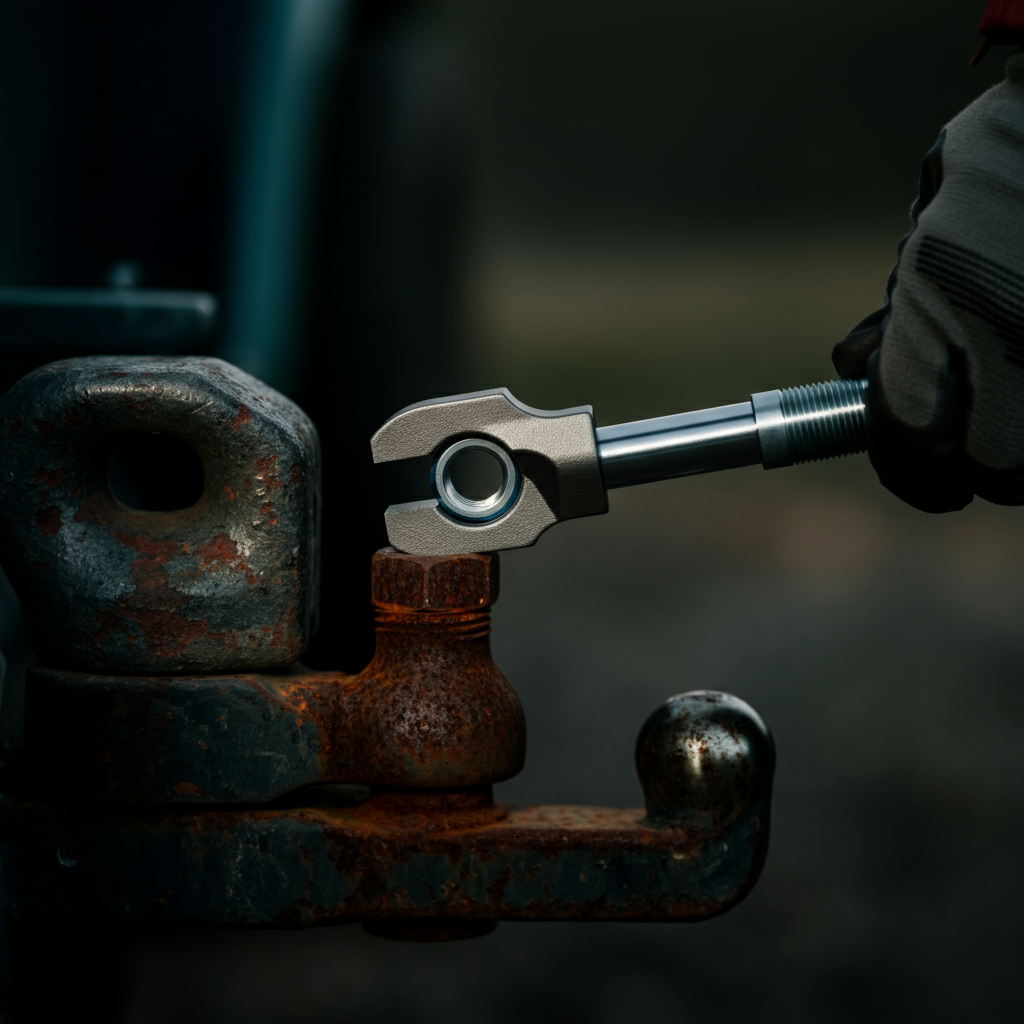
Step 2: Leverage with a Long-Handled Wrench
Once the penetrating fluid has had time to soak, it's time to apply some torque. Use a long-handled wrench that fits the nut snugly. The longer the handle, the more leverage you'll have. If your wrench is too short, consider using a "cheater bar"—a length of pipe slipped over the wrench handle—to extend its reach. Apply steady, consistent pressure in a counter-clockwise direction. Avoid jerking or sudden movements, as this can damage the nut or wrench. If the nut still won't budge, don't force it; move on to the next step.
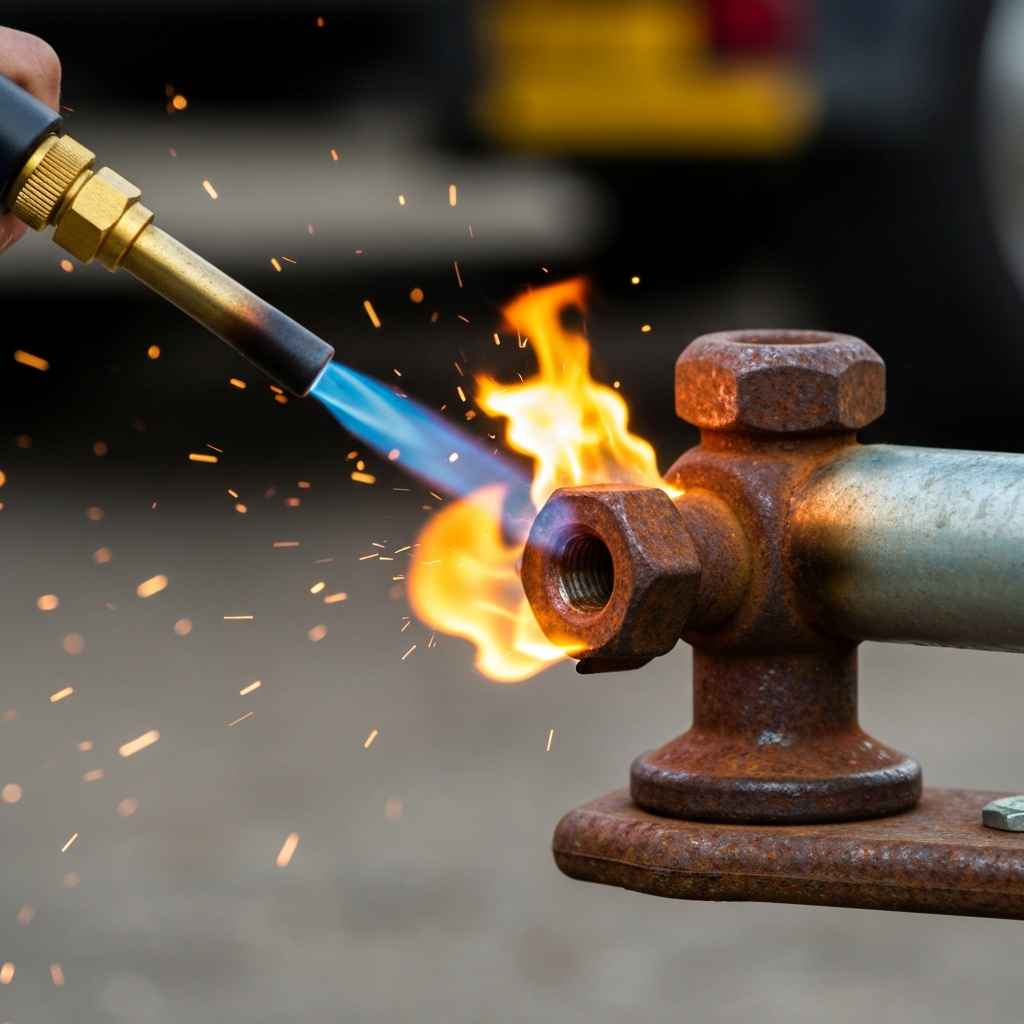
Step 3: Heat Application with a Torch
Heat can be a powerful ally in the fight against rust. Using a propane or MAP gas torch, carefully heat the nut for a few minutes. The goal is to heat the nut evenly, causing it to expand slightly and break free from the corroded threads. Be extremely cautious when using a torch, and always wear appropriate safety gear, including eye protection and gloves. Keep a fire extinguisher nearby. Avoid overheating the surrounding metal, as this can weaken it. After heating, immediately try loosening the nut with the wrench while the metal is still hot. The rapid change in temperature can sometimes be enough to break the rust's grip.
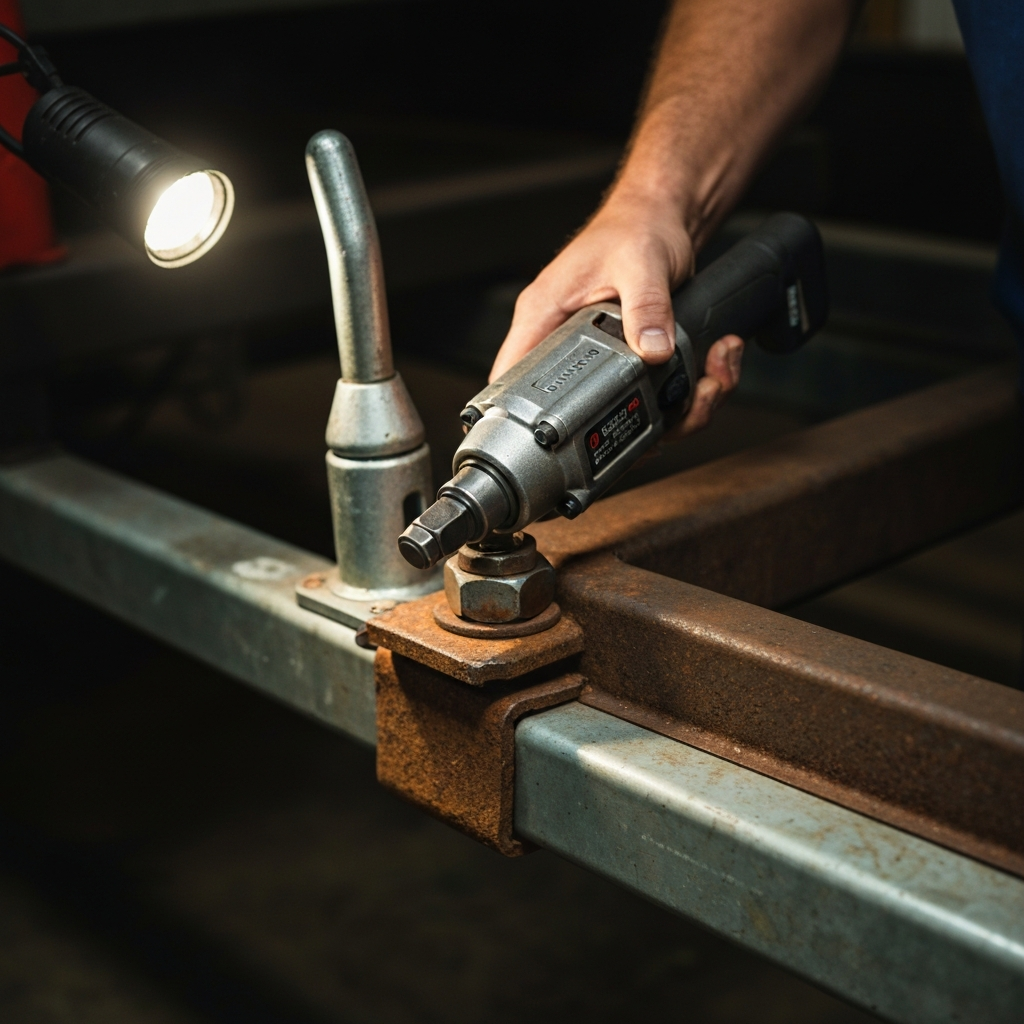
Step 4: Impact with a Hammer and Chisel (or Impact Wrench)
If heat alone isn't sufficient, try applying impact. Position a chisel against one of the flats of the nut and strike it firmly with a hammer in a counter-clockwise direction. The vibrations and force can help break the rust's bond. Alternatively, if you have an impact wrench, use a socket that fits the nut and apply short bursts of power. An impact wrench delivers significantly more torque than a hand wrench and can often loosen stubborn nuts with ease. Be sure to use impact-rated sockets, as standard sockets can shatter under the force of an impact wrench.
Step 5: Nut Splitter as a Last Resort
If all other methods fail, a nut splitter may be your only option. A nut splitter is a tool designed to crack a nut without damaging the bolt or stud it's attached to. Position the nut splitter around the nut and tighten the bolt on the tool until the nut cracks. Once the nut is split, it should be much easier to remove. Be aware that using a nut splitter will destroy the nut, so you'll need to replace it with a new one. Ensure you purchase the correct size and type of nut for your trailer hitch ball.
Tools or Materials Required
- Penetrating fluid
- Long-handled wrench
- Cheater bar (optional)
- Propane or MAP gas torch
- Safety glasses
- Gloves
- Fire extinguisher
- Hammer
- Chisel
- Impact wrench (optional)
- Impact-rated sockets (optional)
- Nut splitter (optional)
- Replacement nut (if using a nut splitter)
Safety Considerations
- Always wear safety glasses and gloves when working with tools and potentially rusted metal.
- Use caution when using a torch, and keep a fire extinguisher nearby.
- Avoid overheating the surrounding metal when using a torch.
- Use impact-rated sockets with an impact wrench.
- Ensure the trailer is properly secured and the vehicle is in park with the parking brake engaged before starting any work.
Common Mistakes to Avoid
- Forcing the nut too hard, which can damage the nut or wrench.
- Using an open flame near flammable materials.
- Not allowing enough time for penetrating fluid to soak.
- Using standard sockets with an impact wrench.
FAQ Section
Q: How long should I let the penetrating fluid soak?
A: Ideally, let it soak overnight. Reapply the fluid periodically during the soaking period.
Q: What if the trailer ball itself starts spinning when I try to loosen the nut?
A: Try gripping the top of the ball with a pipe wrench or vise grips to hold it steady while you turn the nut.
Q: Can I use WD-40 instead of penetrating fluid?
A: While WD-40 can provide some lubrication, it's not as effective as dedicated penetrating fluids designed to break down rust.
Pro Tips
- Apply white lithium grease to the new trailer ball threads after installation to help prevent future rust.
- Consider using a rust converter on the exposed metal after removing the rusted ball to prevent further corrosion.
- If possible, remove the entire hitch receiver and work on it in a more controlled environment, such as a garage.
Conclusion
Removing a rusted trailer hitch ball can be a challenging task, but with the right tools and techniques, it's definitely achievable. Remember to start with the least aggressive methods first and gradually increase the intensity as needed. Patience is key; don't rush the process, and always prioritize safety. By following the steps outlined in this guide, you'll be well-equipped to conquer that rust and get your trailer hitch back in working order.