Bees, including honey bees, bumble bees, and mason bees, are critical for the health of our ecosystems. They provide essential pollination services that enable the growth of countless plant species. However, the use of pesticides in agriculture and other settings poses a significant threat to bee populations worldwide. Pesticide exposure can lead to bee deaths, reduced foraging efficiency, impaired navigation, and weakened immune systems, ultimately jeopardizing the vital role these insects play.
Protecting bees from pesticide poisoning requires a multifaceted approach involving beekeepers, farmers, landowners, and the general public. Understanding the risks, implementing preventative measures, and promoting responsible pesticide use are essential steps in safeguarding bee populations. This guide provides detailed, actionable steps to minimize bee poisoning from pesticides, ensuring the continued health and vitality of these crucial pollinators.
Whether you're a beekeeper looking to protect your hives, a farmer seeking to minimize the impact of pesticides on beneficial insects, or simply a concerned citizen, this guide offers practical advice and expert insights to help you make a difference. By working together, we can create a safer environment for bees and ensure a sustainable future for agriculture and our planet.
Step 1: Register Your Bee Colonies
Registering your bee colonies with your state or local agriculture department is a crucial first step in protecting them from pesticide exposure. Registration allows landowners and applicators to identify the location of beehives before applying pesticides, enabling them to take necessary precautions. Typically, you can find the registration application on your state's agriculture department website. The process may involve providing information about the number of hives, their location, and your contact details. Some states require annual re-registration, so it's important to stay updated on the regulations.
Failing to register can mean your hives are overlooked during pesticide application planning. Check your local requirements; many states mandate registration for beekeepers with more than a few hives. This simple act significantly improves communication and collaboration between beekeepers and pesticide applicators, ultimately reducing the risk of bee poisoning.

Step 2: Strategic Apiary Placement
The location of your apiaries plays a critical role in minimizing pesticide exposure. Ideally, apiaries should be situated at least 4 miles (6.4 km) away from crops that are likely to be treated with pesticides. This distance helps to reduce the likelihood of bees foraging in areas where they may encounter harmful chemicals. If your hives are currently located closer to agricultural areas, consider relocating them to a safer distance. Additionally, clearly label your apiaries with your name, phone number, and address. This allows pesticide applicators to contact you directly if they plan to spray in the vicinity of your hives.
If relocation isn't feasible, consider using mesh screens to cover the hives during peak foraging hours, typically in the afternoon. While this method can help prevent bees from encountering pesticides, it might not eliminate the risk entirely, as some pesticides can persist in the environment. Remember that covering the hives can also stress the bees due to overheating, so ensure proper ventilation.
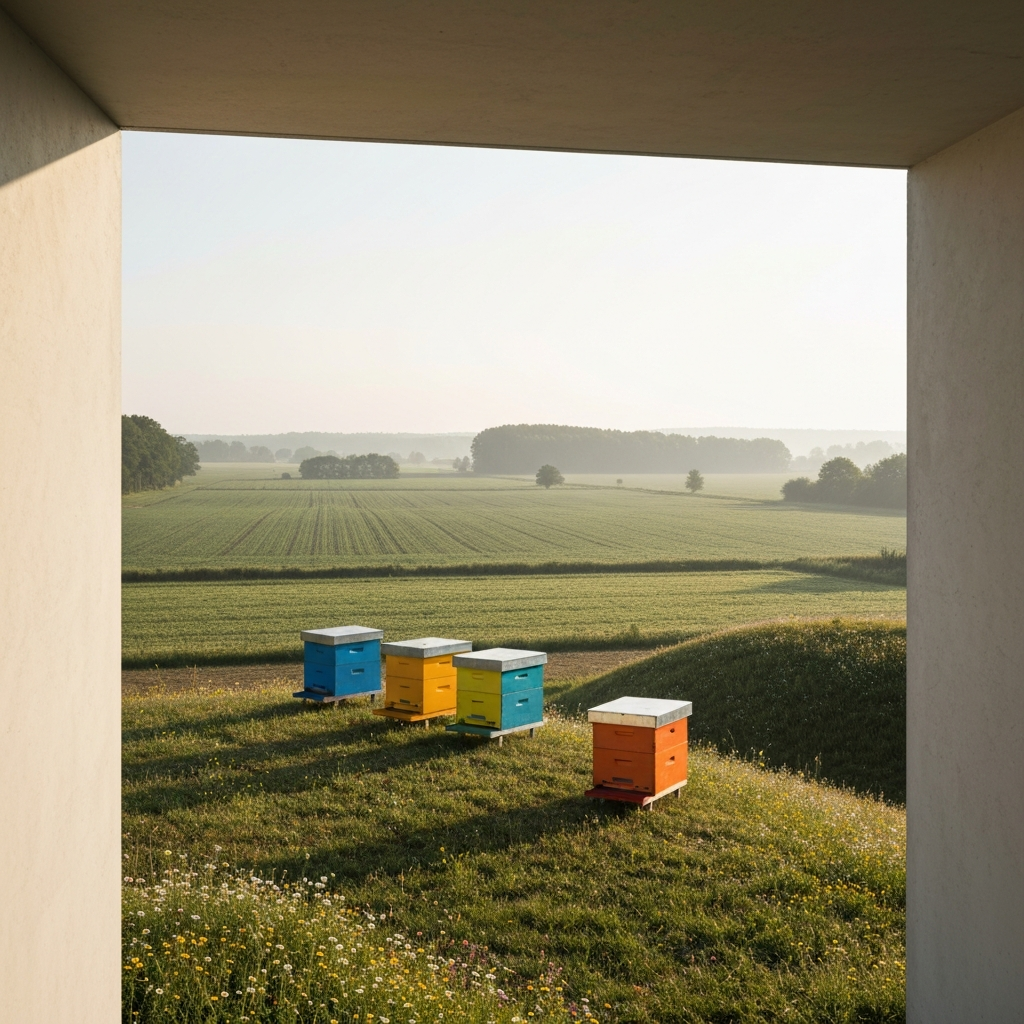
Step 3: Choose Elevated Locations for Hives
Insecticides can drift and accumulate in lower-lying areas, especially in windy conditions. Placing your apiaries on higher ground, such as ridge tops or hills, can help minimize their exposure to pesticide drift. This strategic placement can also ensure that bees have access to fresh, clean water sources, rather than potentially contaminated water in valleys or depressions. While landowners and applicators should avoid spraying pesticides on windy days, it's always best to take proactive measures to protect your hives.
Even if neighbors are conscientious, unforeseen weather changes can occur. Selecting a higher elevation provides an extra layer of protection against unforeseen pesticide drift. Be sure the location also provides shelter from strong winds, as prolonged exposure can weaken the colony.
Step 4: Maintain Distance After Pesticide Application
Studies have shown that a significant proportion of bee deaths from pesticide exposure occur within the first 24 hours after application. If you have moved your bees to protect them from pesticides, wait at least 72 hours before moving them back to the original location. This waiting period is particularly important if the pesticides used are labeled as "bee toxic," as these pesticides can remain harmful to pollinators for extended durations. Check the pesticide label for specific re-entry instructions.
The exact time frame can depend on the type of pesticide, weather conditions, and the specific crop being treated. Err on the side of caution and wait longer if you have any doubts. Communication with the applicator regarding the specific pesticide used and its residual toxicity is essential.
Step 5: Identify Nearby Beehives Before Spraying
Before applying any pesticides, take the time to identify the locations of beehives in your area. Your state's agriculture department may have information on monitored hives on or near your land. Understanding where these hives are allows you to plan pesticide applications in a way that minimizes the risk to bees. Remember that bees can forage over a large area, potentially up to 2 miles (3.2 km) from their hives, so even hives that seem far away could be at risk.
Don’t rely solely on official registries. Actively search for beehives in your vicinity, even if they are not officially registered. Speaking with neighbors and local beekeeping associations can provide valuable information. Understanding the proximity of hives is crucial for making informed decisions about pesticide use.

Step 6: Collaborate with Local Beekeepers
Open communication and collaboration with local beekeepers are essential for protecting bees from pesticide poisoning. Reach out to beekeepers in your area before you plan to use any pesticides to discuss your plans and find out when the best time to spray might be. While it's ultimately the beekeeper's responsibility to protect their bees, working together can significantly reduce the risk of pesticide exposure. Contacting beekeeping associations can help locate beekeepers near you.
These conversations are often a two-way street. Beekeepers can provide insights into bee foraging patterns and seasonal activities, allowing you to make more informed decisions about pesticide application. This collaboration builds trust and fosters a shared responsibility for protecting pollinators.

Step 7: Cultivate Pollinator-Friendly Plants
Planting pollinator-friendly plants away from your crops can help attract bees to safer areas and away from pesticide-treated zones. Flowers, clover, flowering shrubs, flowering trees, and blooming weeds can all serve as attractive food sources for bees. The key is to plant these enticing resources as far away from your crops as possible, creating a designated "bee-friendly" zone. Alfalfa, clover, and wildflowers are popular and effective choices.
Consider creating a diverse habitat with a variety of flowering plants that bloom throughout the growing season to provide a continuous food source for bees. This not only protects them from pesticides but also supports their overall health and well-being. Choosing native plants adapted to your local climate is always a good choice.

Step 8: Establish Buffer Zones
Creating a buffer zone between crops and natural habitats can provide a critical layer of protection for bees. Aim for a buffer of at least 20 feet (6.1 meters) between your crops and any nearby wildlife areas. This buffer can consist of grass, weeds, or other vegetation. In the event of pesticide drift, the buffer zone can help prevent the chemicals from reaching sensitive habitats and harming bees.
While a 20-foot buffer is a good starting point, consider expanding it if possible. The wider the buffer, the greater the protection for bees and other beneficial insects. Regularly maintain the buffer zone to ensure it remains effective.

Step 9: Report Bee Poisoning Incidents
Bee poisonings are serious events that can disrupt entire ecosystems. If you observe an excessive number of dead or dying bees, a lack of bees on your property, bees that are unable to fly ("crawlers"), or colonies that fail to survive the winter, it's important to report the incident to the Environmental Protection Agency (EPA). The EPA can investigate the cause of the bee deaths and help to mitigate the effects. You can report bee poisonings on the EPA website.
Document the incident as thoroughly as possible, including the date, time, location, and specific observations. Collect samples of dead bees for analysis if possible. Providing detailed information helps the EPA conduct a more effective investigation. For beekeepers, remove potentially contaminated combs and soak them in water for 24 hours, then wash the pollen off and dry before returning. Feeding poisoned hives with sugar, pollen, and water aids in their recovery.
Step 10: Opt for Spray or Granular Pesticides
The formulation of the pesticide can significantly impact its toxicity to bees. Studies have shown that dust pesticide formulas are generally more toxic to pollinators than spray formulas, even when using the same active ingredient. Granular pesticides are typically less hazardous to bees, making them a preferable option when possible. When choosing a pesticide, carefully consider the formulation and its potential impact on pollinators.
Dust formulations are easily carried by the wind and can directly contact bees as they forage. Sprays, especially those with larger droplet sizes, are less likely to drift. Granular pesticides are typically applied to the soil and pose a lower risk of direct contact with bees. Consider all application options before choosing the most appropriate pesticide.
Step 11: Avoid Pesticides with Extended Residual Toxicity
Pesticides with extended residual toxicity can persist in the environment for weeks or months, posing a prolonged threat to pollinators. When selecting a pesticide, carefully review the label and avoid products containing ingredients known to be highly toxic to bees, such as organophosphates, N-methyl carbamates, neonicotinoids, and pyrethroids. These chemicals can have devastating effects on bee populations, even at low concentrations.
Consider alternative pesticides with shorter residual activity. Integrated pest management (IPM) strategies can also reduce the reliance on broad-spectrum pesticides. Researching alternative pest control methods is an ongoing process, but the benefits to bee populations are undeniable.
Step 12: Utilize Spraying Equipment to Minimize Drift
Proper spraying equipment and techniques can significantly reduce pesticide drift and minimize exposure to bees. Use drift-reducing spray nozzles whenever possible. These nozzles produce larger droplets that are less susceptible to being carried by the wind. A low-pressure spray nozzle can also help to prevent pesticide from drifting off target. Consider installing a cone or shield around your spray nozzle to further reduce drift.
Fine droplets are more prone to drift. Regularly calibrate your spraying equipment to ensure it's operating efficiently and delivering the correct droplet size. Wind speed and direction should always be considered before beginning pesticide application.
Step 13: Follow Pesticide Label Directions Meticulously
Adhering to the pesticide label directions is paramount to protecting bees and other beneficial insects. The label provides critical information on proper application rates, timing, and safety precautions. Misusing pesticides can have severe consequences for the environment and can also result in legal penalties. Always read and follow the label directions carefully.
The pesticides that you can legally use vary from state to state. Make sure you check in with your local laws to ensure you’re not buying a regulated pesticide that's only for professionals. Never exceed the recommended application rate. Consider using lower rates if pest pressure is low. Always wear appropriate protective gear, including long sleeves, long pants, and eye goggles, when handling pesticides.
Step 14: Inform Your Neighbors About Spraying Plans
Even with careful application, pesticides can sometimes drift onto neighboring properties. It's courteous and responsible to inform your neighbors of your spraying plans in advance, especially if they keep bees. Providing a few days' notice allows you to discuss any concerns and work together to find a spraying schedule that minimizes potential risks.
Communicate openly and honestly about the pesticides you plan to use and the precautions you are taking. Addressing any concerns proactively can build trust and prevent misunderstandings. Consider offering to share information about bee-friendly practices or provide assistance with protecting their hives. If neighbors are using pesticides, inform them of your interest in protecting the bees.
Step 15: Spray During Early Morning or Late Evening
Bees are most active during the warmest part of the day. To minimize direct contact with pesticides, spray during the early morning or late evening hours when bees are less likely to be foraging. This timing allows the pesticide to dry or dissipate before bees become active again. Check the weather forecast to ensure that conditions are favorable for spraying, with minimal wind or rain.
Even if bees are less active, some foraging may still occur during these times. Use extra caution and avoid spraying directly on flowering plants that are attracting bees. Consider using repellents or other bee-deterrent strategies to further minimize the risk.
Step 16: Choose Mild Weather Conditions for Spraying
Weather conditions can significantly impact pesticide drift and effectiveness. Avoid spraying on windy or rainy days. Wind can carry pesticides far beyond the intended target area, while rain can wash them away, reducing their efficacy and potentially contaminating waterways. Wait for a clear day with minimal wind and no rain in the forecast.
Temperature can also affect pesticide volatility. Higher temperatures can increase evaporation and drift potential. Ideal spraying conditions typically involve low wind speeds, moderate temperatures, and no immediate threat of rain.
Step 17: Avoid Spraying During the Blooming Stage
Blooming flowers are a major attractant for pollinating bees. If possible, avoid spraying pesticides during the blooming stage of your crops or other plants. This is when bees are most likely to be actively foraging and at the highest risk of pesticide exposure. If spraying is unavoidable during bloom, take extra precautions to protect bees, such as using bee-deterrent products or covering flowering plants.
Some plants may produce nectar even when they are not actively in bloom, so it's important to be aware of potential bee attractants. Consider mowing or weeding flowering plants before spraying to reduce their attractiveness to bees.
Step 18: Remove Flowering Plants Before Spraying
If you must spray an area that is currently in bloom, consider removing any pollinating plants before you begin. Mowing or weeding the area can eliminate the flower heads and reduce the attractiveness to bees. This simple step can significantly reduce the risk of bees coming into contact with pesticides. For instance, you might mow a patch of clover before spraying in the area.
Even after removing flowering plants, some bees may still be present. Take extra precautions to minimize pesticide drift and avoid direct contact with bees. Consider using bee-deterrent products to further reduce the risk.
Safety Considerations
All pesticides are poisonous and should be handled with extreme care. Always wear appropriate protective gear, including long sleeves, long pants, eye goggles, and gloves, when applying pesticides. Follow all label directions carefully and avoid contact with skin, eyes, and clothing. Store pesticides in a secure location out of reach of children and animals. Properly dispose of empty pesticide containers according to local regulations.
Conclusion
Reducing bee poisoning from pesticides is a complex challenge that requires a collaborative effort from beekeepers, farmers, landowners, and the general public. By implementing the strategies outlined in this guide, we can create a safer environment for bees and ensure the continued health and vitality of these crucial pollinators. From registering bee colonies and strategically placing apiaries to choosing safer pesticides and applying them responsibly, every step we take can make a significant difference. Remember that protecting bees is not just about preserving a single species; it's about safeguarding the health of our ecosystems and ensuring a sustainable future for all.