Moving a grandfather clock can seem like a daunting task. These beautiful timepieces are not only valuable but also delicate, requiring careful handling to prevent damage. Improper moving techniques can lead to costly repairs or even irreversible harm. This comprehensive guide will walk you through each step of the process, ensuring a safe and successful move for your cherished clock.
Whether you're a seasoned mover or a first-timer, following these instructions diligently will help you avoid common pitfalls and protect your investment. Remember, patience and precision are key. It's always better to take your time and do it right than to rush and risk damaging your clock. Gather your supplies, enlist some help, and let's get started!
Before starting, evaluate the clock’s condition. Note any pre-existing scratches, dings, or mechanical issues. This record will be valuable should anything occur during the move. This guide prioritizes safety for both you and the clock, ensuring the moving process runs smoothly and efficiently.
Tools or Materials Required
- Moving blankets
- Heavy-duty packing tape
- Bubble wrap
- Packing paper
- Screwdrivers (various sizes)
- Gloves (cotton or nitrile)
- Dollie (preferably with straps)
- Boxes (small to medium size)
- Painter's tape or masking tape
- Soft cloths
-
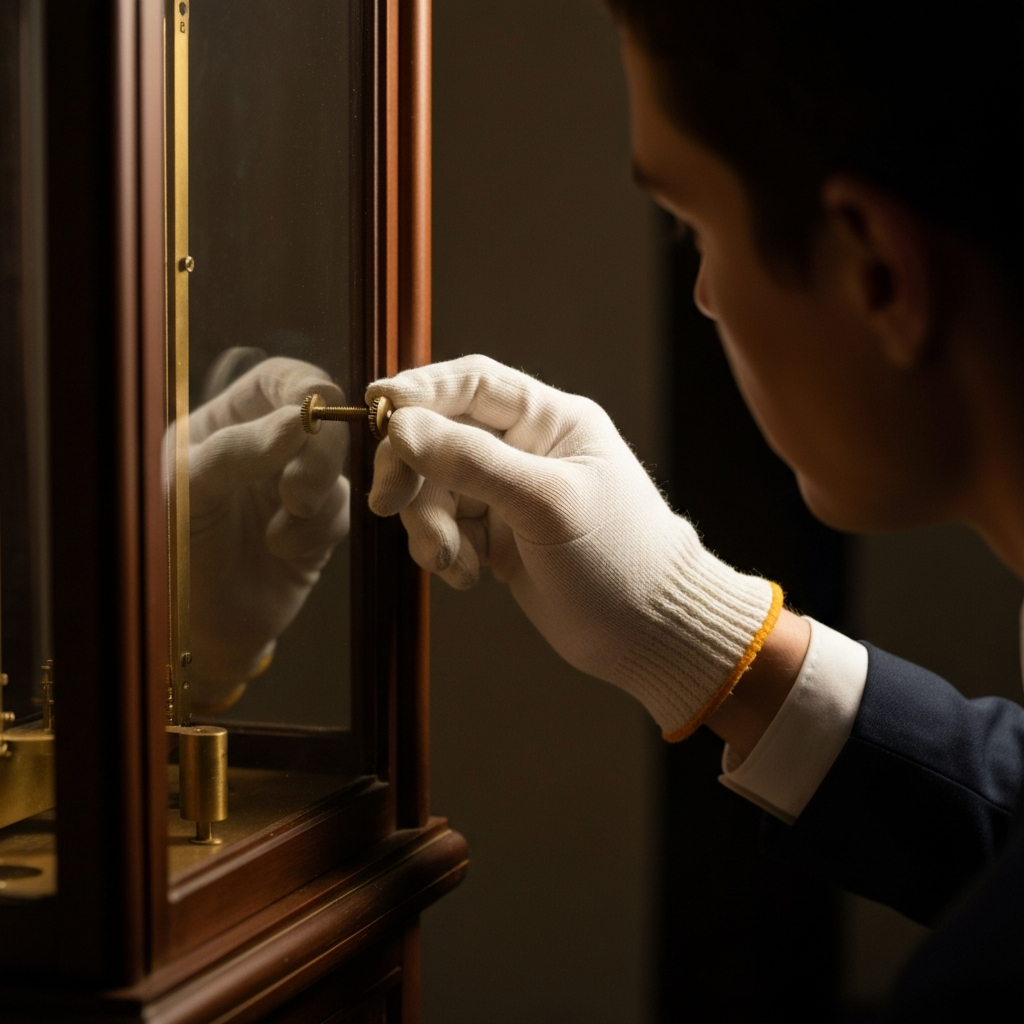
Step 1: Remove the Glass Panels
If your grandfather clock has glass panels, the first step is to carefully remove them. Often, these panels are held in place by small knobs or screws accessible from inside the clock case. Wear gloves to avoid leaving fingerprints on the glass. Gently twist or unscrew the fasteners and carefully slide the glass panels out. Handle them with extreme care, as they are easily broken.
-
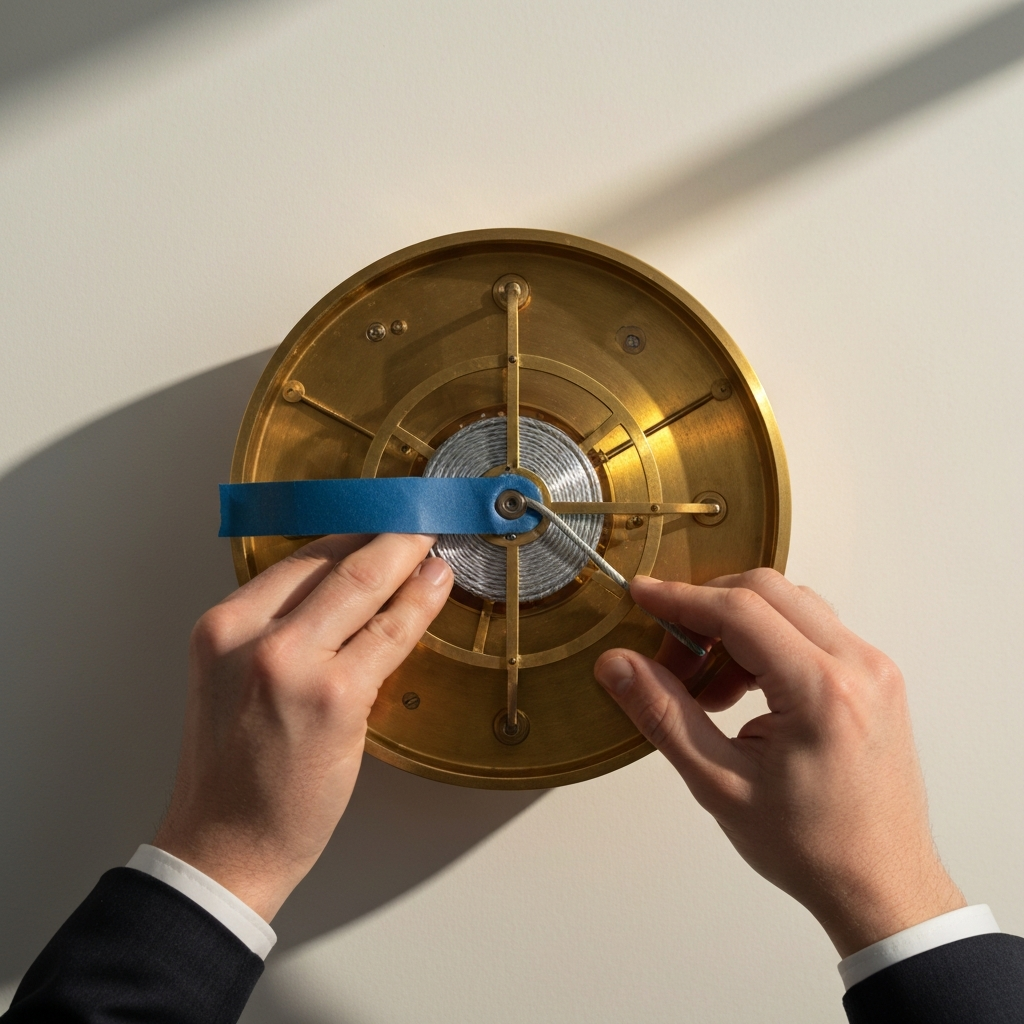
Step 2: Secure the Cables or Chains
Grandfather clocks use either cables or chains to suspend the weights. For cable-driven clocks, use painter's tape or masking tape to secure the cables to the spools inside the clock mechanism. This prevents them from unwinding and causing tangles or damage. Avoid using strong adhesive tapes that could leave a residue. For chain-driven clocks, carefully detach the chains from the weights, noting their original positions for reassembly. It’s vital to ensure the chains will not slip off their gears during transport.
-
Step 3: Remove and Label the Weights
The weights are essential for the clock's operation, and their correct placement is crucial for proper functioning after the move. Before removing the weights, label each one as "Left," "Center," or "Right" to correspond to their original positions. Then, carefully detach them from the cables or chains. Wrap each weight individually in bubble wrap to protect them from scratches and dents. Place the wrapped weights in a sturdy box, filling any empty space with packing paper to prevent movement during transport. Inaccurate labeling can result in improper chime function later.

-
Step 4: Remove the Pendulum
The pendulum is another delicate component that needs to be removed for safe transport. Gently stop the pendulum from swinging and carefully detach it from its suspension point, usually a hook or a crutch located at the top of the pendulum. Pay close attention to how the pendulum is attached to avoid bending any delicate parts. Wrap the pendulum in bubble wrap and place it in a separate box. Some clocks have a pendulum "crutch," a small wire loop the pendulum hangs through. Be extremely careful not to bend it. Older clocks may have more fragile pendulums, so extra care is necessary.

-
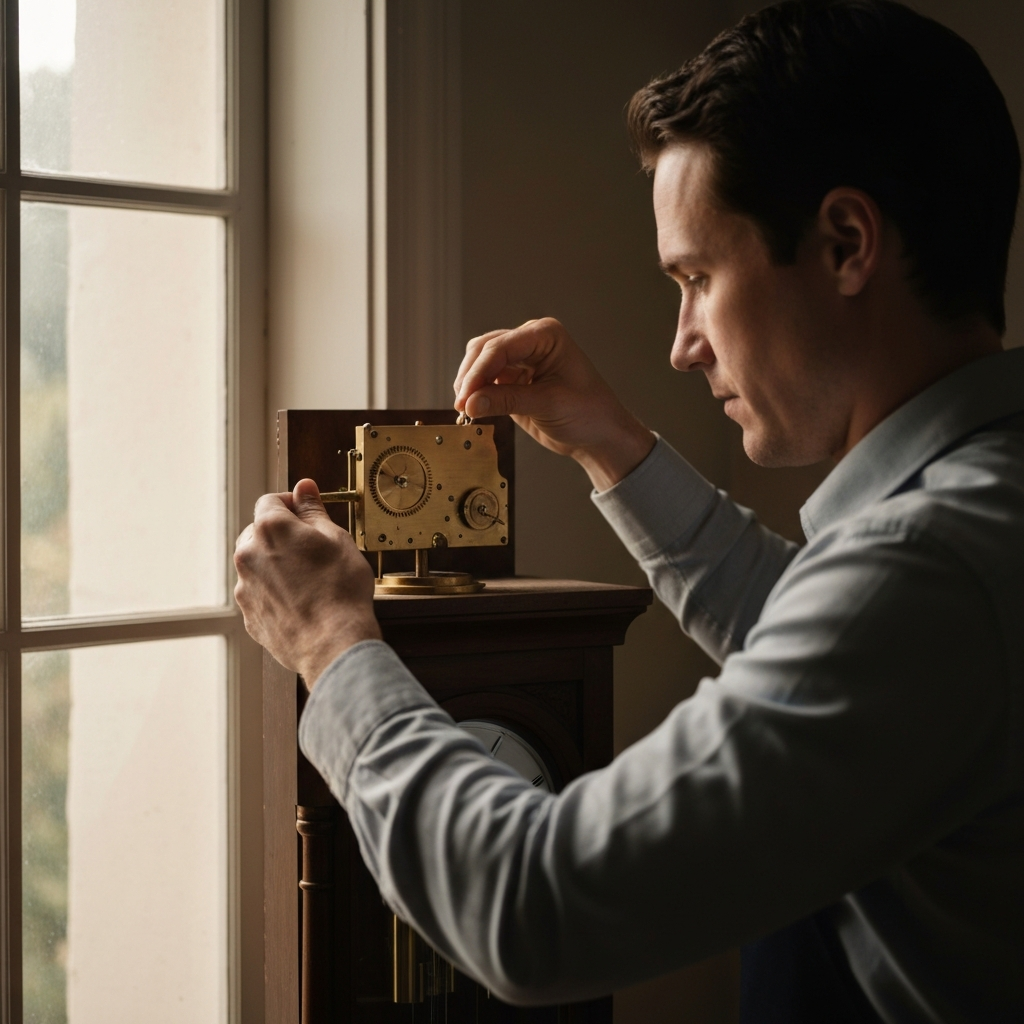
Step 5: Remove the Clock Movement (Optional, but Recommended)
Removing the clock movement (also known as the "works") is the most challenging step, but also the most critical for preventing damage during transport. If you are not comfortable with this step, consult a professional clock repair service. In older clocks, the movement might be accessible by sliding the hood forward. In newer clocks, it may be secured with screws from underneath. Gently lift the movement out, supporting it from below. Wrap the movement in bubble wrap, paying special attention to protecting the chime rods. Place foam blocks under the chimes for extra support. If you absolutely cannot remove the movement, tightly wrap the chime rods in bubble wrap as a last resort.
-
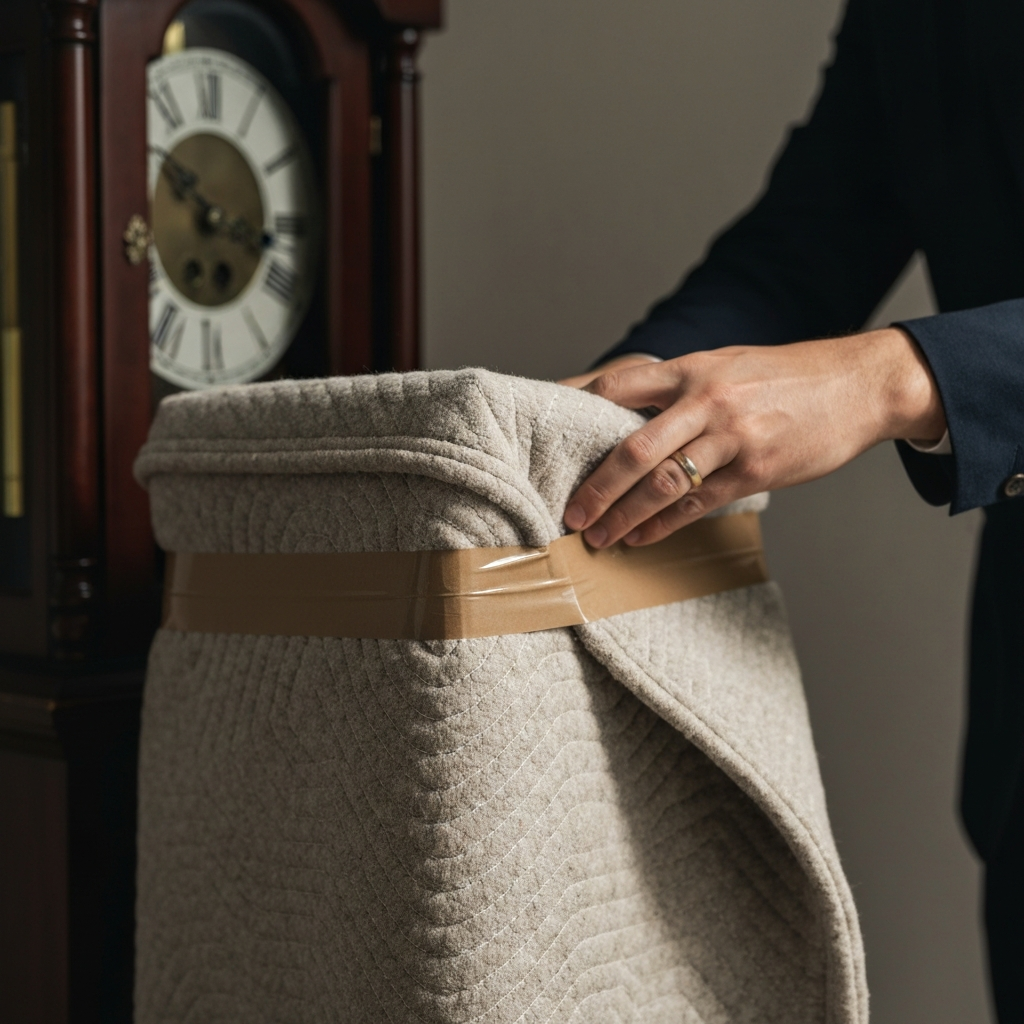
Step 6: Wrap and Protect the Clock Case
Now that the internal components are removed, it's time to protect the clock case itself. Wrap the entire clock in moving blankets, securing them with heavy-duty packing tape. Pay extra attention to protecting any delicate carvings or protruding features. If you have the original shipping crate, or can construct one, that provides the best protection. Use plenty of packing material to create a cushion against bumps and vibrations during transport. Corner protectors can also add a significant level of defense. If possible, shrink-wrapping the clock after wrapping in blankets can help to keep everything securely in place.
-
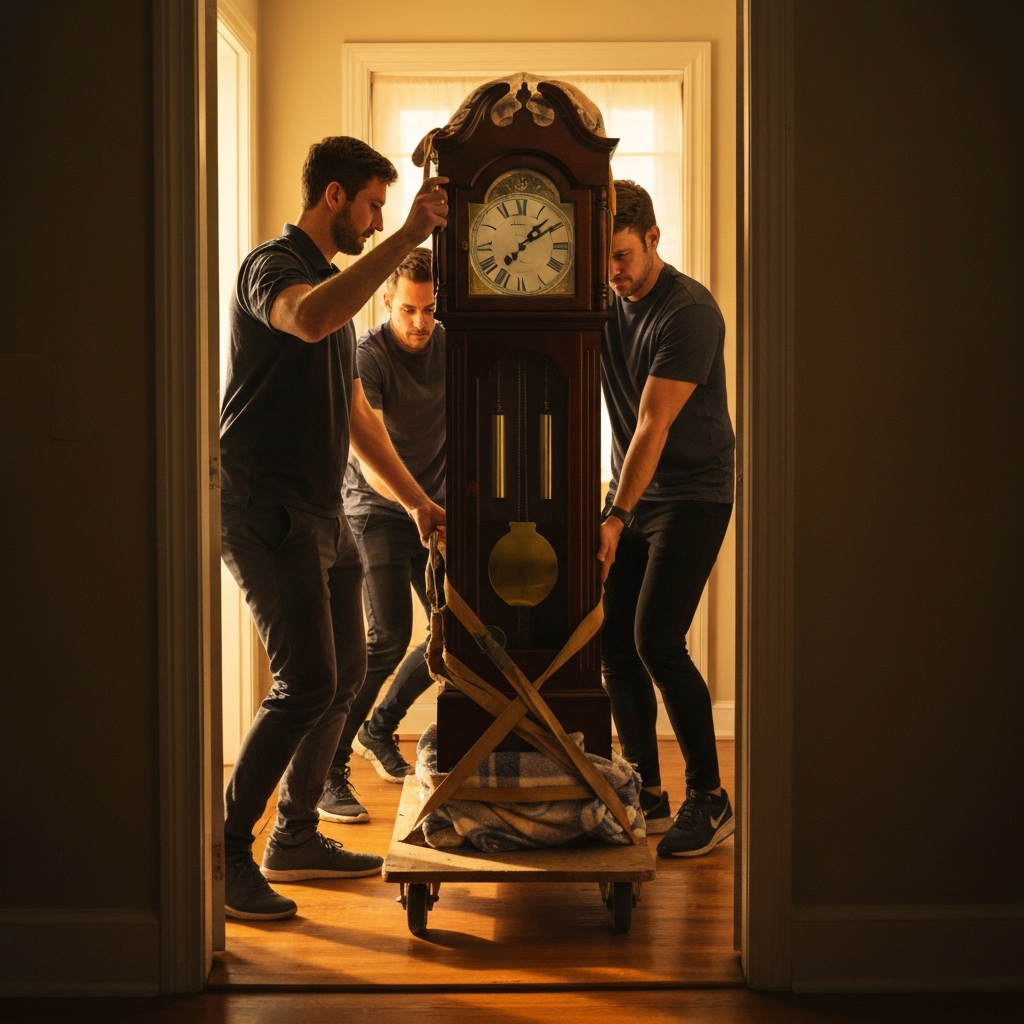
Step 7: Use a Dolly for Moving
Grandfather clocks are heavy and unwieldy. Use a furniture dolly to move the clock. Enlist the help of at least two other people to guide and stabilize the clock as you move it. Lift with your legs, keeping your back straight, to avoid injury. Secure the clock to the dolly with straps if possible. Carefully roll the dolly, avoiding bumps and uneven surfaces. Keep the clock upright at all times. Lift the clock safely by keeping your back straight, abs tight, and lifting with your knees.
-
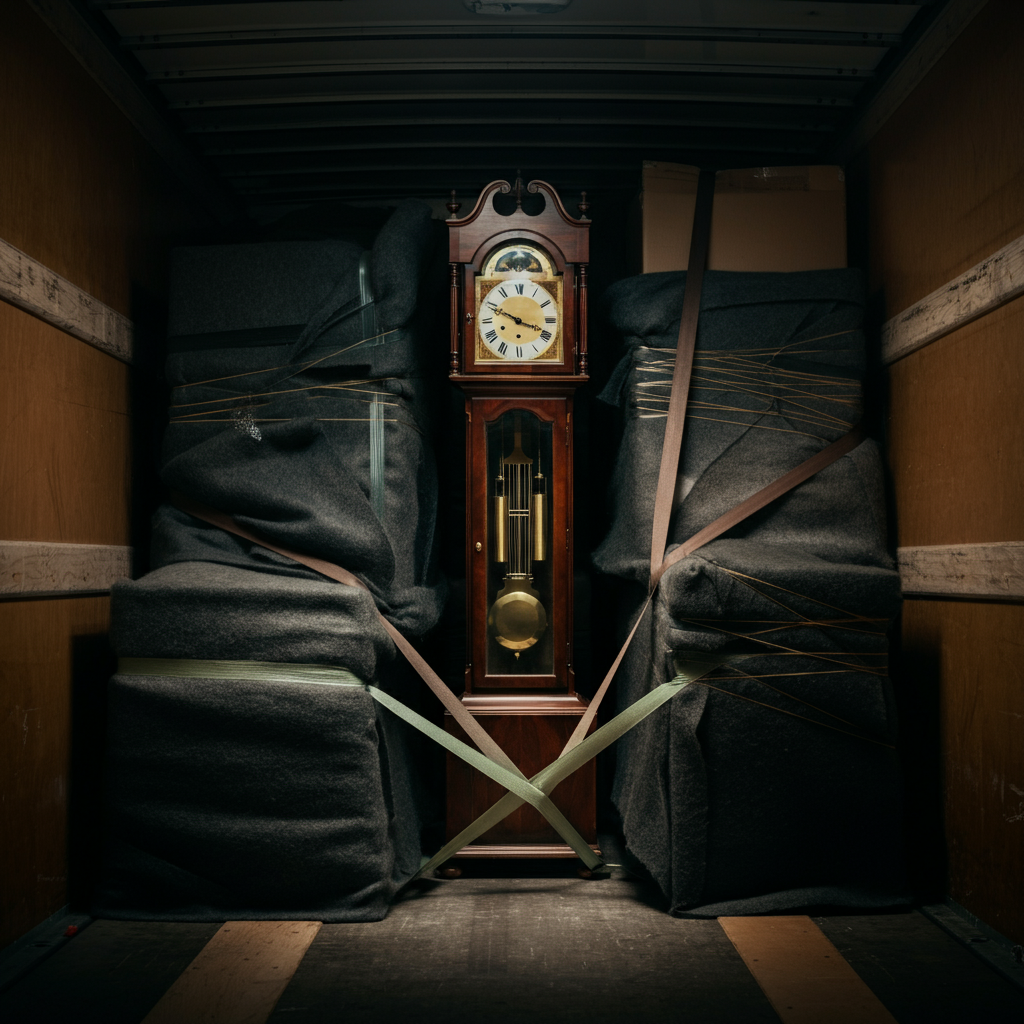
Step 8: Transport and Placement
When transporting the clock in a vehicle, ensure it is secured and cannot tip over. Use straps or ropes to tie it down. Maintain a cool environment inside the vehicle, as extreme temperature changes can damage the wood. Upon arrival at your new location, carefully unload the clock and place it in its designated spot. Allow the clock to acclimate to the new environment for a few hours before reassembling it. Avoid placing the clock in direct sunlight or near a heat source.
-
Step 9: Reassembly
Reassemble the clock in the reverse order of disassembly. Carefully reinstall the clock movement, pendulum, weights, and glass panels. Refer to your labels and notes to ensure each component is placed correctly. Once the clock is reassembled, wind it and check its operation. If the clock does not function properly, consult a qualified clock repair technician. It’s a good idea to get your clock professionally cleaned and tuned up after a move as well.
Common Mistakes to Avoid
- Failing to properly secure the cables or chains.
- Forgetting to label the weights.
- Attempting to move the clock alone.
- Using improper lifting techniques.
- Exposing the clock to extreme temperatures.
Safety Considerations
- Always wear gloves when handling clock components.
- Use proper lifting techniques to avoid back injuries.
- Enlist the help of others to move the clock safely.
- If you are uncomfortable with any step, consult a professional.
Pro Tips
- Take photographs or videos of each step of the disassembly process.
- Keep all screws and small parts in labeled bags.
- Check the clock's balance and level after reassembly.
- Consider hiring a professional clock mover for valuable or antique clocks.
FAQ Section
- Q: How long does it take to move a grandfather clock?
- A: The time required depends on your experience and the complexity of the clock, but plan for at least 2-3 hours.
- Q: Can I lay the clock on its side during transport?
- A: No, it is not recommended. The clock should always be transported upright.
- Q: What if I lose the labels for the weights?
- A: Consult a clock repair technician to determine the correct weight placement.
Moving a grandfather clock requires careful planning and execution. By following these steps and taking your time, you can successfully relocate your cherished timepiece without damage. Remember, when in doubt, consult a professional. Your grandfather clock will keep ticking for generations if you protect it well during transport.