We all love our furry, scaled, or feathered companions and enjoy spoiling them with treats. However, store-bought pet treats can be expensive and often contain questionable ingredients. What if you could create your own delicious and healthy treats at home? With a little effort and the right recipes, you can provide your beloved pets with wholesome snacks they'll adore.
This guide provides several easy-to-follow recipes for various pets, including dogs, cats, and rabbits. We'll cover everything from savory bacon bones for dogs to calming kitty cookies for cats, and even some healthy rabbit wheels. You'll learn how to select safe ingredients, avoid common mistakes, and store your homemade treats properly.
So, roll up your sleeves and get ready to become your pet's favorite treat-maker! With a few simple steps, you can create custom-made treats that cater to your pet's specific tastes and dietary needs. This will ensure that the treats are healthy and do not contain any harmful chemicals or preservatives.
Let's embark on this exciting journey of making healthy and tasty treats for your beloved pets!
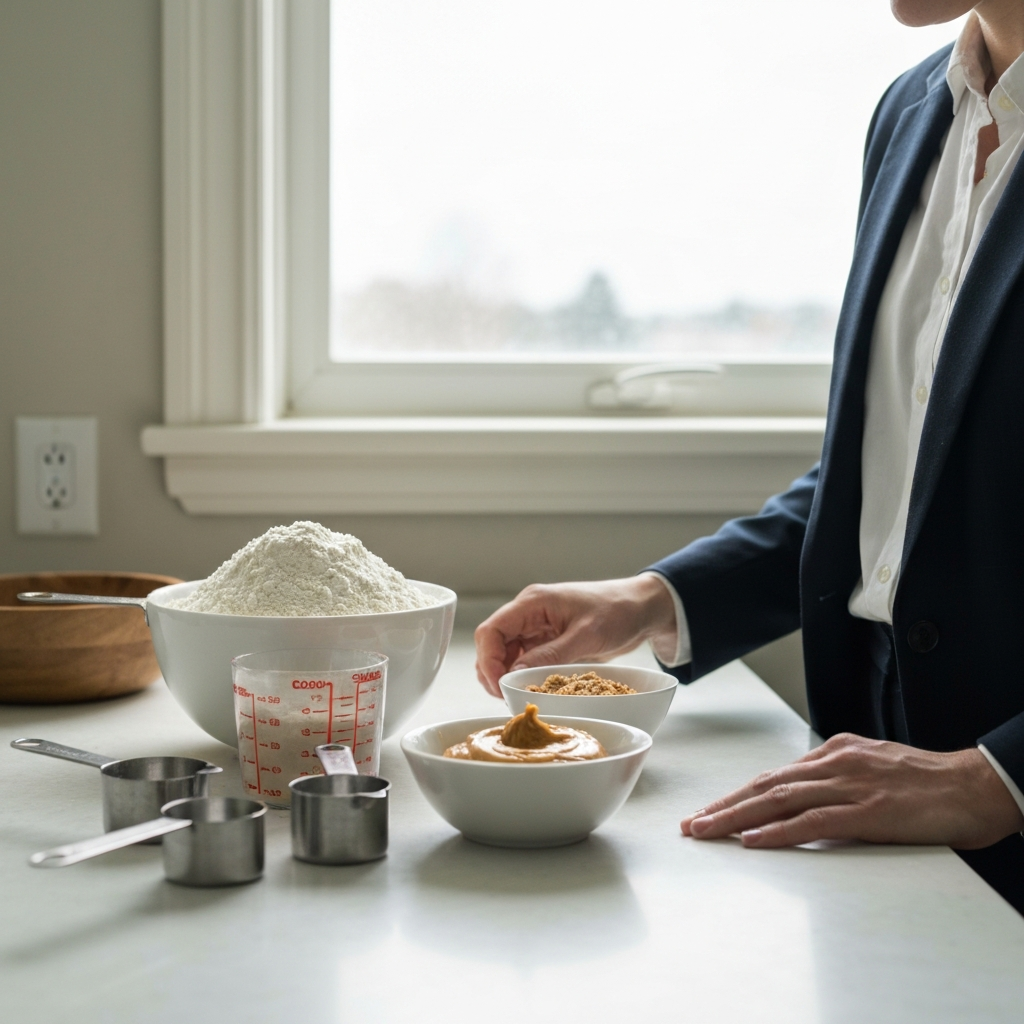
Step 1: Pumpkin Peanut Butter Dog Bones
This recipe is a classic favorite among dog owners, combining the goodness of pumpkin and peanut butter into a tasty bone-shaped treat. These are easy to make and can be stored for several weeks. Ensure you use natural peanut butter without Xylitol, which is highly toxic to dogs. Cinnamon is optional but adds a pleasant aroma. Don't substitute with nutmeg, as it is harmful to dogs.
Ingredients: 1 cup pumpkin puree, 2 eggs, 1/3 cup natural peanut butter, 2 cups whole wheat flour, 1/2 tsp cinnamon (optional)
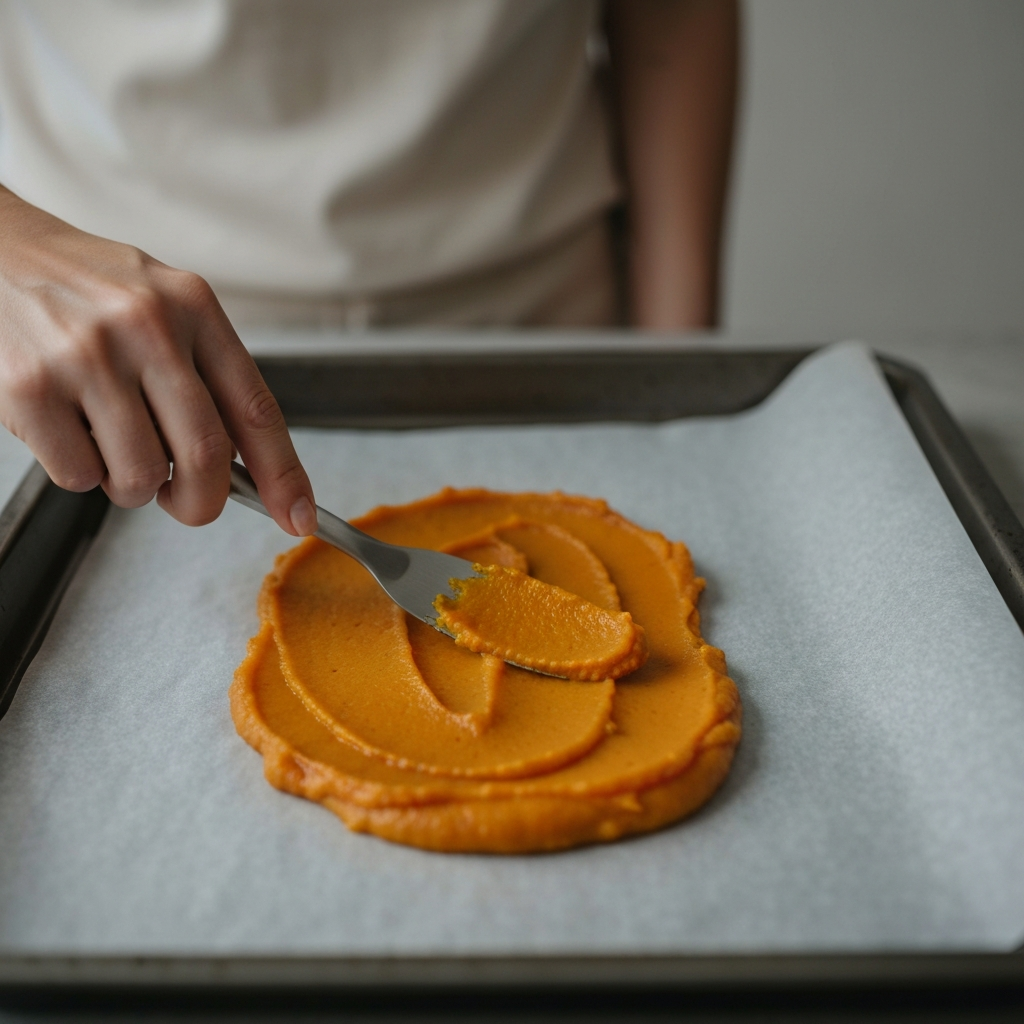
Step 2: Baking the Dog Bones
Preheat your oven to 350°F (175°C). Line a large baking sheet with parchment paper to prevent sticking and easy cleanup. In a large bowl, mix together the pumpkin puree, eggs, and peanut butter until thoroughly combined. The mixture should have a liquid consistency at this stage. Properly lining the baking sheet is crucial for easy removal of the treats after baking.
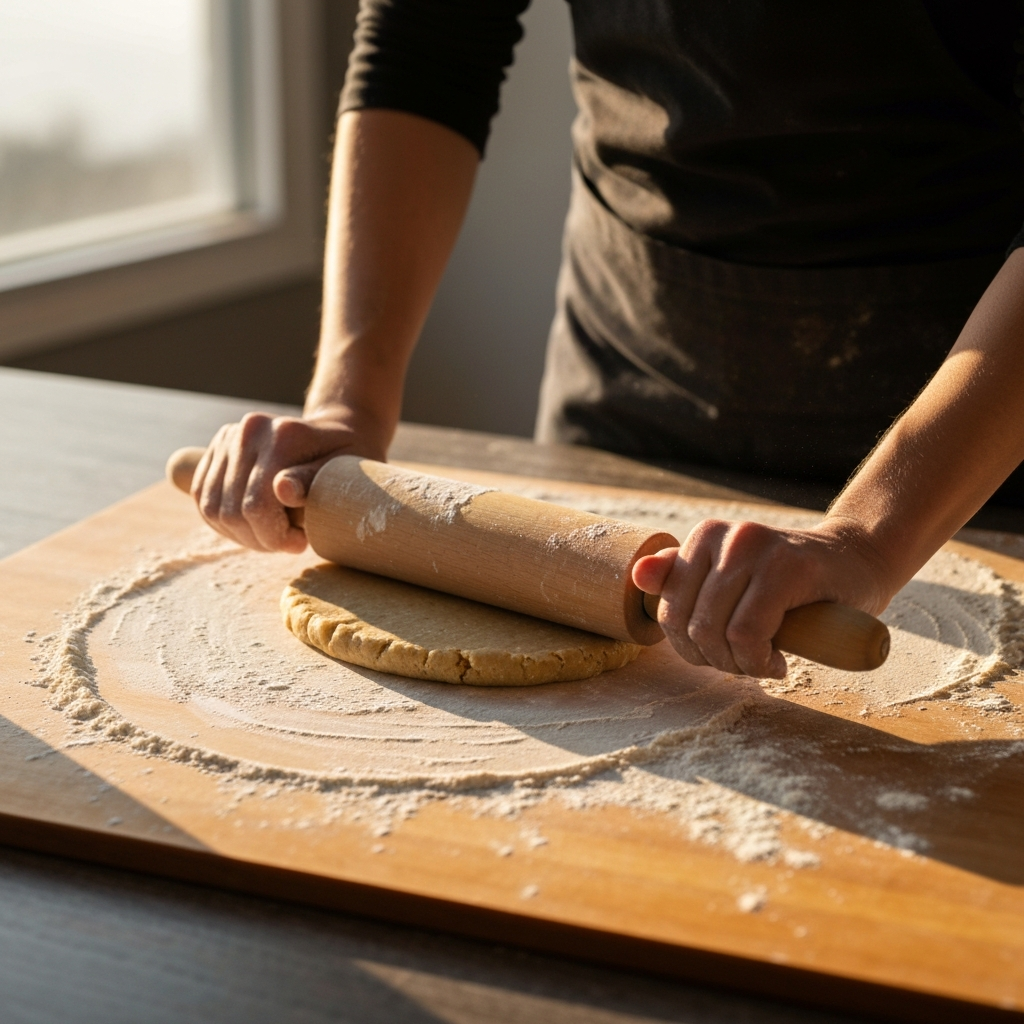
Step 3: Forming the Dough
Add the whole wheat flour and cinnamon (if using) to the wet ingredients. Stir until everything is well combined and a dough forms. The consistency should be doughy, allowing you to roll it out without it cracking or breaking. Lightly flour a flat surface and roll out the dough to about ¼ inch thickness. Use flour as needed to prevent sticking, but be careful not to add too much, as this can affect the treat's texture. Over-flouring the surface can make the treats dry and crumbly.
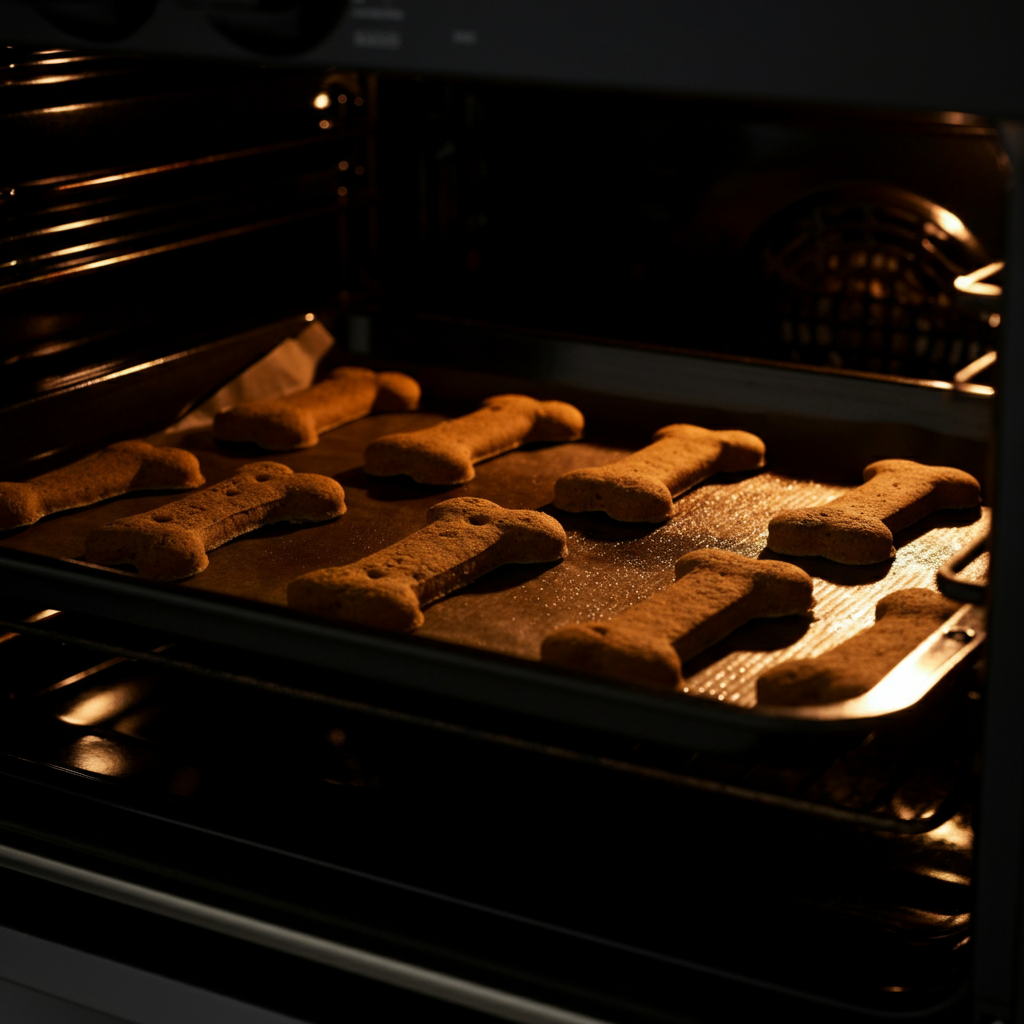
Step 4: Cutting and Baking the Treats
Use bone-shaped cookie cutters to cut out the treats from the dough. Place the cut-outs onto the prepared baking sheet, spacing them slightly apart. Bake for approximately 30 minutes, or until the edges are lightly golden brown. Once baked, place the treats on a wire cooling rack and allow them to cool completely for about 20-30 minutes. Cooling the treats completely prevents them from becoming soggy in storage.
Step 5: Storage and Serving
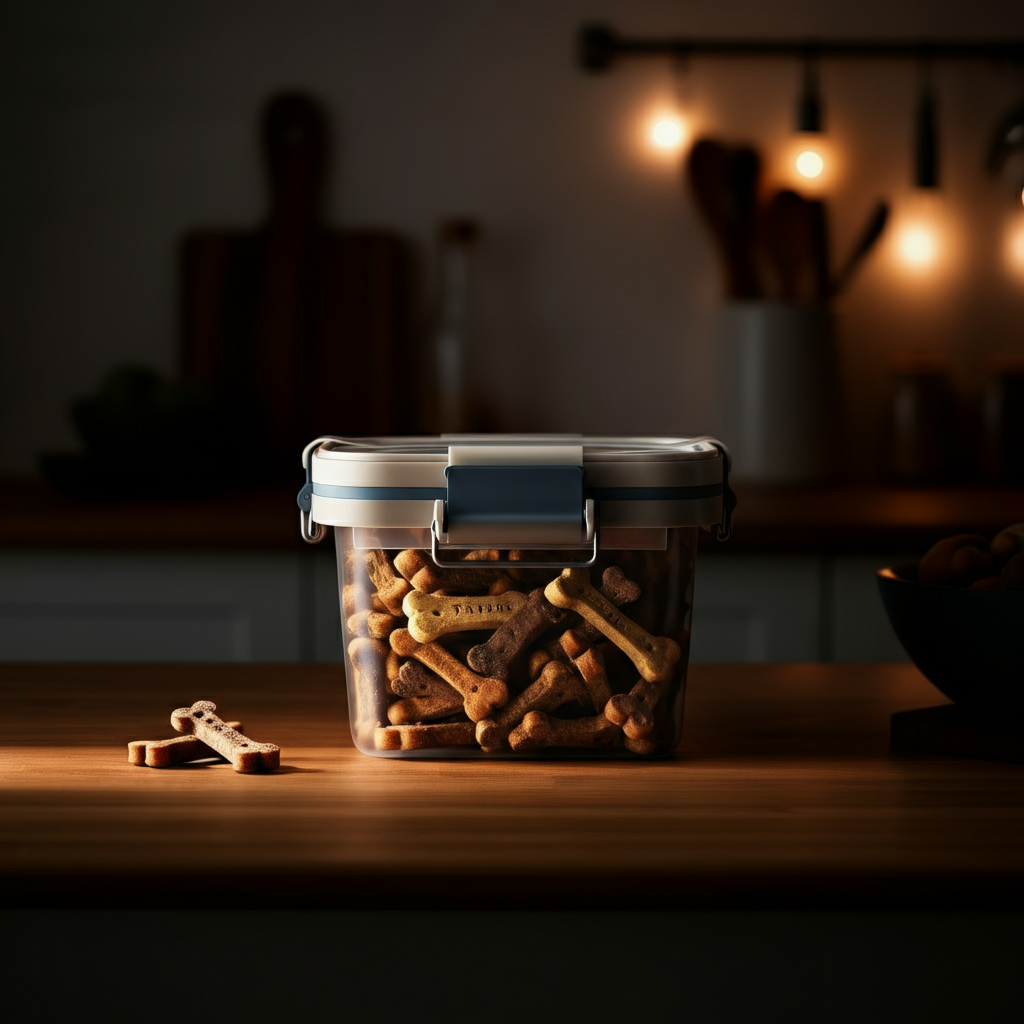
To store the pumpkin peanut butter dog bones, place them in an airtight container. They can be kept in the refrigerator for up to one month or in the freezer for up to six months. If freezing, make sure to thaw the treats completely before serving them to your dog. Proper storage is key to maintaining the treats' freshness and preventing spoilage. These treats are best served at room temperature.
Step 6: Bacon Bones for Your Dog
Another delightful treat for dogs is bacon bones. The irresistible aroma of bacon will surely entice your furry friend. Remember to use real bacon and avoid artificial bacon bits, which may contain harmful additives. Like the previous recipe, this one requires careful attention to ingredient proportions.
Ingredients: 2 slices diced bacon, 1 cup pumpkin puree, 2 large eggs, 1 cup oats, 3 cups whole wheat flour (or more as needed)
Step 7: Preparing the Bacon
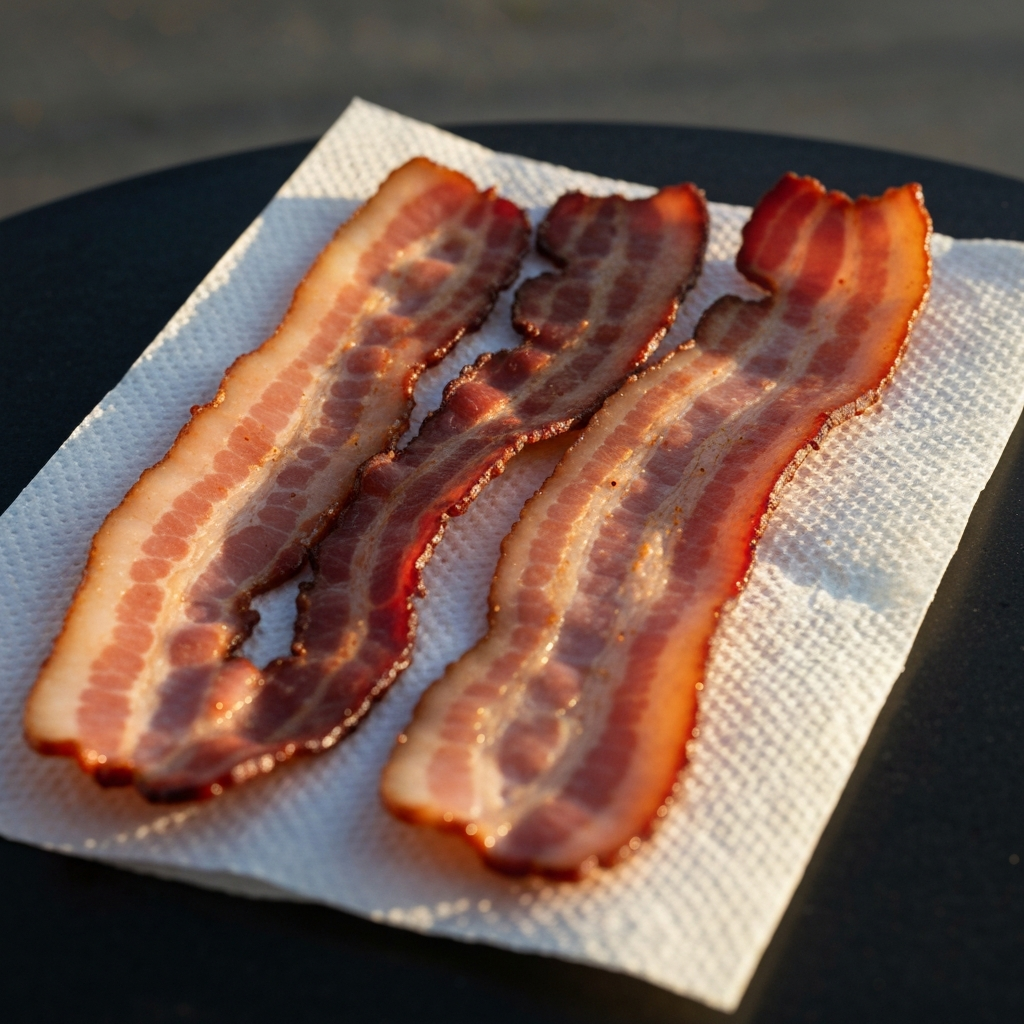
Preheat your oven to 350°F (175°C) and line a baking sheet with parchment paper. Cook the bacon until it's brown and crispy, about 6-8 minutes. Remove the bacon from the skillet and allow it to cool slightly. Retain the bacon fat; it will add flavor and moisture to the treats. Drain the fat into a separate bowl, being careful not to burn yourself.
Step 8: Mixing the Ingredients
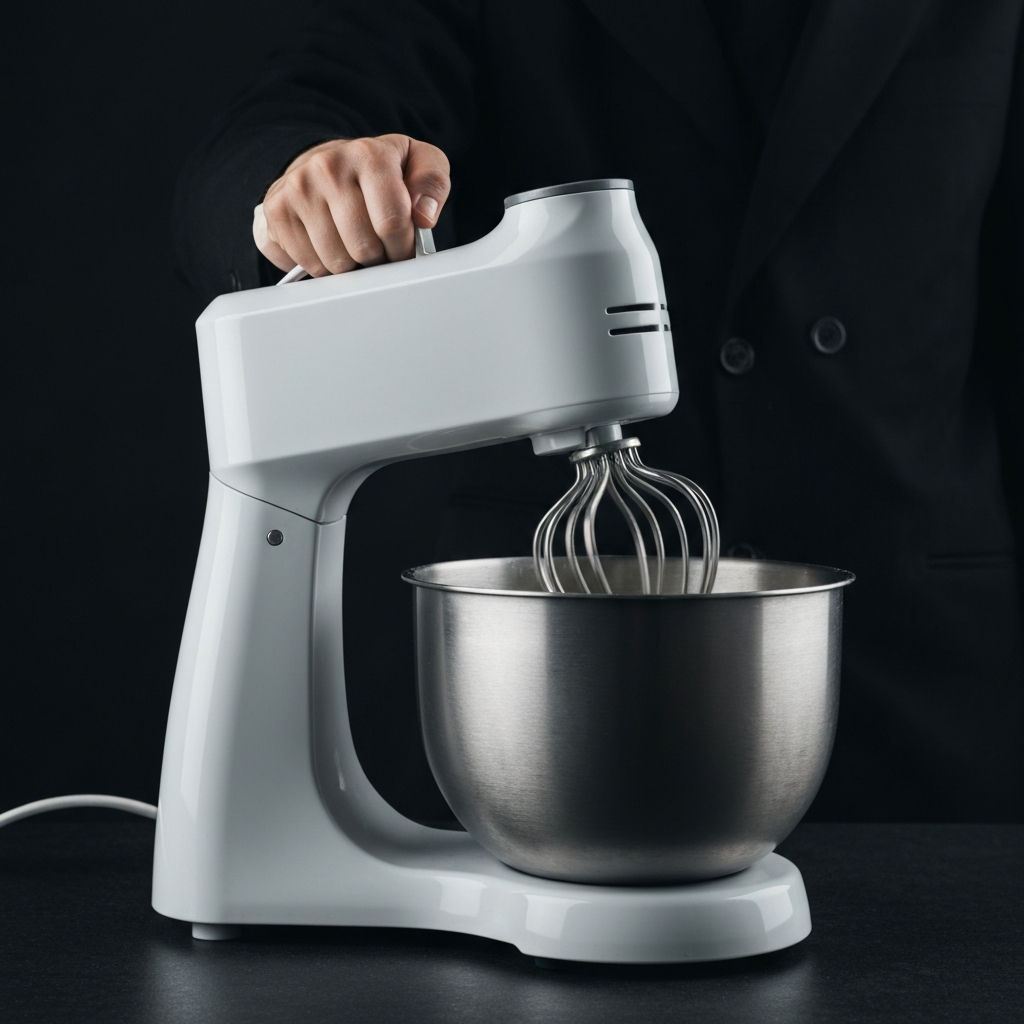
Using an electric mixer, beat together the pumpkin puree, eggs, and bacon fat on medium-high speed until well combined, about 1-2 minutes. Slowly add the oats and 2 ½ cups of whole wheat flour at low speed, beating until just combined. Add the diced bacon and another ¼ cup of flour, blending until everything is incorporated. The dough should have a doughy consistency and no longer be sticky. Use the paddle attachment on your electric mixer for best results.
Step 9: Shaping and Baking the Bacon Bones
On a lightly floured surface, knead the dough until it comes together. Using a rolling pin, roll the dough to about ¼ inch thick. Cut out bone shapes using cookie cutters and place the treats onto the prepared baking sheet. Bake until the edges are golden brown, approximately 20-25 minutes. Keep a close eye on the treats while baking to prevent burning.
Step 10: Cooling and Storing the Treats
Once the bacon bones are done, place them on a cooling rack for about 20-30 minutes, or until cool. To store, keep the treats in the refrigerator for a few days or in the freezer for longer storage. Always ensure the treats are completely cool before storing to prevent moisture buildup. Proper cooling and storage will maintain the treats' texture and flavor.
Step 11: No-Bake Dog Pill Pockets
Giving pills to dogs can sometimes be a challenge. These no-bake pill pockets are a convenient and tasty solution. This recipe requires no baking, making it a quick and easy option for busy pet owners. The peanut butter and coconut oil provide a palatable flavor that masks the pill's taste.
Ingredients: 1 tablespoon natural peanut butter, 1 tablespoon coconut oil, 1 tablespoon water, ½ tablespoon crushed oats (or more as needed), 4-5 Milk-Bone dog biscuits
Step 12: Mixing the Ingredients
In a bowl, combine 1 tablespoon of hot water, 1 tablespoon of coconut oil, and 1 tablespoon of peanut butter. Mix until well combined. The mixture should have a liquid consistency. Crush a handful of oats in a food processor until they become a fine powder. Add the oat powder to the bowl and stir until everything is well combined. If using Milk-Bones, crush them into a fine powder and add them to the mixture slowly to avoid making it too stiff. The final consistency should be doughy. Adjust the amount of crushed oats or Milk-Bone powder to achieve the desired dough consistency.
Step 13: Forming the Pill Pockets
Using a ½ teaspoon, scoop balls of dough and place them on a plate. Using the bottom of a pen or pencil, create a small hole in the ball to accommodate the pill. Place the pill inside the hole, ensuring it's well hidden. The dough should be pliable enough to completely encase the pill.
Step 14: Storing and Serving
To store the no-bake dog pill pockets, place the plate in the refrigerator or freezer. If freezing, thaw the pockets completely before giving them to your dog. These pill pockets are best served cold. Freezing the pill pockets can extend their shelf life significantly.
Step 15: Tuna Bites for Your Cat
Cats adore the taste of tuna, making these tuna bites a surefire hit. Make sure to use tuna canned in oil, thoroughly drained. You can also use other canned fish such as salmon, mackerel, or cod. Adding a sprinkle of catnip will make these treats even more irresistible.
Ingredients: 1 egg, 1 tin tuna in oil (thoroughly drained), pinch of catnip (optional)
Step 16: Preparing the Egg White
Preheat your oven to 330°F (165°C) and line a baking sheet with grease-proof paper or baking parchment. Crack open the egg and separate the white from the yolk. Discard the yolk and place the white in a large mixing bowl. Beat the egg white until stiff peaks form using a whisk or electric mixer. Stiff peaks are crucial for creating a light and airy texture in the treats.
Step 17: Blending the Tuna
Empty the can of tuna into a blender or food processor. Add two tablespoons of whisked egg white to the tuna and blend until the mixture is a smooth paste. If you're using catnip, add ¼ teaspoon of it to the mixture. Blending the tuna with egg white creates a smooth and palatable base for the treats.
Step 18: Folding and Piping
Remove the tuna paste mixture from your blender and gently fold it into the remaining whisked egg white using a spatula or spoon. Spoon the mixture into a piping bag with a small star-shaped nozzle. Pipe the mixture into small rounds on the parchment-lined baking sheet, making swirls about ½ inch wide. If you don't have a piping bag, you can also do this with your hands. Folding the mixture gently ensures that the egg whites don't deflate.
Step 19: Baking the Tuna Bites
Bake for 20-25 minutes. The treats should feel dry to the touch and should be easily removable from the baking sheet. Place them on a wire cooling rack for about 15-20 minutes until cool. Baking time may vary depending on your oven; check the treats frequently.
Step 20: Storing the Treats
To store the tuna bites, place them in an airtight container in the refrigerator or freezer for up to 2 weeks. Ensure the treats are fully cooled before storing to prevent condensation. Proper storage prevents the treats from becoming moldy or losing their flavor.
Step 21: Calming Kitty Cookies
These calming kitty cookies are designed to help stressed, scared, or anxious cats. The combination of tuna, catnip, and chamomile extract creates a soothing effect. If you don't have chamomile extract, you can substitute with licorice root extract.
Ingredients: 1 can tuna, 1 cup dry cat food (biscuits), 2 tablespoons dried catnip, a few drops of chamomile or licorice root extract
Step 22: Mixing the Ingredients
Open the can of tuna and drain the liquid. Crush a handful of dry cat food. Add the crushed cat food, dry catnip, and a few drops of chamomile extract to the tuna. Stir until well combined. Ensure the ingredients are thoroughly mixed to evenly distribute the calming properties.
Step 23: Shaping the Cookies
Shape the mixture into small balls about ½ inch tall and ½ inch wide. Gently push them down to create small dots. These will be your kitty cookies. Uniformly sized cookies will ensure even distribution of ingredients and a consistent calming effect.
Step 24: Setting and Storing
Place the cookies in the refrigerator to set. Store them in an airtight container in the refrigerator for up to one week. Serve these cookies to your cat whenever they're feeling stressed, scared, or anxious. Refrigeration helps maintain the cookies' freshness and consistency.
Step 25: No-Bake Cat Pill Pockets
Similar to the dog pill pockets, these no-bake cat pill pockets are a convenient way to administer medication to your feline friend. The beef bouillon granules add a savory flavor that cats often find appealing. This recipe is quick, simple, and requires no baking.
Ingredients: 6 teaspoons flour, 1 teaspoon beef bouillon granules, 2 teaspoons milk
Step 26: Mixing the Dough
In a small cup, mix the milk and beef bouillon granules. Add half of the flour and stir until well combined. Add the remaining flour and stir until a dough forms. Gradually adding the flour helps prevent lumps and ensures a smooth dough.
Step 27: Forming the Pockets
Flour your hands and roll the dough into small balls between your palms. If the dough is sticky, add more flour; if it's too stiff, add ¼ to ½ teaspoon of water. Using the bottom of a pencil or pen, create a hole at the top of each ball to fit the pill. Adjusting the flour and water content is crucial for achieving the perfect dough consistency.
Step 28: Inserting the Pill and Serving
Place the pill in the hole, ensuring it is hidden. Give the pill pocket to your cat. To store, place the remaining pill pockets in an airtight container for up to 7 days. Hiding the pill effectively increases the likelihood of your cat willingly consuming the treat.
Step 29: Rabbit Wheels
Rabbits need healthy treats too! These rabbit wheels are made with natural ingredients like banana, mango, and hay dust. Ensure the rabbit pellet dry food is suitable for your rabbit's age and health condition. These treats are a great source of fiber and essential nutrients.
Ingredients: ¼ cup rabbit pellet dry food, 1 banana (mashed), 1 mango (mashed), ½ cup hay dust
Step 30: Preparing the Ingredients
Preheat your oven to 350°F (175°C). Using a food processor, blend the rabbit pellets into a powder. Mash the banana and mango using a fork or food processor. Mashing the banana and mango thoroughly helps bind the ingredients together.
Step 31: Mixing and Forming
Combine the mashed banana, mashed mango, and pellet powder. Mix in the hay dust until a doughy consistency is achieved. Add extra water if necessary. Cut strips of a cardboard roll to create rings. The dough should be firm enough to hold its shape when formed into wheels.
Step 32: Assembling and Baking
Add the mixture to the cardboard rings. Assemble the wheels on a baking tray. Place the tray in the oven for 20 minutes, then turn the oven off while leaving the treats inside for another 30 minutes. If the treats are not fully dried, flip them over and repeat on the other side. The low and slow baking process ensures the treats are thoroughly dried without burning.
Step 33: Cooling and Serving
Let the treats cool completely before giving them to your rabbit. To store, place the rabbit wheels in an airtight container for up to seven days. Ensure the treats are completely cool before storing to prevent moisture buildup and spoilage.
Safety Considerations
- Always check the ingredients carefully to ensure your pet is not allergic to any of them.
- Avoid using artificial sweeteners, especially Xylitol, as it is toxic to dogs.
- Store treats properly to prevent spoilage and maintain freshness.
- Supervise your pet while they are enjoying the treats.
Pro Tips
- Use high-quality ingredients for the best taste and nutritional value.
- Get creative with shapes and sizes of the treats to make them more appealing.
- Consider your pet's dietary needs and preferences when selecting recipes.
- Involve children in the treat-making process for a fun and educational activity.
Common Mistakes to Avoid
- Using ingredients that are toxic to pets.
- Over-baking or under-baking the treats.
- Not storing the treats properly.
- Giving too many treats to your pet, leading to weight gain or other health issues.
FAQ Section
- How long will homemade pet treats last?
- Depending on the recipe and storage method, homemade pet treats can last from a few days to several months. Refrigeration and freezing can significantly extend their shelf life.
- Are homemade treats healthier than store-bought treats?
- Homemade treats can be healthier as you have control over the ingredients and can avoid artificial additives, preservatives, and fillers.
- Can I use different flours for the dog treat recipes?
- Yes, you can experiment with different flours like oat flour or brown rice flour, but be aware that this may change the texture and baking time.
- My cat is a picky eater; what treat recipe would you recommend?
- The tuna bites are generally a hit with most cats due to their strong flavor. You can also try the calming kitty cookies, but be mindful of their preferences.
Conclusion
Making your own pet treats is a rewarding experience that allows you to provide your beloved companions with healthy and delicious snacks. By following these recipes and tips, you can create custom-made treats that cater to your pet's specific needs and preferences. Remember to always prioritize safety, use high-quality ingredients, and store the treats properly to maintain their freshness. Happy baking and happy treating!