A fireplace can be a wonderful source of heat and ambiance in your home, but it's crucial to ensure it's operating safely. Regular chimney inspections are essential for identifying potential hazards like creosote buildup, cracks, or obstructions. These issues, if left unaddressed, can lead to chimney fires or carbon monoxide poisoning. This guide will walk you through the process of inspecting your fireplace chimney, allowing you to identify potential problems and take necessary preventative measures. While this guide offers a detailed overview, remember that complex issues are best addressed by a qualified chimney sweep or professional.
This inspection process involves both an interior and exterior examination of your chimney. We'll start inside the firebox and flue, looking for signs of damage and excessive creosote. Then, we'll move to the rooftop to assess the chimney's structural integrity, flashing, and overall condition. By following these steps, you'll gain a solid understanding of your chimney's health and be able to make informed decisions about maintenance and repairs.
Performing a basic chimney inspection yourself can save you money and potentially prevent a disaster. Schedule approximately 1-2 hours for this task, depending on the size and complexity of your chimney. Let's get started!
Step 1: Prepare the Firebox
Clear Out Ashes and Debris
Begin by removing all ashes and debris from the firebox. Use a stiff broom or chimney brush to scrub the sides and bottom, dislodging any loose material. A shop vacuum is ideal for removing the loosened ashes. If possible, remove the andirons to provide a clearer view and easier access to the firebox floor. Neglecting this step can obstruct your view during the internal inspection, making it difficult to spot potential problems.
Step 2: Inspect the Firebox Interior
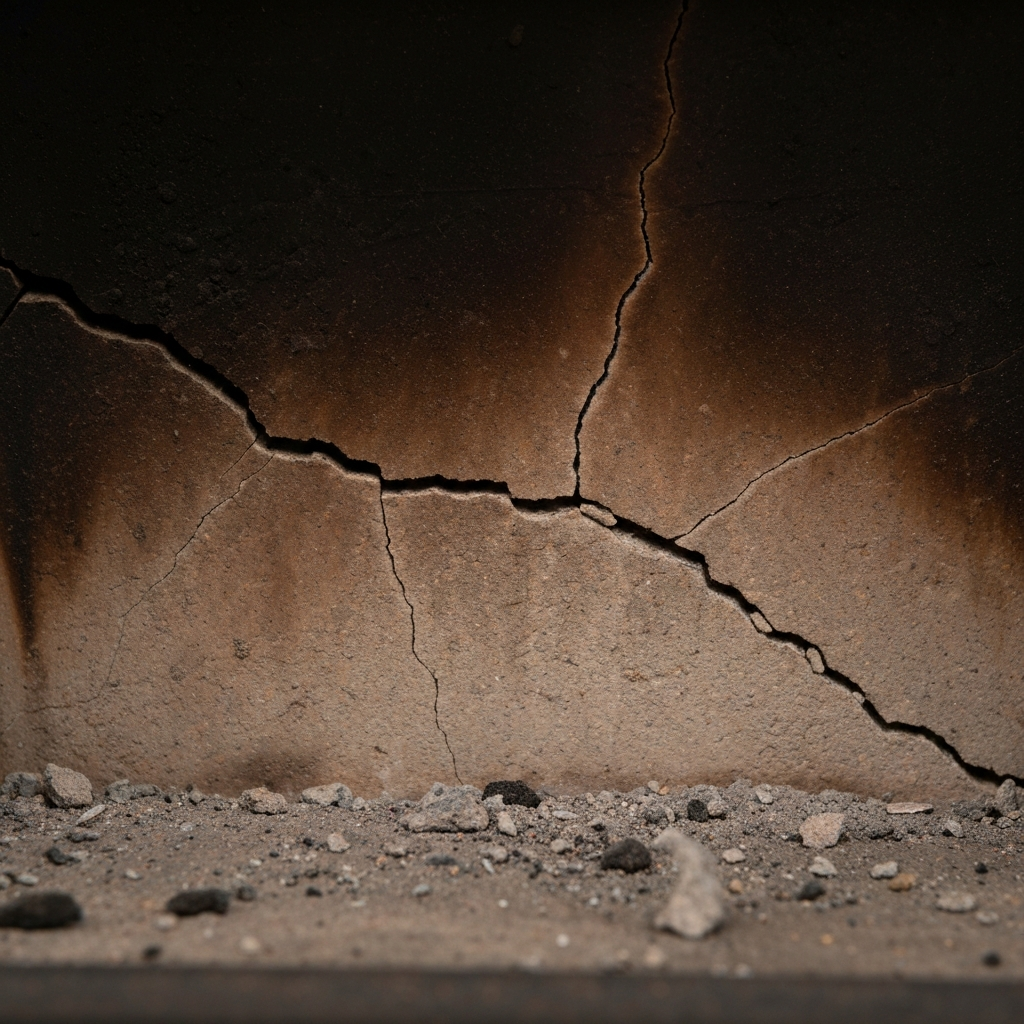
Examine for Cracks and Damage
Open the fireplace screen and glass doors as wide as possible. Place a large piece of cardboard or a drop cloth in the firebox to protect your room from soot and debris. Lie on your back and slide into the firebox as far as needed to get a good view up the flue. Use a powerful flashlight to thoroughly examine the interior. Look for cracks in the masonry, burn-out holes in a metal insert, and the general condition of the firebox walls. Pay close attention to the joints between bricks or stone, as these are common areas for cracking. Ignoring small cracks can lead to bigger problems as they expand from repeated heating and cooling.
Step 3: Check the Damper
Assess Damper Functionality and Condition
Have someone operate the damper while you observe its movement. Ensure it opens and closes smoothly and fits securely in its brackets. Wear safety glasses during this step, as the damper may be coated with creosote and ash that can fall into your eyes. Ensure the damper is in the closed position when you are finished. A malfunctioning damper can significantly reduce the efficiency of your fireplace and can even create a fire hazard if it doesn't seal properly, allowing drafts to feed a smoldering fire.
Step 4: Protect the Room from Falling Debris
Set Up a Protective Barrier
Place a drop cloth or a large piece of cardboard in the firebox with the edge taped up or propped at the front to protect the room from material that may fall from the chimney during the external inspection and cleaning. Close the screen and glass doors, if equipped. This simple step can save you considerable time cleaning up soot and debris later.
Step 5: Access the Chimney on the Roof
Safety First: Roof Access and Preparation
Using a sturdy ladder, carefully climb onto the roof of your home. Ensure the ladder is properly positioned and secured before climbing. Proceed to the location where the chimney projects. If the chimney has a rain cover or bird screen, have the necessary tools ready to remove it. Before removing the rain cover or bird screen, have flashing material on hand to reseal it after you finish your inspection. This is essential to prevent water damage. Be extremely cautious while on the roof, especially if it's wet or icy. If you are not comfortable working on the roof, it's best to hire a professional.
Step 6: Inspect the Chimney Flue from Above
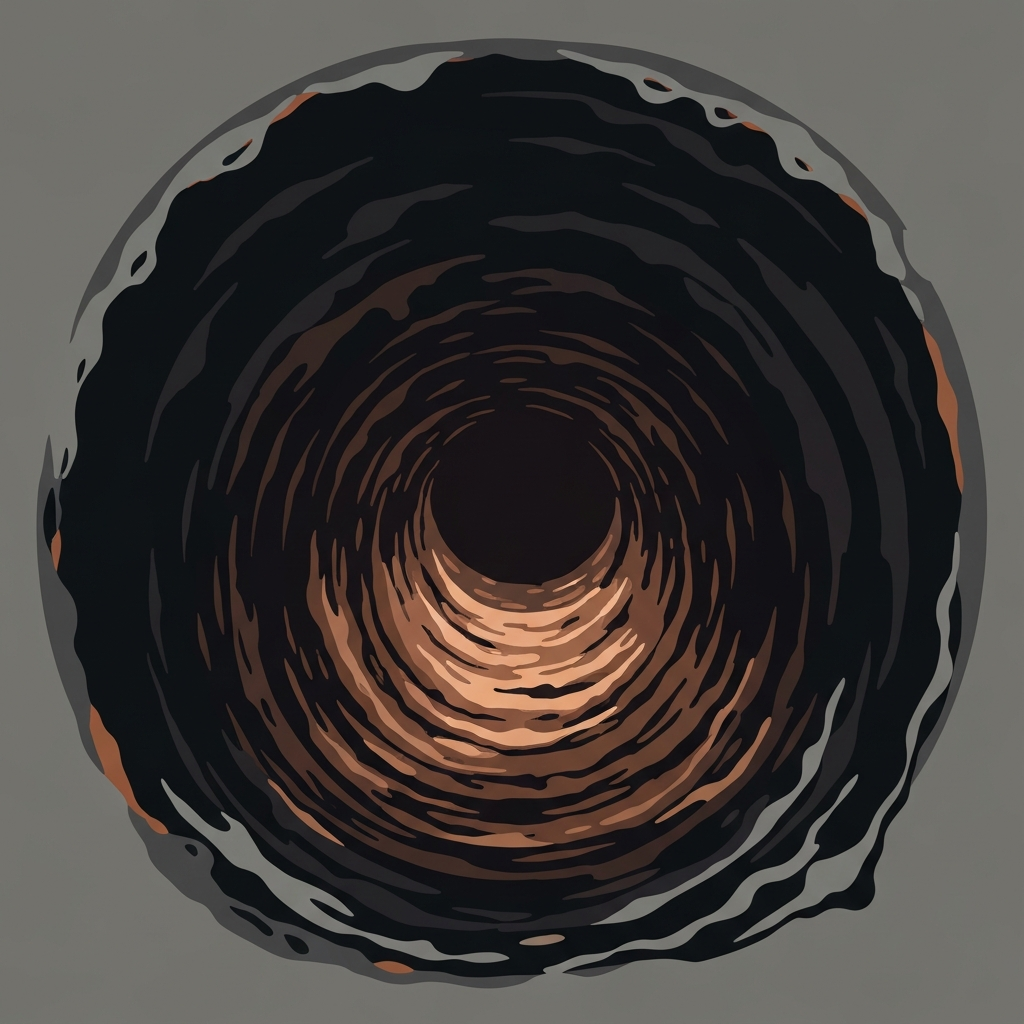
Check for Creosote Buildup and Obstructions
Shine your flashlight down the flue and carefully inspect for a dangerous buildup of creosote. Creosote is a combustible byproduct of burning wood that accumulates in chimney flues. It appears as a brown or black, crusty or tar-like substance. Also look for any obstructions like bird nests or debris. Excessive creosote buildup, exceeding 1/8 inch, poses a significant fire risk. Obstructions can impede airflow, leading to smoke backing up into your home.
Step 7: Clean the Chimney Flue (If Necessary and Safe)
Remove Loose Creosote
Using a stiff brush with a long handle, start at the top of the chimney and brush the sides, working your way down. Unless you have specialized chimney cleaning equipment, you likely won't be able to completely clean the inside of the chimney. However, you should be able to dislodge enough of the buildup to improve safety. Consider renting or purchasing a chimney brush if you plan on regular cleaning. Remember, if you're unsure about the condition or extent of creosote, calling a chimney sweep is the best course of action.
Step 8: Remove Dislodged Debris
Clean Up the Debris
Fashion an extension tube for a shop vacuum using a length of PVC pipe that is the same diameter as the shop vac hose. This extension can then be dropped down to remove the debris you dislodged from the flue. Most chimneys have a smoke shelf and damper door, which prevent this material from dropping all the way to the firebox floor. After cleaning, use the flashlight to re-examine the flue for cracks and gaps. Most chimneys are constructed with either a metal pipe flue or a clay chimney liner that comes in sections. If you are satisfied that there are no visible cracks, replace the chimney cap, if there was one, using the sealant for the flashing removed earlier. This prevents leaks.
Step 9: Inspect the Chimney Flashing
Examine the Flashing for Damage and Leaks
Carefully examine the flashing where the chimney adjoins the roof, especially on the sides where it penetrates the roof. The flashing is a waterproof barrier designed to prevent leaks. Look for signs of corrosion, damage, or debris accumulation. Pay close attention to any areas where the flashing appears to be loose or cracked. Addressing damaged flashing promptly is essential to prevent costly water damage to your roof and home's interior. This is often a hidden source of leaks that goes unnoticed for a long time.
Step 10: Final Steps
Reassemble and Restore
Climb down the ladder and return to the fireplace. Remove the drop cloth or protective barrier you installed to prevent the soot and ash brushed from the upper flue from being scattered in your room. You should now be ready to replace your andirons. After a fire, remember to close the damper to slow combustion and save heat.
Tools or Materials Required
- A good canister type wet/dry vacuum cleaner with a flexible hose and brush attachments.
- Drop cloth or cardboard
- A stiff brush, the kind sold at home centers for acid washing will usually work fine
- A length of PVC pipe the same diameter as the shop vac hose to extend down the flue
- Sealant and nails or screws to reattach the chimney cap if it is removed.
- Ladder tall enough to access the roof safely
- Flashlight
- Safety Glasses
Safety Considerations
- Be careful on the roof, and use your ladder correctly. If you are not comfortable walking on the roof, it is probably too steep for you.
- Find a professional to repair any problems you find that you do not feel competent doing yourself. The risk of a fire is not worth the cost.
- If you use a fireplace for heat, have a carbon monoxide detector nearby. Fireplaces can use up the oxygen in a confined space, especially when there is very little ventilation.
Common Mistakes to Avoid
- Ignoring small cracks in the firebox or flue liner. These can quickly worsen and lead to dangerous situations.
- Neglecting to wear safety glasses when inspecting the damper. Creosote and ash can easily fall into your eyes.
- Using the wrong type of sealant when reattaching the chimney cap. Ensure the sealant is designed for high-temperature applications.
- Attempting to clean the chimney yourself without proper equipment or experience. This can be dangerous and ineffective.
FAQ Section
- How often should I inspect my chimney?
- It's recommended to inspect your chimney at least once a year, preferably before the start of the heating season.
- When should I call a professional chimney sweep?
- If you notice excessive creosote buildup (more than 1/8 inch), cracks in the flue liner, or any other signs of damage, it's best to call a professional chimney sweep. They have the expertise and equipment to properly clean and repair your chimney.
- Can I clean my chimney myself?
- You can perform a basic cleaning yourself, but it's important to have the right tools and experience. If you're not comfortable working on the roof or dealing with creosote, it's best to hire a professional.
Conclusion
Regularly inspecting your fireplace chimney is a vital step in ensuring the safety and efficiency of your home. By following the steps outlined in this guide, you can identify potential problems and take preventative measures to avoid costly repairs or dangerous situations. However, remember that some issues are best left to the professionals. If you're ever unsure about the condition of your chimney, don't hesitate to contact a qualified chimney sweep for assistance. A well-maintained chimney will provide warmth and enjoyment for years to come.