Outdoor furniture, exposed to the elements, inevitably shows its age. Sun, rain, wind, and temperature fluctuations take their toll, leaving pieces looking faded, worn, and generally uninviting. But before you resign yourself to replacing your patio set, consider the possibility of a restoration project. With some time, effort, and the right techniques, you can revitalize your tired outdoor furniture, making it look as good as new and extending its lifespan for years to come.
This guide provides a step-by-step approach to breathing new life into your outdoor furniture, covering everything from cleaning and repairing damage to refinishing and protecting against future wear and tear. We'll delve into techniques suitable for various materials, including wood, metal, and plastic, ensuring you have the knowledge and confidence to tackle any restoration project. Remember, proper preparation is key to a successful and long-lasting finish.
Investing the time to restore your existing furniture is not only cost-effective but also an environmentally conscious choice. Instead of contributing to landfills with discarded furniture, you're giving these pieces a second chance and reducing your carbon footprint. So, gather your tools, choose your materials, and let's begin the journey of transforming your tired outdoor furniture into a stylish and comfortable oasis.
Step 1: Assessment and Planning
Evaluate the Condition of Your Furniture
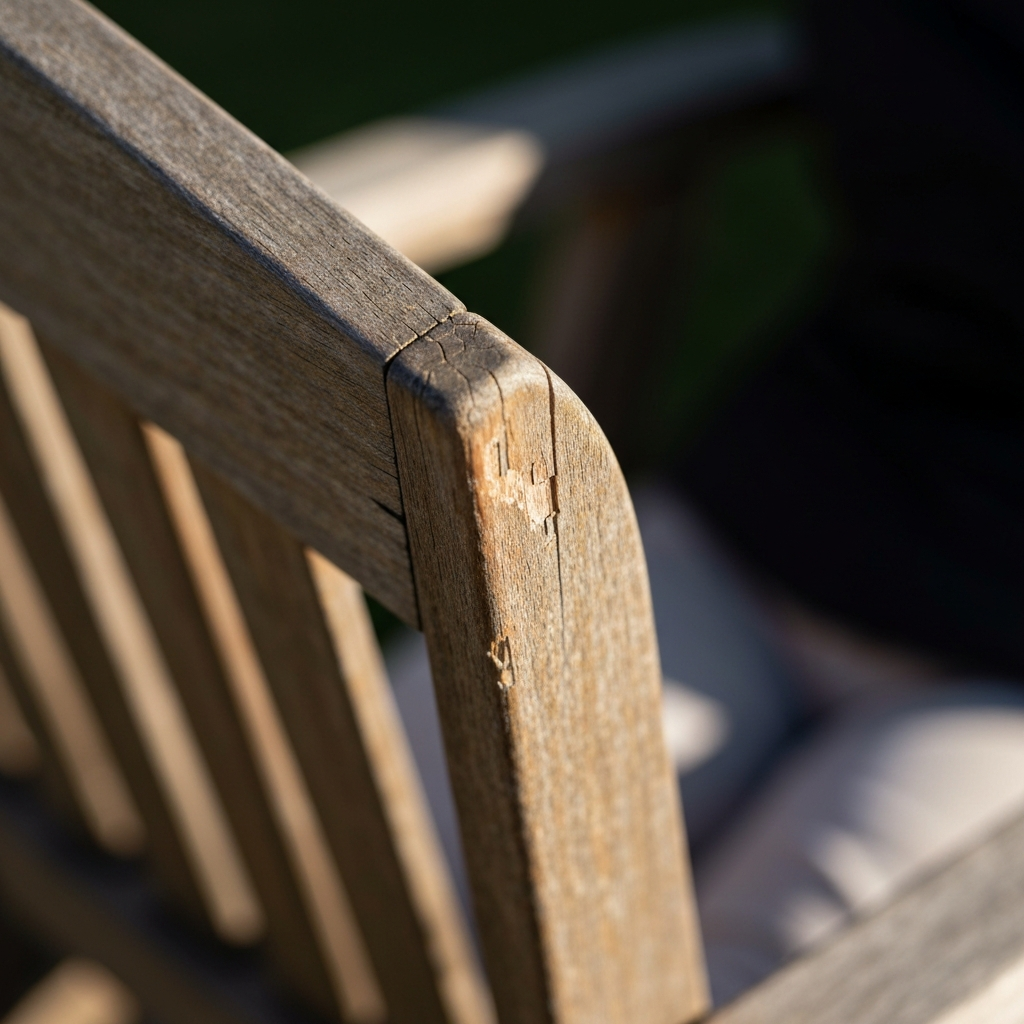
Before you even think about picking up a brush or screwdriver, take a comprehensive look at each piece of furniture. Identify the type of material it's made of – wood, metal, plastic, or a combination. Carefully examine for signs of damage like rust, rot, cracks, peeling paint, or broken parts. The extent of the damage will dictate the tools, materials, and techniques you'll need for the restoration. For example, heavily rusted metal furniture will require more extensive rust removal and treatment than a piece with only minor surface rust. Similarly, rotten wood will need to be replaced or reinforced. Make a list of all the issues you identify for each piece.
Step 2: Cleaning and Preparation
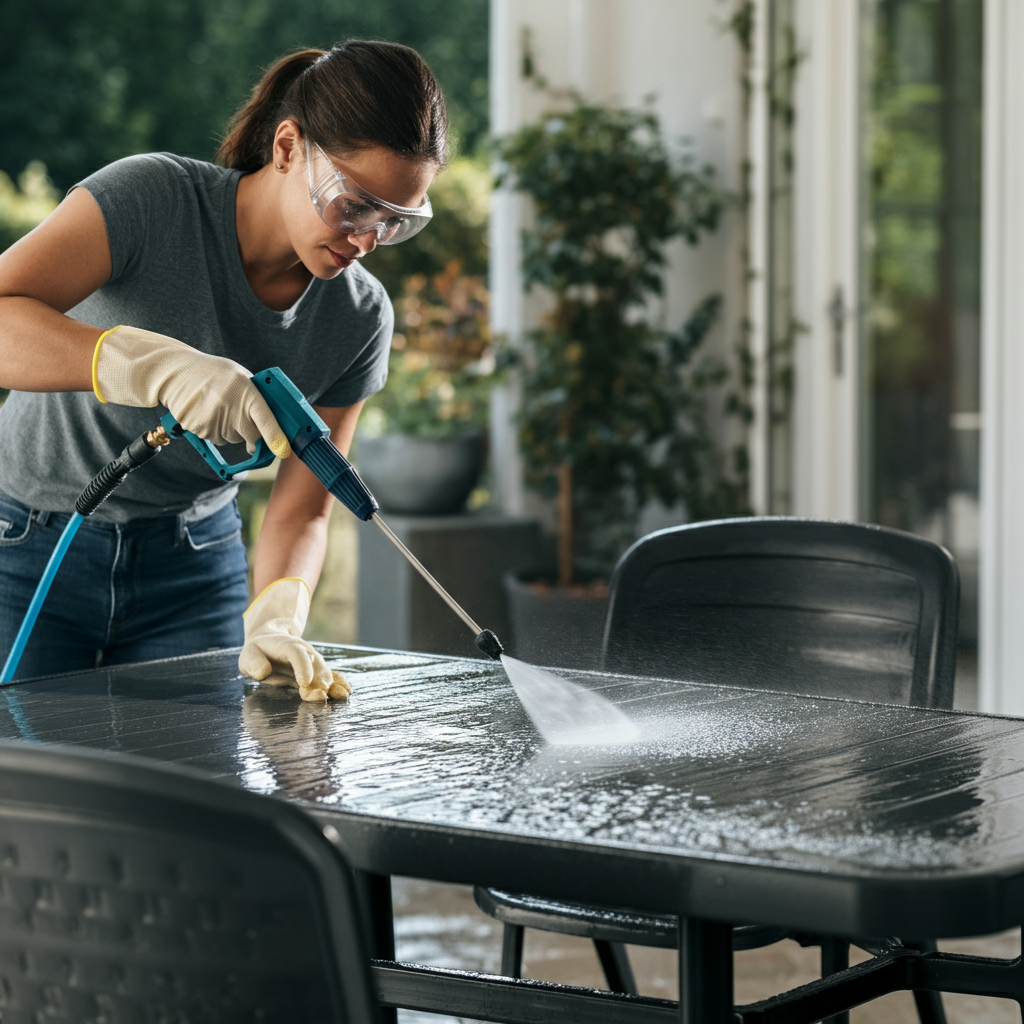
Thoroughly Clean Each Piece
Cleaning is a crucial first step, regardless of the material. Remove any cushions, covers, or accessories. For wood and plastic furniture, use a mixture of mild soap (dish soap works well) and warm water. Apply the solution with a scrub brush or sponge, paying close attention to crevices and areas with dirt buildup. Rinse thoroughly with clean water and allow to dry completely. For metal furniture, use a wire brush or steel wool to remove any loose rust or corrosion before cleaning with soap and water. Pressure washing can be effective for large surfaces, but be cautious with delicate materials or intricate details, as it can cause damage.
Step 3: Repairing Damage
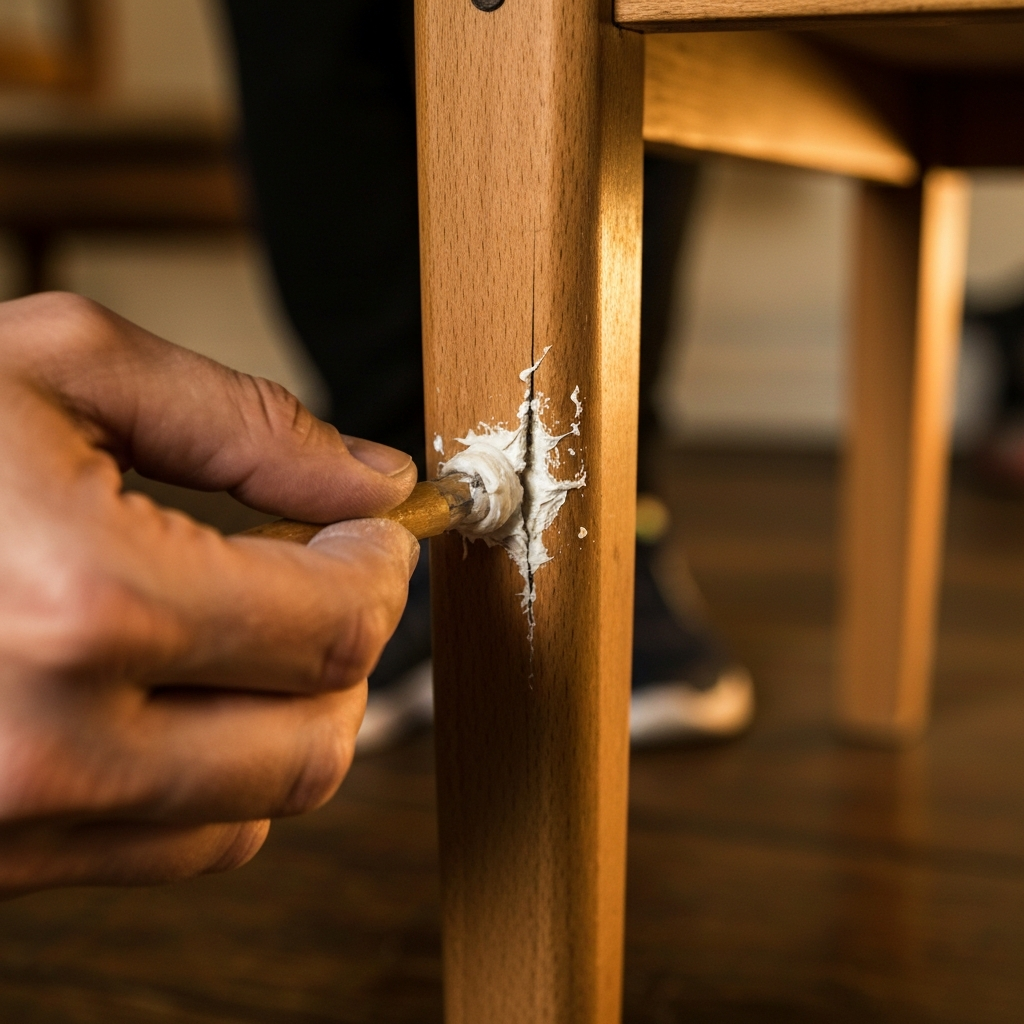
Address Structural Issues and Imperfections
Once the furniture is clean and dry, it's time to address any structural damage. For wooden furniture, this might involve patching cracks with wood filler, replacing rotten or damaged sections, or tightening loose joints with wood glue and clamps. When using wood filler, overfill slightly and sand smooth once dry for a seamless finish. For metal furniture, weld any broken joints or use epoxy for smaller repairs. Remove rust with a wire brush, sandpaper, or a rust converter product. For plastic furniture, use a plastic repair kit to fix cracks or breaks. Follow the manufacturer's instructions carefully. Consider reinforcing weak points with metal brackets or braces for added stability.
Step 4: Sanding and Priming
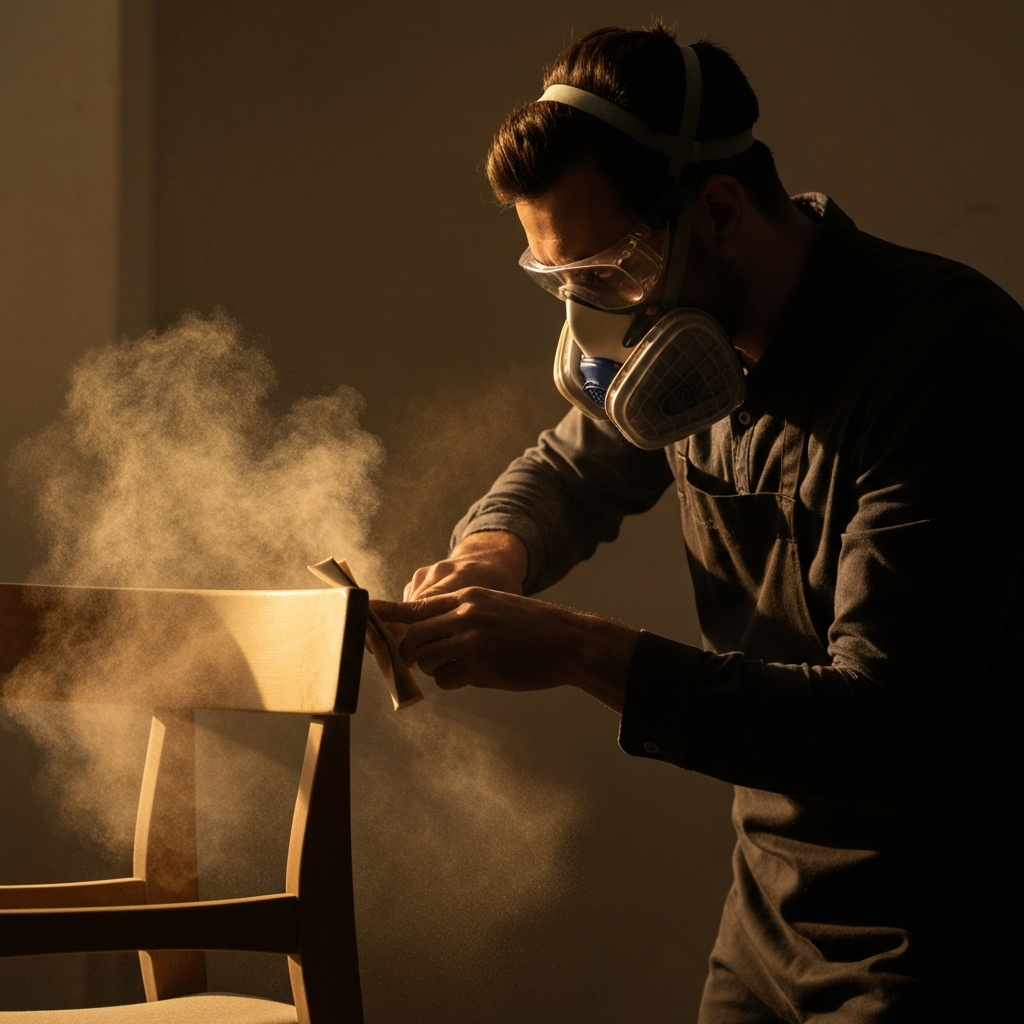
Prepare Surfaces for Refinishing
Sanding creates a smooth surface for paint or stain to adhere to, ensuring a professional-looking finish. For wood furniture, start with a coarser grit sandpaper (80-120) to remove old finishes and imperfections, then gradually move to finer grits (180-220) for a smooth final surface. For metal furniture, sand to remove any remaining rust and create a slightly textured surface for better paint adhesion. Always wear a dust mask when sanding to protect your lungs. After sanding, wipe down the furniture with a tack cloth to remove any dust. Apply a primer specifically designed for the material you're working with. Primer helps the paint or stain adhere better and provides a uniform base color, especially when covering dark or uneven surfaces.
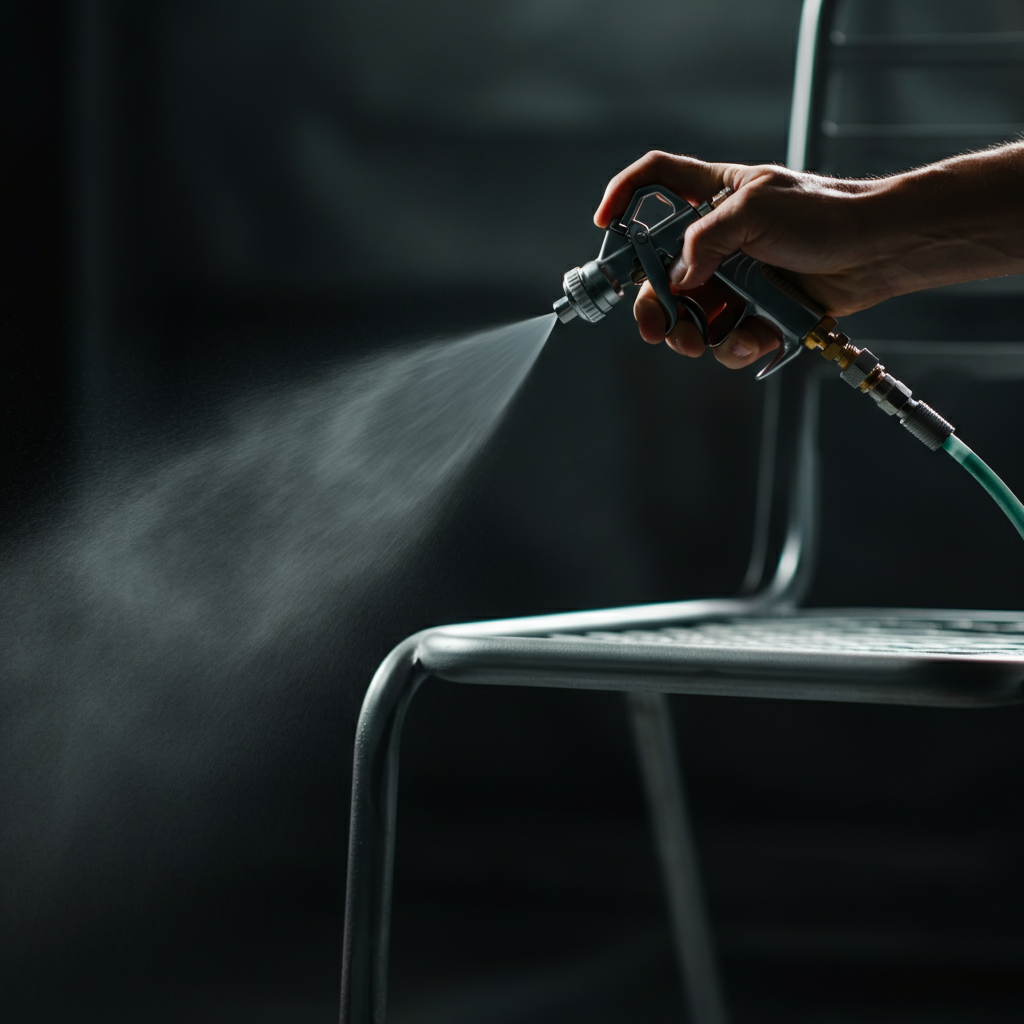
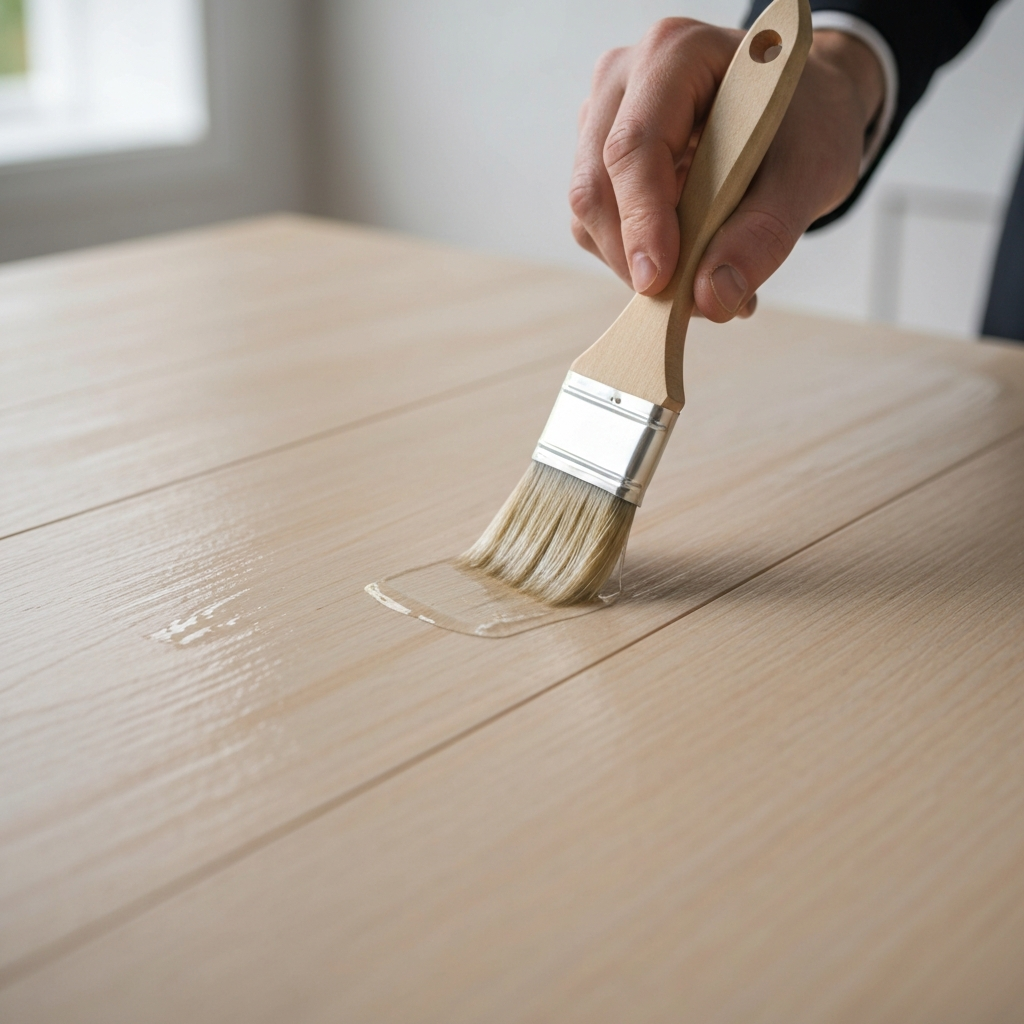
Step 5: Painting or Staining
Apply Your Chosen Finish
Now comes the fun part – applying your chosen finish! For wood furniture, you can choose between stain, paint, or varnish. Stain enhances the natural grain of the wood, while paint provides a more opaque and colorful finish. Varnish provides a protective topcoat. For metal furniture, use a rust-resistant paint specifically designed for outdoor use. For plastic furniture, use a paint formulated for plastic. Apply thin, even coats, allowing each coat to dry completely before applying the next. Avoid painting in direct sunlight or humid conditions, as this can affect the drying time and finish quality. Consider using a sprayer for a smooth, professional-looking finish, especially on intricate designs.
Step 6: Sealing and Protection
Protect Your Refurbished Furniture
Once the paint or stain is completely dry, apply a sealant or protective topcoat to protect the finish from the elements. For wood furniture, use an exterior-grade sealant or varnish. For metal furniture, use a clear coat designed to protect against rust and corrosion. For plastic furniture, use a sealant formulated for plastic. Apply multiple thin coats, allowing each coat to dry completely before applying the next. Proper sealing will significantly extend the life of your refinished furniture and protect it from fading, cracking, and peeling. Consider applying a UV protectant spray to further shield the furniture from sun damage.
Step 7: Reassembly and Enjoyment
Put Your Furniture Back Together
Once everything is dry and sealed, carefully reassemble your furniture. Replace any hardware that was removed during the repair process. Add new cushions, covers, or accessories to complete the transformation. Step back and admire your handiwork! You've successfully breathed new life into your tired outdoor furniture, saving money and contributing to a more sustainable lifestyle. Now, relax and enjoy your refreshed outdoor space!

Tools or Materials Required
- Mild soap and water
- Scrub brush or sponge
- Wire brush or steel wool (for metal)
- Sandpaper (various grits)
- Dust mask
- Tack cloth
- Wood filler or plastic repair kit
- Wood glue
- Clamps
- Rust converter (for metal)
- Primer
- Paint or stain
- Sealant or varnish
- Paintbrushes or sprayer
- Gloves
- Safety glasses
Common Mistakes to Avoid
- Skipping the cleaning and preparation steps.
- Using the wrong type of paint or sealant for the material.
- Applying paint or sealant too thickly.
- Painting in direct sunlight or humid conditions.
- Not allowing enough drying time between coats.
Safety Considerations
- Always wear safety glasses when sanding or using power tools.
- Wear a dust mask when sanding to protect your lungs.
- Work in a well-ventilated area when painting or using sealants.
- Follow the manufacturer's instructions for all products.
FAQ Section
Q: How often should I clean my outdoor furniture?
A: At least twice a year, or more often if it gets particularly dirty.
Q: Can I paint over rust?
A: No, you should always remove rust before painting to prevent it from spreading.
Q: How can I protect my furniture from fading in the sun?
A: Use a UV protectant spray and store your furniture in a shaded area or cover it when not in use.
Conclusion
Revitalizing tired outdoor furniture is a rewarding project that can save you money and extend the life of your favorite pieces. By following these steps, you can transform your outdoor space into a comfortable and stylish oasis, ready for relaxation and enjoyment. Remember, thorough preparation, quality materials, and patience are the keys to a successful and long-lasting restoration. So, embrace the challenge, get creative, and enjoy the fruits of your labor!