A worn or damaged refrigerator seal (also known as a gasket) can lead to significant energy loss, causing your appliance to work harder and your electricity bills to rise. Replacing the seal is a relatively simple DIY project that can save you money and extend the life of your refrigerator. This guide provides a comprehensive, step-by-step approach to replacing your refrigerator seal, ensuring a proper fit and optimal performance.
Before you begin, it's crucial to identify the correct replacement seal for your specific refrigerator model. Using the wrong seal will result in an improper fit, defeating the purpose of the repair. With a few basic tools and some patience, you can easily tackle this project and keep your refrigerator running efficiently.
This guide will walk you through the entire process, from identifying the right seal to ensuring a perfect airtight closure. Let's get started!
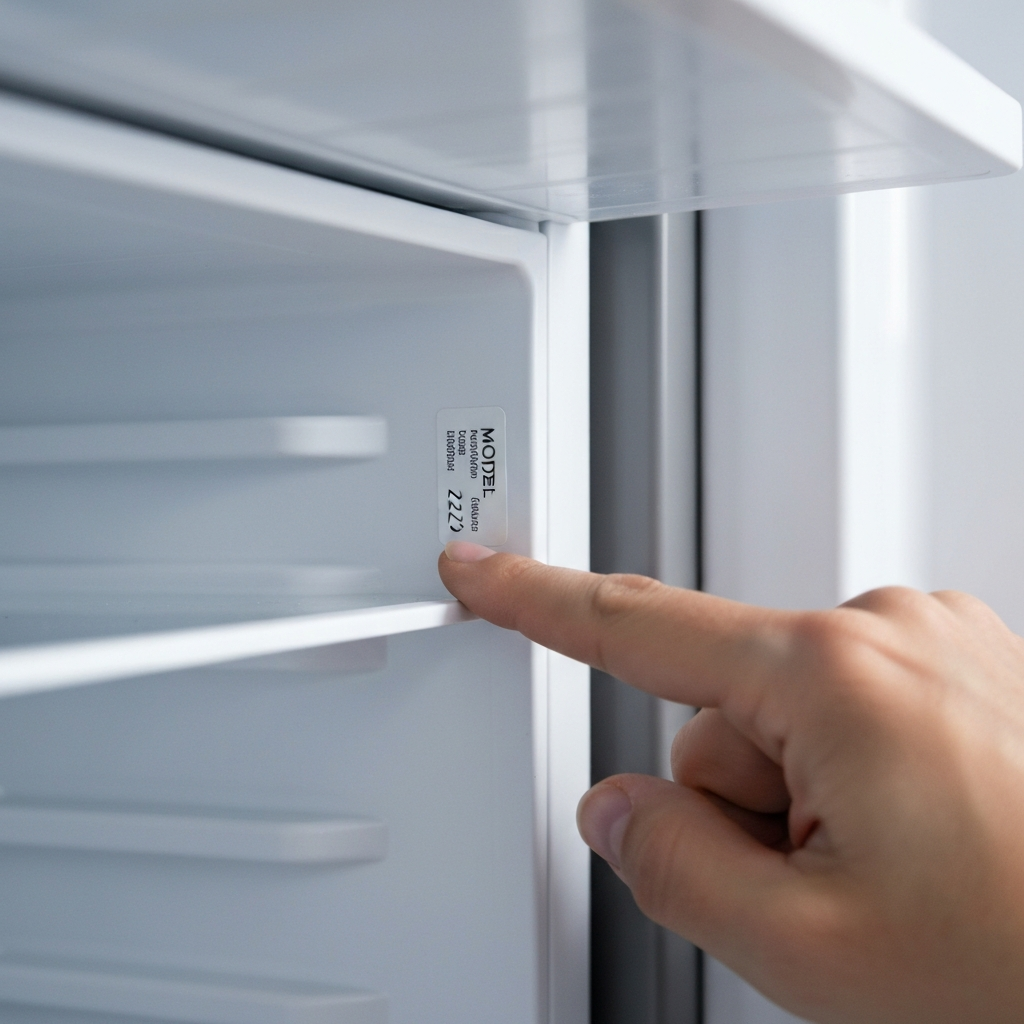
Step 1: Identify and Purchase the Correct Replacement Seal
Finding the right replacement seal is paramount. Start by locating your refrigerator's model number. This is typically found on a sticker inside the refrigerator compartment, often on a side wall or near the door. Once you have the model number, search online retailers or appliance parts stores for a seal specifically designed for your refrigerator. When ordering, double-check that the description and dimensions match your existing seal. Some manufacturers also sell seals directly on their websites. Pay close attention to reviews from other customers to ensure the seal is a good fit and high quality.
Step 2: Remove the Old Refrigerator Seal
Before you start removing the old seal, unplug your refrigerator to prevent any electrical hazards. The old seal is usually held in place by either adhesive or a series of retainer clips. Gently peel back the old seal, starting at one corner. If it's glued, you may need to use a putty knife or similar tool to carefully separate it from the door. Work your way around the entire perimeter of the door. If the seal is held by clips, use a screwdriver or your fingers to gently release each clip. Be careful not to damage the door's surface during this process. Once the seal is completely detached, clean the area where the seal was attached with a mild detergent and water to remove any residual adhesive or debris. Make sure the area is completely dry before proceeding.

Step 3: Prepare the New Seal for Installation
New refrigerator seals are often compressed during shipping, which can cause them to lose their shape. To restore the seal to its original shape, lay it flat in a warm room or use a hairdryer on a low setting to gently warm it. Be careful not to overheat the seal, as this could damage the material. Another method is to soak the seal in warm water for a few minutes. This will make it more pliable and easier to work with. Once the seal is warmed, lay it out on a clean, flat surface and allow it to fully expand.

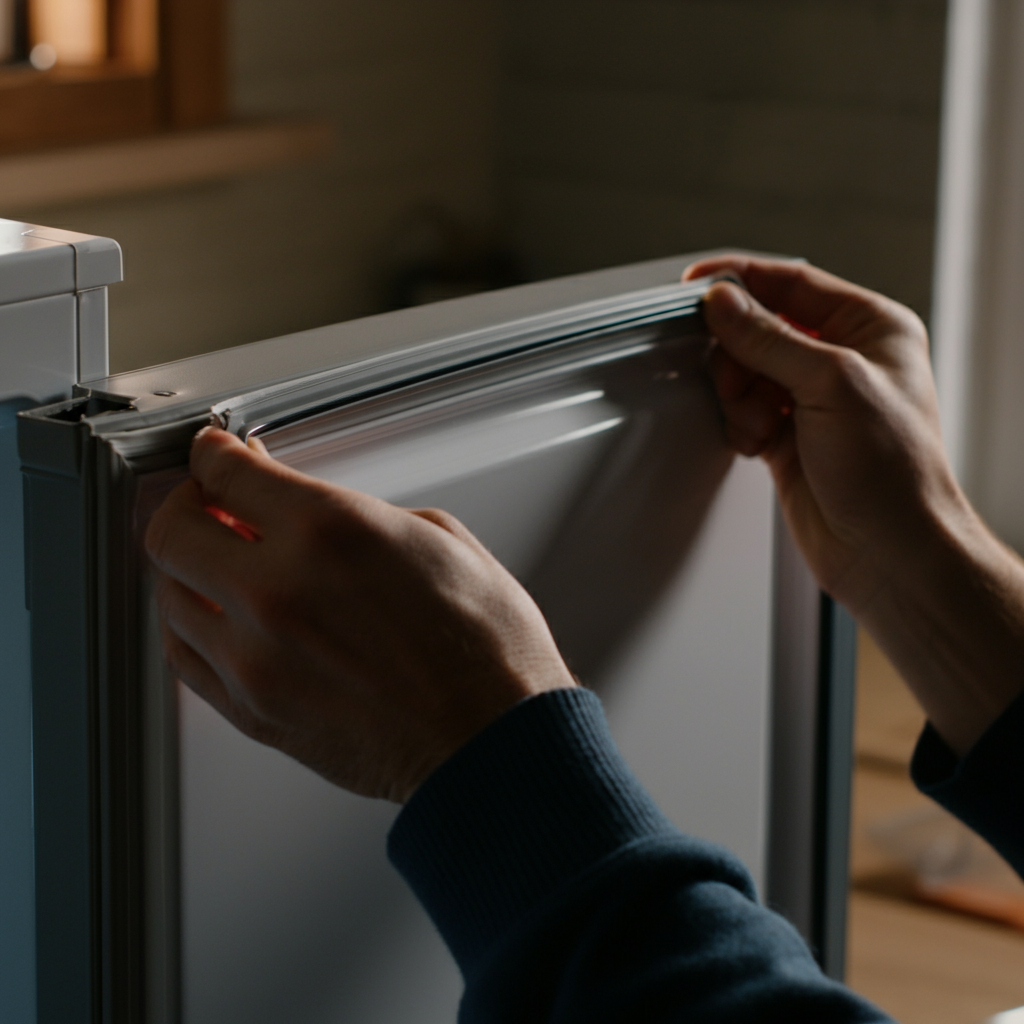
Step 4: Install the New Refrigerator Seal
Begin installing the new seal by aligning it with the refrigerator door. If the seal has retainer clips, carefully press the seal onto the door frame, ensuring that each clip snaps securely into place. If the seal is adhesive-backed, peel off a small section of the backing and carefully attach the seal to the door. Work your way around the perimeter of the door, peeling off the backing and pressing the seal firmly into place. Ensure the seal is properly aligned and that there are no gaps or wrinkles. If you are using adhesive, apply even pressure to ensure a strong bond. Some seals may require the use of a specialized adhesive recommended by the manufacturer.
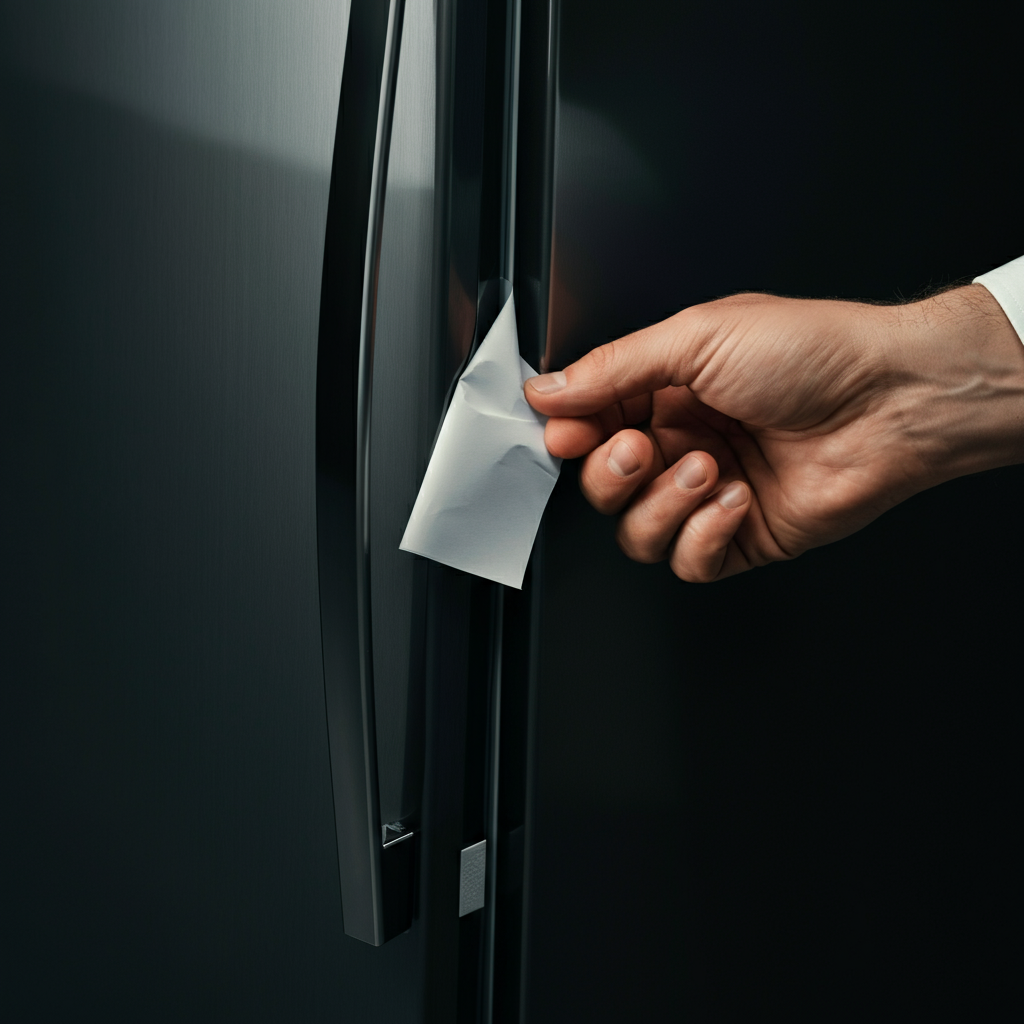
Step 5: Test the Seal and Make Adjustments
Once the seal is installed, close the refrigerator door and check for any gaps or leaks. You can use a piece of paper to test the seal. Close the door on the paper at various points around the perimeter. If you can easily pull the paper out, the seal is not tight enough. If you find any gaps, you may need to adjust the seal or add additional adhesive. In some cases, you may need to slightly loosen the door hinges and adjust the door's position to ensure a proper seal. If the door is too tight, the latch may need adjustment as well. Continue testing and adjusting the seal until you achieve an airtight closure. Let the adhesive cure completely before using the refrigerator normally. Check the manufacturer's instructions for the recommended cure time.
Tools or Materials Required
- New refrigerator seal
- Putty knife or scraper (if needed)
- Mild detergent and water
- Clean cloth
- Hairdryer (optional)
- Screwdriver (if needed)
- Adhesive (if needed)
- Paper for testing the seal
Common Mistakes to Avoid
- Purchasing the wrong seal for your refrigerator model.
- Damaging the refrigerator door while removing the old seal.
- Not properly preparing the new seal before installation.
- Creating gaps or wrinkles during installation.
- Not allowing the adhesive to cure completely.
Safety Considerations
- Always unplug the refrigerator before starting any repairs.
- Be careful when using sharp tools to avoid injury.
- Wear gloves to protect your hands from adhesive and cleaning agents.
Pro Tips
- Consider using painter's tape to hold the seal in place while the adhesive cures.
- If you are having trouble removing the old seal, try using a heat gun on a low setting to soften the adhesive.
- Consult a professional if you are unsure about any part of the process.
FAQ Section
Q: How often should I replace my refrigerator seal?
A: It depends on the condition of your seal. If you notice cracks, tears, or a loss of elasticity, it's time to replace it.
Q: Can I repair a damaged refrigerator seal instead of replacing it?
A: Minor tears or cracks can sometimes be repaired with silicone sealant, but replacement is generally the best option for long-term performance.
Q: What happens if my refrigerator seal is not properly installed?
A: An improperly installed seal can lead to energy loss, food spoilage, and increased electricity bills.
Conclusion
Replacing your refrigerator seal is a straightforward task that can significantly improve your refrigerator's efficiency and save you money on energy costs. By following these steps and taking your time, you can ensure a proper fit and airtight seal. Remember to purchase the correct seal for your model, prepare it properly before installation, and carefully test the seal after installation. With a little effort, you can keep your refrigerator running smoothly for years to come.