Recycling is an essential practice for environmental sustainability, but often, the infrastructure isn't readily available or conveniently placed. This guide will walk you through the process of building your own custom recycling bin, tailored to your specific needs and space. Whether you're aiming to separate paper, plastic, or glass, a DIY recycling bin can be a fantastic and rewarding project.
By crafting your own bin, you gain complete control over its size, compartments, and aesthetic appeal. It's an excellent way to repurpose materials, reducing waste while simultaneously promoting environmentally conscious habits. This project is suitable for individuals of varying skill levels, with adaptations possible to suit different budgets and available tools.
This comprehensive guide focuses on creating a durable and functional recycling bin using readily available materials. We will cover everything from initial design to final finishing touches, ensuring that your custom bin is both practical and aesthetically pleasing. Let's get started on this eco-friendly endeavor!
Tools or Materials Required
- 105-A Epoxy Resin x2
- 206-B Slow Hardener x2
- 6 oz. Fiberglass Cloth
- Glue Application Brushes
- FOAMULAR 150 2 in. x 4 ft. x 8 ft. R-10 Scored Squared Edge Rigid Foam Board Insulation Sheathing (2 sheets)
- Two-bin trash can
- Latex gloves
- Goggles
- N95 mask
- Sharpie
- T-Square
- Jigsaw
- Spray Foam
- Acrylic Paints
- Masking Tape
Common Mistakes to Avoid
- Using the wrong type of resin or hardener can lead to improper curing and a weakened structure. Always double-check compatibility and follow the manufacturer's instructions.
- Skipping safety precautions can result in exposure to harmful fumes or skin irritation. Ensure adequate ventilation and wear appropriate PPE at all times.
- Applying the fiberglass cloth unevenly can create weak spots in the bin's surface. Take your time and ensure consistent resin application.
- Rushing the drying process can compromise the structural integrity of the bin. Allow sufficient curing time as specified by the resin manufacturer.
Safety Considerations
- Working with resin and fiberglass requires proper ventilation to avoid inhaling harmful fumes. Work in a well-ventilated area or wear a respirator.
- Always wear gloves and eye protection when handling resin, hardener, and fiberglass. These materials can cause skin and eye irritation.
- Dispose of leftover resin and hardener according to local regulations. Do not pour them down the drain.
- Be careful when using power tools like the jigsaw. Follow the manufacturer's safety guidelines and wear appropriate safety gear.
-
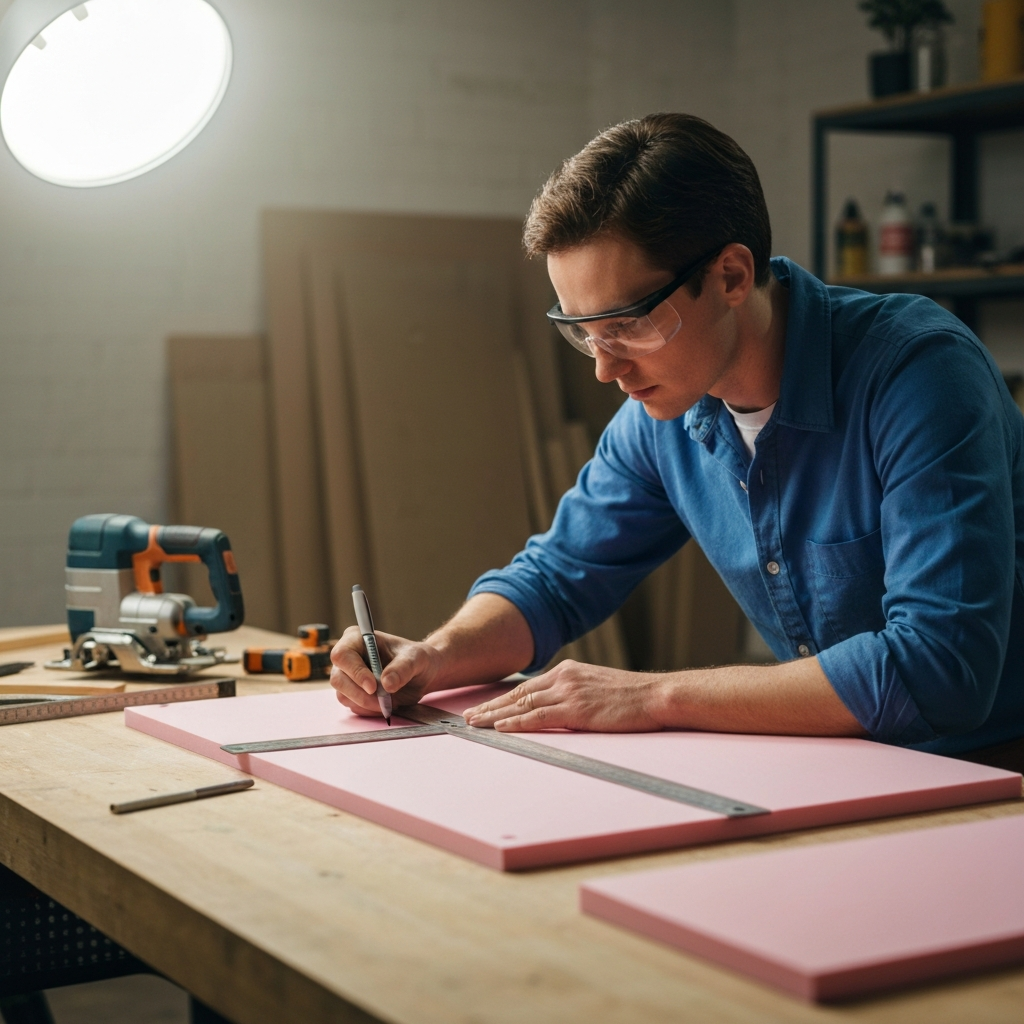
Step 1: Designing Your Recycling Bin
Begin by sketching out the dimensions and layout of your desired recycling bin. Consider the amount of space you have available and the types of recyclables you want to separate. Use the T-square and Sharpie to transfer your design onto the pink foam board. Precise measurements are crucial at this stage to ensure the final product fits your specifications. Think about incorporating separate compartments for paper, plastic, and glass for optimal sorting efficiency.
-
Step 2: Cutting the Foam Board
Carefully use the jigsaw to cut the foam board pieces according to your marked design. This is a subtractive process, so it's better to cut slightly less than needed and then refine the shape later. Focus on creating smooth, even cuts to avoid jagged edges that could affect the structural integrity of the bin. Assemble the pieces to form the basic shape of your recycling bin.

-
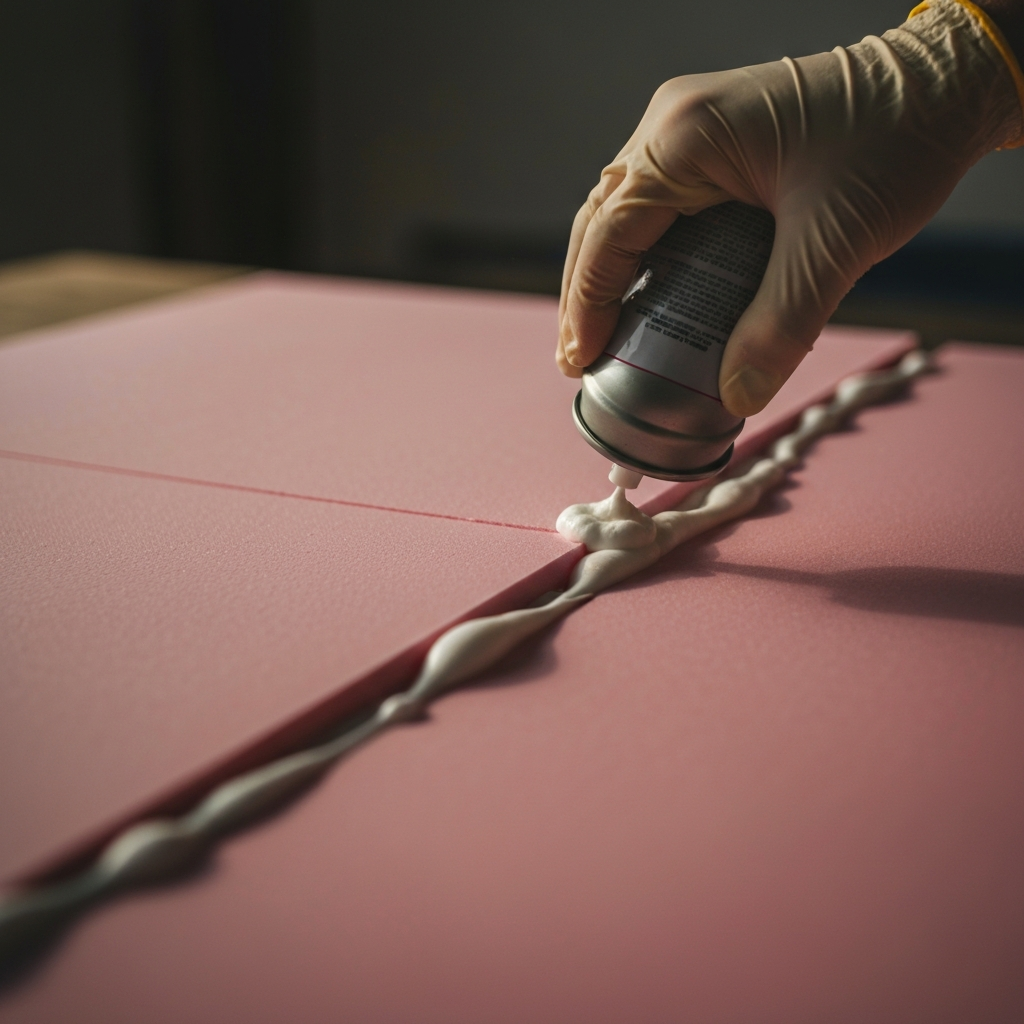
Step 3: Applying Spray Foam
Use spray foam to fill any gaps or seams between the foam board pieces. Allow the spray foam to fully dry and expand before trimming off the excess with a sharp knife. The spray foam not only adds structural support but also creates a smoother surface for applying the fiberglass later. Ensure the foam is evenly distributed to avoid any weak points in the bin's construction.
-
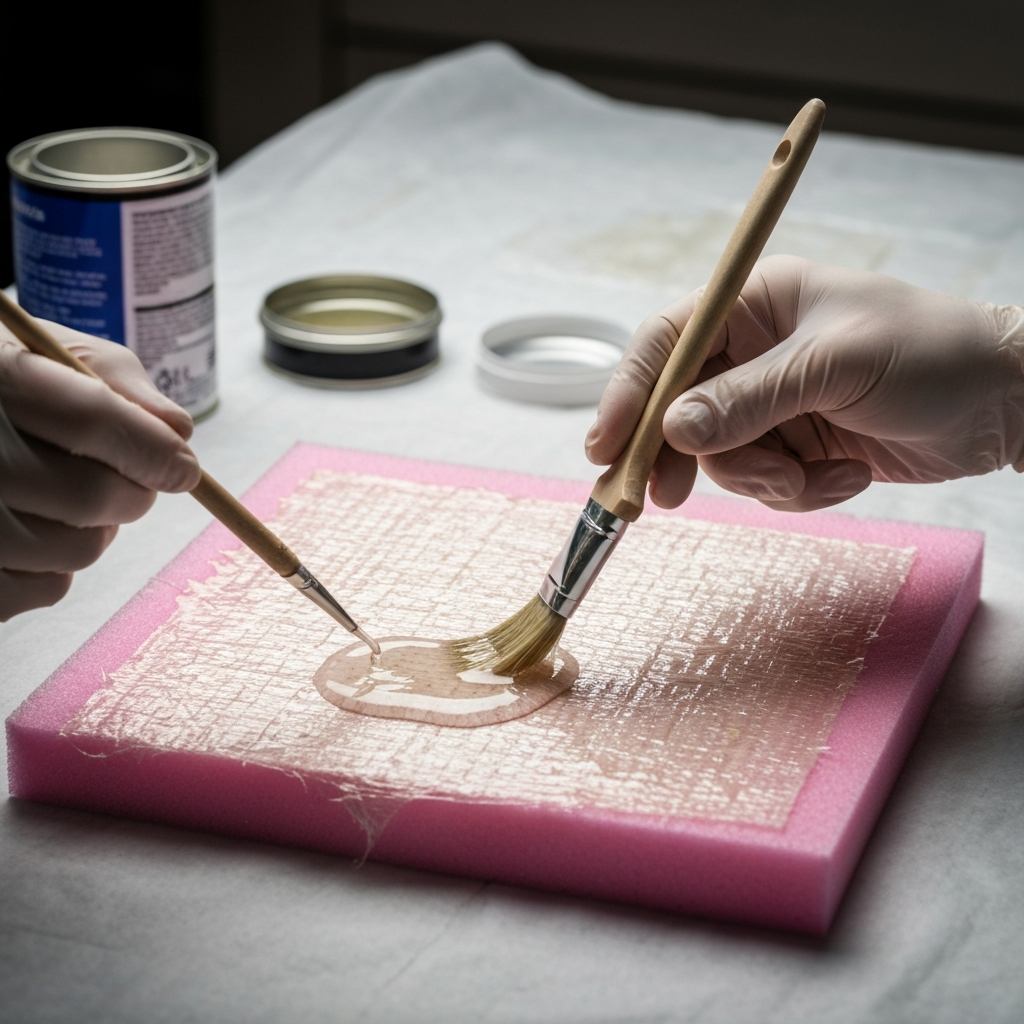
Step 4: Applying Fiberglass Cloth and Resin
Cut the fiberglass cloth into shapes that correspond to the surface area of your recycling bin. Following the instructions on the resin container, prepare the resin mixture. This step requires careful attention to detail and proper mixing ratios. Apply the resin to the surface of the foam and then carefully lay the fiberglass cloth on top. Use a glue application brush to apply more resin in a circular motion, ensuring the cloth is fully saturated. Allow the resin to cure overnight.
-
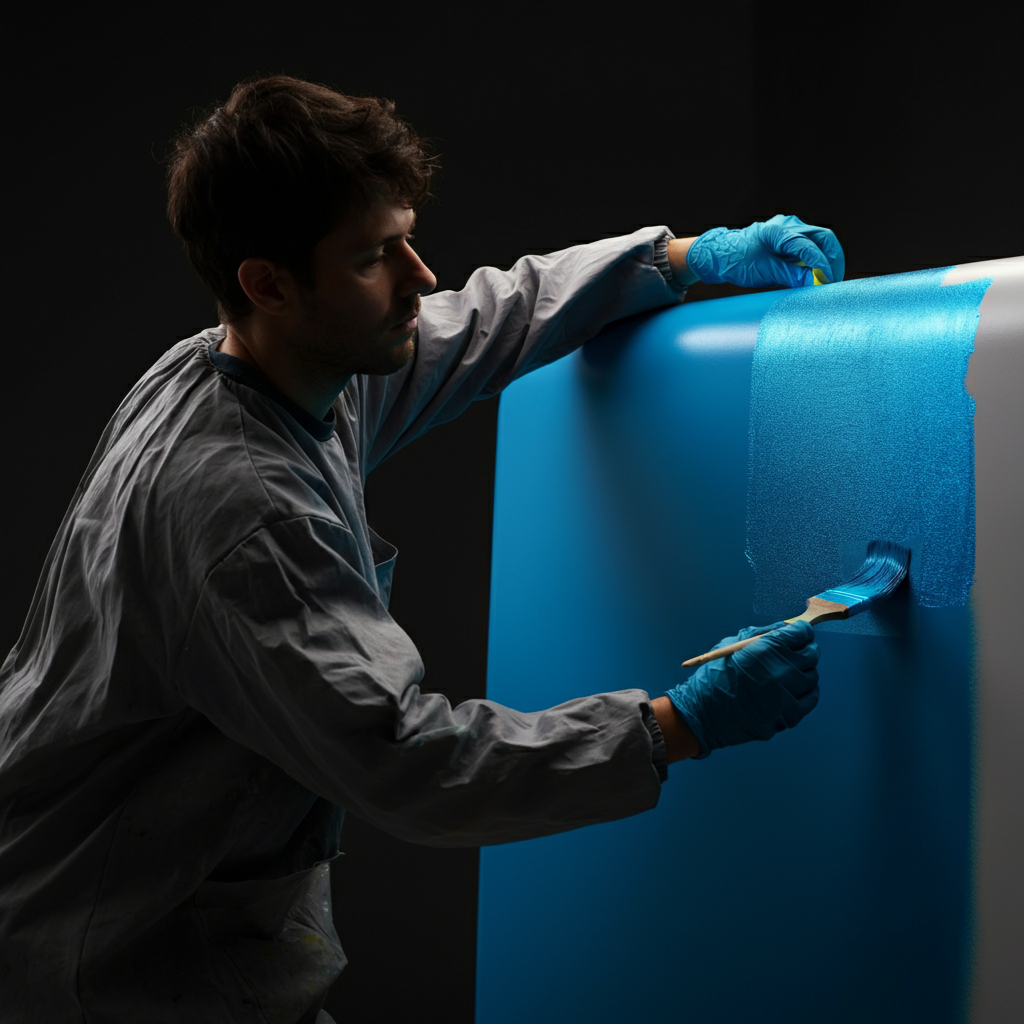
Step 5: Finishing and Painting
Once the resin has fully cured, you can sand any rough edges or imperfections. Now it's time to get creative with acrylic paints! Use masking tape to create clean lines and unique designs on your recycling bin. Consider using different colors to differentiate between recycling streams. Multiple coats of paint may be needed for optimal coverage and durability.
Pro Tips
- Consider adding wheels to your recycling bin for easy mobility.
- Line the inside of the bin with plastic bags for easier emptying and cleaning.
- Label each compartment clearly to avoid confusion and ensure proper sorting.
- Use recycled materials whenever possible to further reduce your environmental impact.
FAQ Section
- How long does the resin take to cure?
- The curing time for resin depends on the specific product and environmental conditions. Generally, it takes about 24 hours for the resin to fully cure. Refer to the manufacturer's instructions for the most accurate information.
- Can I use a different type of foam board?
- While FOAMULAR 150 is recommended for its rigidity and insulation properties, you can use other types of foam board. However, ensure it is compatible with the resin and strong enough to support the weight of the recyclables.
- What if I don't have a jigsaw?
- If you don't have a jigsaw, you can use a utility knife with a sharp blade. However, this will require more time and effort, and it's essential to be extra careful when cutting to avoid accidents.
Creating your own recycling bin is a rewarding and environmentally friendly project. By following these steps, you can build a custom bin that perfectly fits your needs and contributes to a more sustainable future. Remember to prioritize safety and take your time throughout the process for optimal results. Good luck!