King's Cake, a vibrant and delicious tradition of Mardi Gras, is more than just a sweet treat; it's a centerpiece of celebration. This oval-shaped cake, adorned with the festive colors of purple, green, and gold, embodies the spirit of the season. But beyond its beautiful appearance lies a playful secret: a hidden plastic baby figurine. The thrill of finding the baby adds an element of surprise and anticipation to the gathering.
This guide will walk you through each step of creating your own King's Cake, from preparing the dough to applying the final shimmering touches of colored sugar. We'll cover everything you need to know to bake a cake that's not only delicious but also a memorable part of your Mardi Gras festivities. Get ready to immerse yourself in a culinary adventure that's as fun as it is rewarding!
So, gather your ingredients, put on some festive music, and let's embark on this baking journey together. Whether you're a seasoned baker or just starting out, this guide will provide you with the knowledge and confidence to create a King's Cake that will impress your friends and family. Remember, the most important ingredient is love and a spirit of celebration!
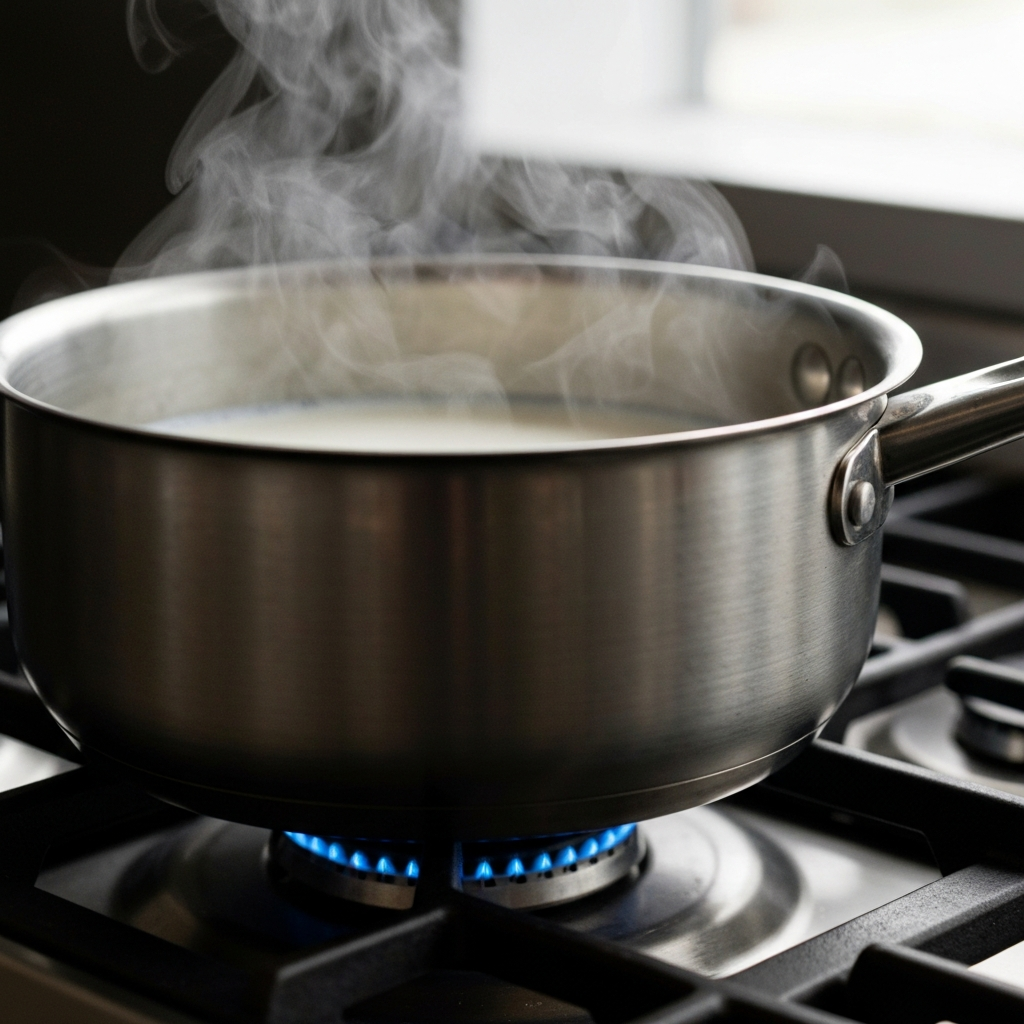
Step 1: Scalding the Milk
The first step in creating a delightful King's Cake is to scald the milk. Pour 1 cup (240 milliliters) of milk into a heavy-bottomed saucepan. Using a heavy-bottomed pan is crucial to prevent scorching. Place the pan on the stove over medium heat, stirring frequently. Heat the milk until it begins to steam and small bubbles form around the edges – but do not boil. This process helps to develop the dough's flavor and texture. Once the milk is scalded, add ¼ cup (55 grams) of butter, cut into smaller pieces for faster melting, and stir until completely dissolved. Let the mixture cool to 110°F (45°C) before proceeding. If the mixture is too hot it can kill the yeast.
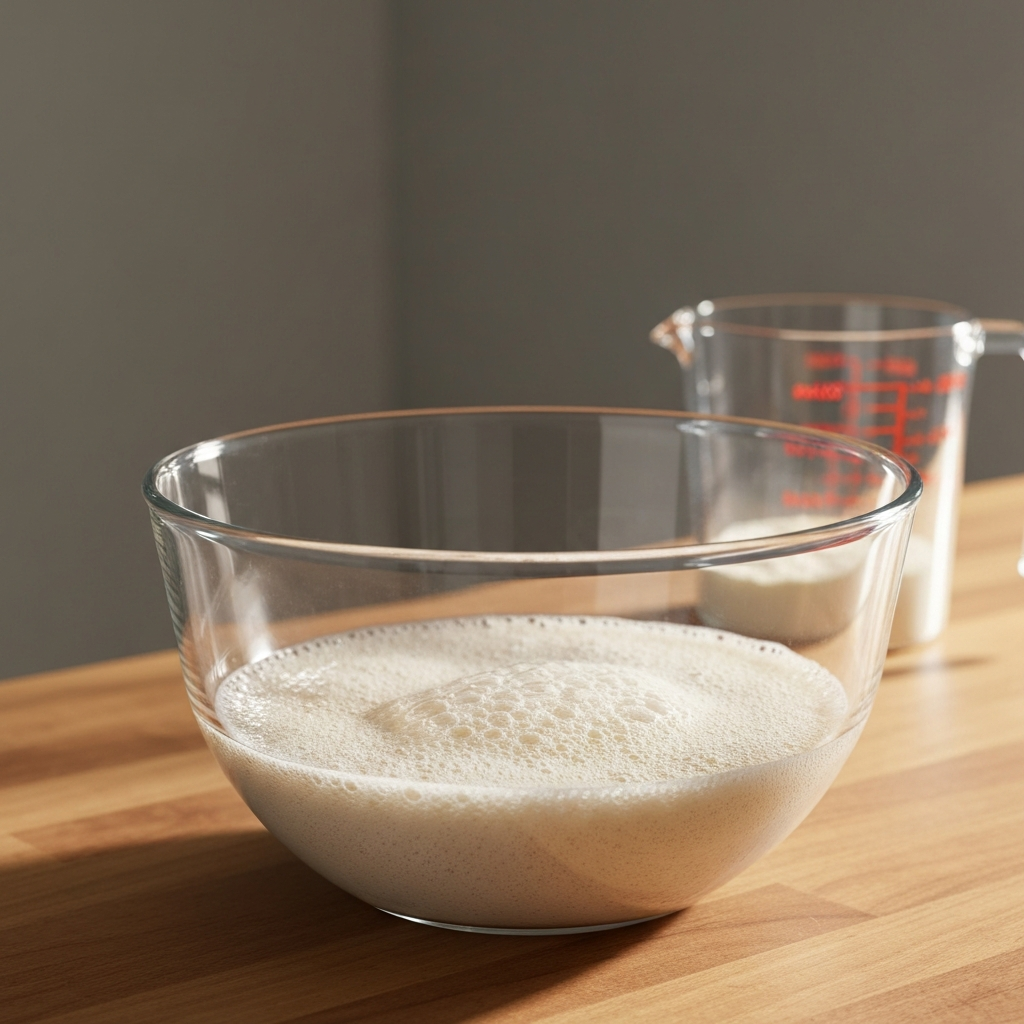
Step 2: Activating the Yeast
Next, we activate the yeast, the leavening agent that will give our King's Cake its light and airy texture. In a mixing bowl, combine 2 (¼-ounce/7-gram) packages of active dry yeast with ⅔ cup (160 milliliters) of warm water, heated to 110°F (45°C). The water temperature is critical; too hot and it will kill the yeast, too cold and it won't activate properly. Add ½ cup (115 grams) of granulated sugar to feed the yeast. Stir the mixture gently to combine. Allow it to stand for about 10 minutes, or until it becomes creamy and bubbly, indicating that the yeast is active and ready to use.
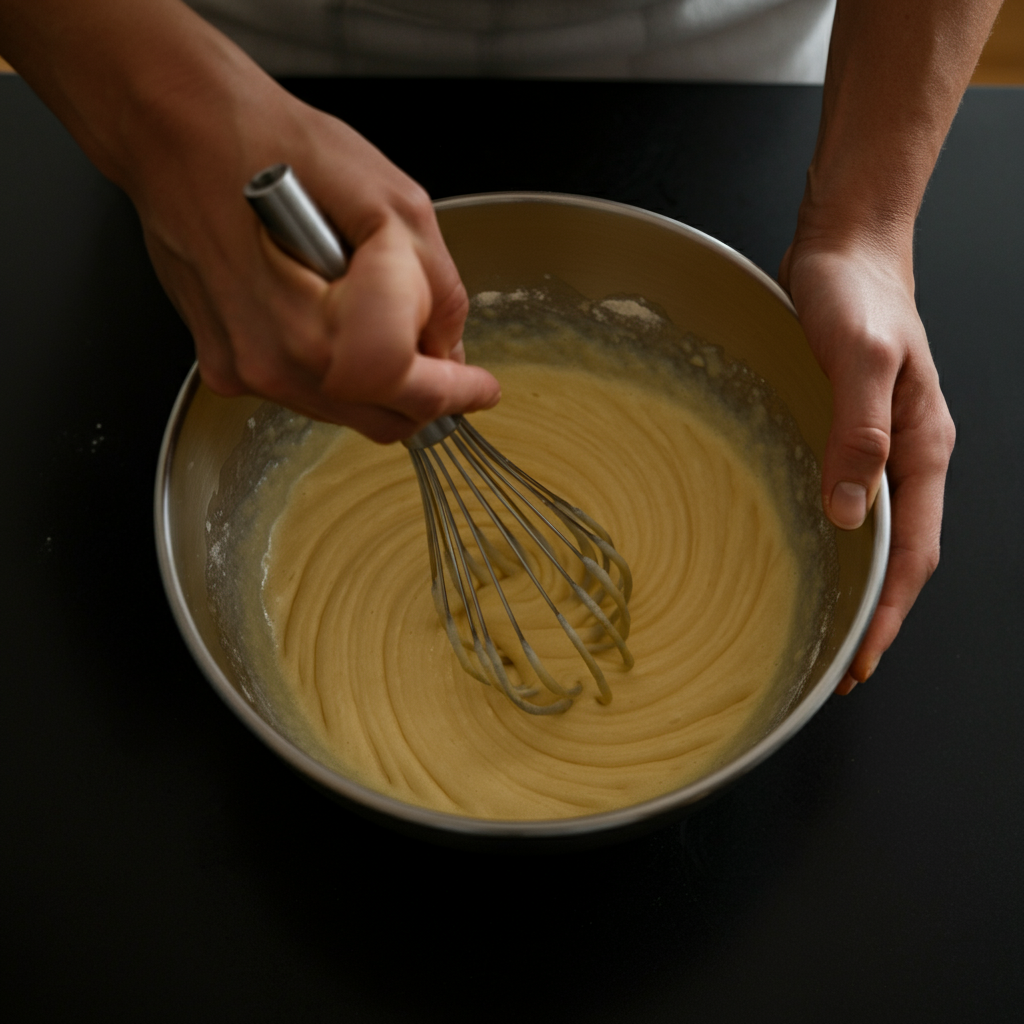
Step 3: Combining Wet Ingredients
Now it's time to bring together the wet ingredients. Pour the cooled milk and butter mixture into the activated yeast mixture. Ensure the milk mixture has cooled adequately to prevent damaging the yeast. Whisk in 2 eggs, followed by 1½ teaspoons of salt and ½ teaspoon of freshly grated nutmeg. Freshly grated nutmeg adds a warm, aromatic depth to the cake, but store-bought ground nutmeg can be used if necessary. Stir the mixture well until all ingredients are thoroughly combined and no streaks of egg remain.
Step 4: Incorporating the Flour
Gradually add the flour, 5½ cups (550 grams) total, to the wet ingredients. Add the flour 1 cup (100 grams) at a time, stirring after each addition with a rubber spatula. This prevents clumps from forming and ensures a smooth, consistent dough. Be patient and incorporate the flour slowly; overmixing at this stage can lead to a tough cake. At the very end, stir in the final ½ cup (50 grams) of flour until just combined.
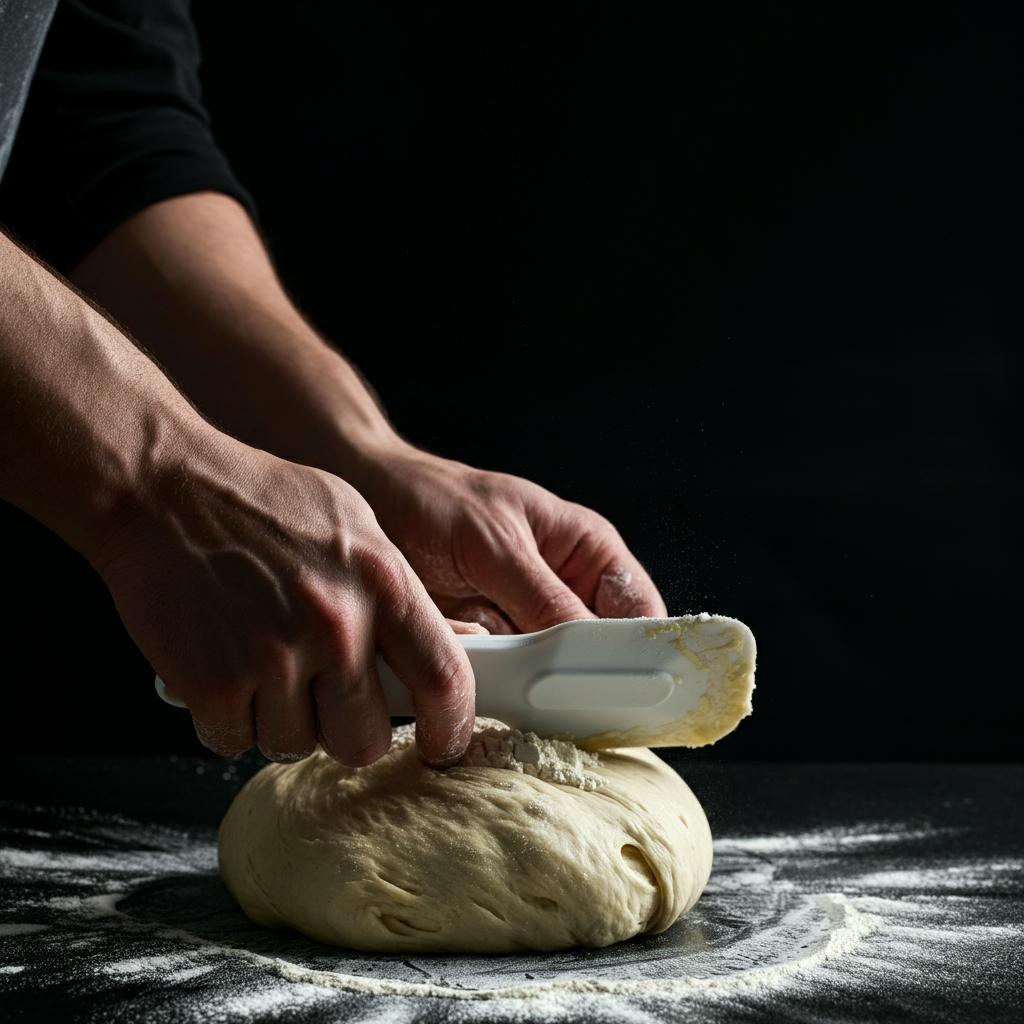
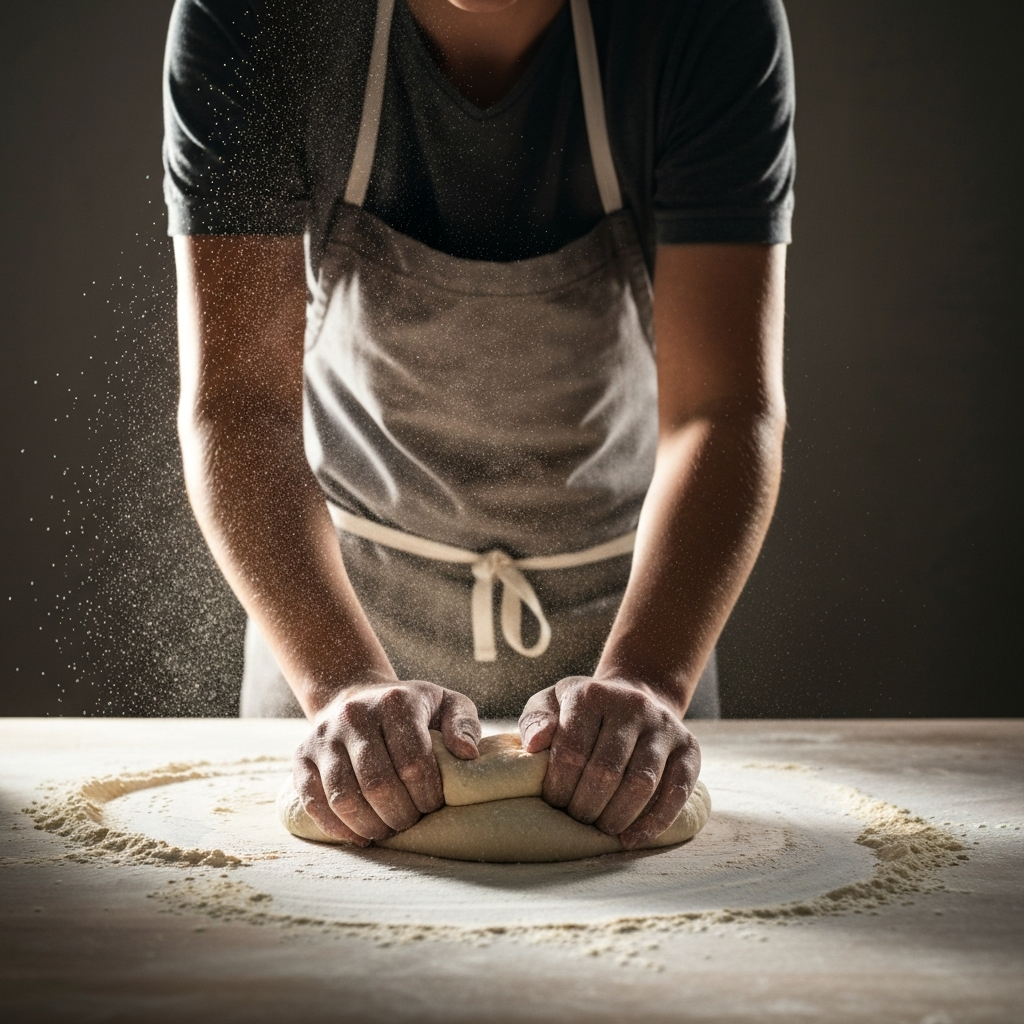
Step 5: Kneading the Dough
Turn the dough out onto a lightly floured surface and knead it until it becomes smooth and stretchy. This crucial step develops the gluten, which provides structure to the cake. Knead the dough for about 8 to 10 minutes, using a push-turn-fold motion. If the dough is too sticky, add a little more flour, but be careful not to add too much, or the cake will be dry. The dough is ready when it springs back slightly when poked and has a smooth, elastic texture.
Step 6: First Rise
Place the kneaded dough into a lightly oiled bowl, turning to coat all sides. Cover the bowl with plastic wrap to prevent the dough from drying out. Place the bowl in a warm place, free from drafts, and let the dough rise until it has doubled in size. This usually takes about 2 hours. A warm oven (turned off!) or a sunny spot can provide the ideal environment for rising. This rising process is what gives the cake its airy and light texture.

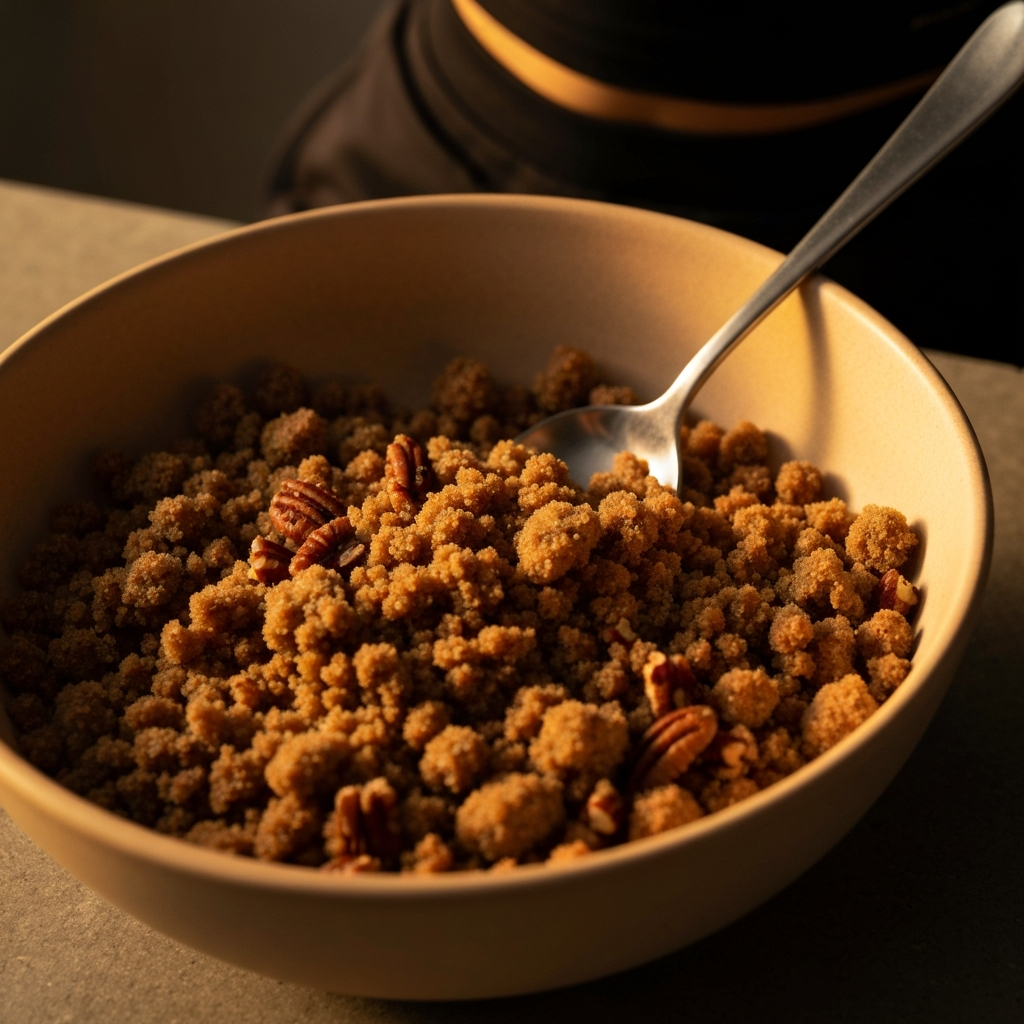
Step 7: Preparing the Filling
While the dough is rising, prepare the filling. In a mixing bowl, combine 1 cup packed (200 grams) of brown sugar, 1 tablespoon (7.5 grams) of ground cinnamon, ⅔ cup chopped (85 grams) of pecans, and ½ cup (50 grams) of all-purpose flour. Add ½ cup (75 grams) of raisins, if desired, for added flavor and texture. The raisins are optional, but they add a delightful sweetness and chewiness to the filling. Stir in ½ cup (115 grams) of melted butter until the mixture is crumbly and well combined.
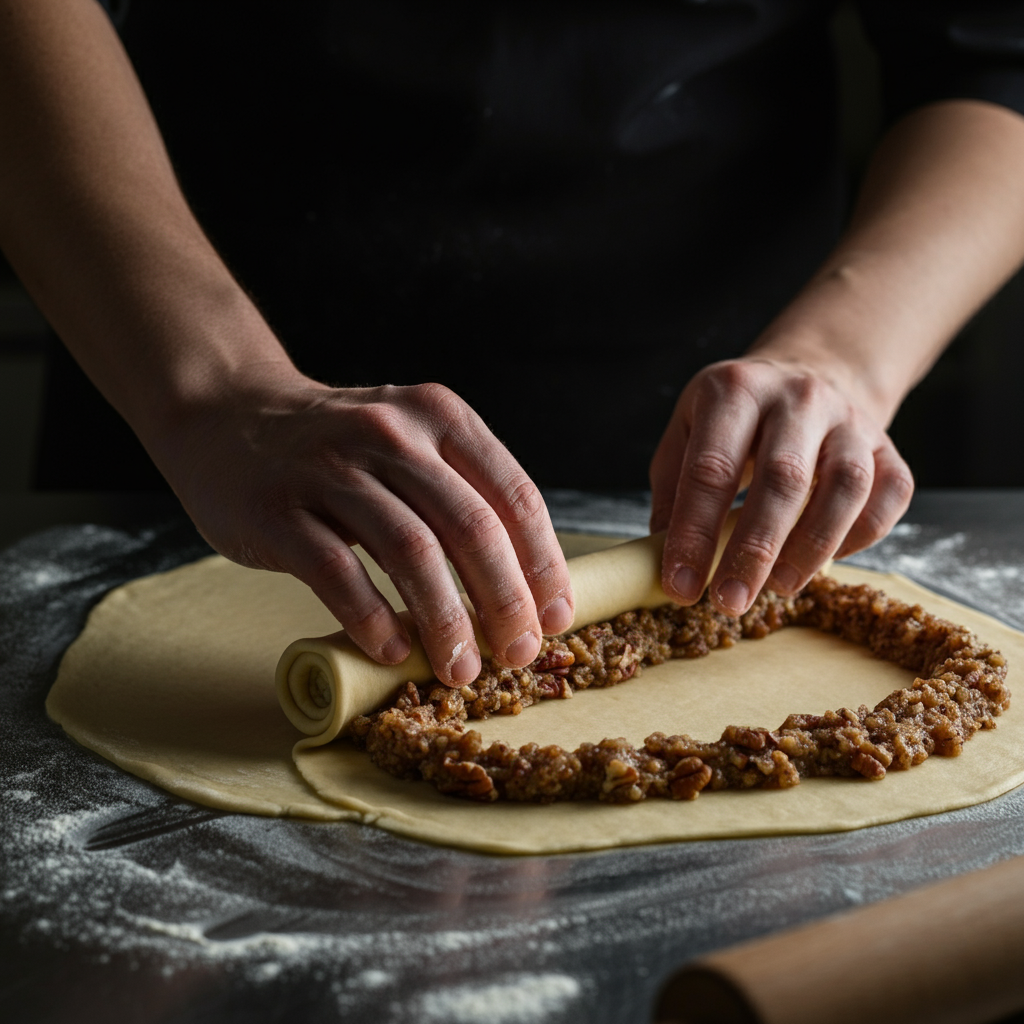
Step 8: Shaping the Cakes
Preheat your oven to 375°F (190°C). Cover two baking sheets with parchment paper or lightly grease them. Once the dough has doubled in size, punch it down to release the air. Divide the dough in half. On a lightly floured surface, roll each half into a rectangle approximately 10 by 16 inches (25 by 40 centimeters). Sprinkle half of the prepared filling evenly over each rectangle. Roll each rectangle up tightly, lengthwise, forming a 16-inch (40-centimeter) long tube. Bring the ends of each tube together to form an oval ring, overlapping the ends slightly and pinching to seal. Transfer each ring to a prepared baking sheet and shape it into a smooth oval.
Step 9: Adding Slits and Second Rise
Using a pair of scissors or a sharp knife, cut slits ⅓ of the way deep into the rings, spacing them about 1 inch (2.54 centimeters) apart. These slits will create the characteristic crown-like appearance of the King's Cake. Cover the cakes loosely with plastic wrap and let them rise again for about 45 minutes, or until they have nearly doubled in size. This second rise is essential for a light and airy final product. Don't skip it!
Step 10: Baking the Cakes
Bake the cakes in the preheated oven for 30 minutes, or until they are golden brown. If your oven is small, you may need to bake the cakes on separate racks. If so, switch the racks halfway through baking to ensure even browning. Keep a close eye on the cakes while they're baking; oven temperatures can vary, and you don't want them to burn. Once baked, remove the cakes from the oven and let them cool slightly on the baking sheets before transferring them to serving dishes.
Step 11: Adding the Baby and Icing
Once the cakes have cooled slightly, push a small, plastic baby doll into the bottom of each cake. This is a traditional element of the King's Cake, and the person who finds the baby in their slice is said to have good luck or is responsible for hosting the next Mardi Gras party. If serving to children, be sure to warn guests about the baby or substitute it with a larger, inedible item or something edible like a pecan half. For the icing, whisk together 1 cup (125 grams) of confectioners' sugar with 1 to 2 tablespoons (15 to 30 milliliters) of water until smooth and pourable. The icing should be thick enough to coat the back of a spoon. If it's too thick, add more water, a teaspoon at a time.
Step 12: Decorating the Cakes
While the cakes are still warm, pour the icing over them, allowing it to drip down the sides. Immediately sprinkle the cakes generously with purple, green, and gold sugar, creating vibrant bands of color. This is what makes a King's Cake distinctly Mardi Gras! The warmth of the cake will help the icing set and the sugar adhere. Let the icing set completely before serving.
Tools or Materials Required
- Heavy-bottomed saucepan
- Mixing bowls
- Whisk
- Rubber spatula
- Plastic wrap
- 2 large baking sheets
- Parchment paper (optional)
- Small, plastic baby (optional)
- Scissors or sharp knife
Safety Considerations
- Be extremely careful when working with hot liquids and hot surfaces to avoid burns.
- If using a plastic baby, inform guests about its presence to prevent choking hazards, especially with children. Consider using an edible substitute for children.
- Make sure the oven is preheated to the correct temperature before baking.
Common Mistakes to Avoid
- Using water that is too hot or too cold when activating the yeast.
- Adding too much flour, resulting in a dry cake.
- Not allowing the dough to rise properly, resulting in a dense cake.
- Overbaking the cake, resulting in a dry and hard texture.
FAQ Section
Q: Can I make the dough ahead of time?
A: Yes, you can prepare the dough a day in advance and store it in the refrigerator. Allow it to come to room temperature before proceeding with the shaping and baking.
Q: Can I freeze the King's Cake?
A: Yes, you can freeze the baked cake, unfrosted. Wrap it tightly in plastic wrap and foil. Thaw completely before frosting and decorating.
Q: What can I use instead of pecans in the filling?
A: Walnuts or almonds are good substitutes for pecans. You can also omit the nuts entirely if you have allergies or prefer a nut-free filling.
Conclusion
Congratulations! You've successfully created a beautiful and delicious King's Cake. Remember, the key to a great King's Cake is patience and attention to detail. From scalding the milk to sprinkling the final touch of colored sugar, each step contributes to the overall flavor and texture of the cake. Enjoy the process, embrace the tradition, and share your creation with friends and family during this festive season. Now, slice and serve, and let the good times roll! Laissez les bons temps rouler!