Holding a drumstick correctly is fundamental to playing the drums effectively. It's not just about gripping the stick; it's about finding a balance between control, power, and finesse. Different grips offer varying advantages, influencing your sound, stamina, and the overall feel of your drumming. This guide will walk you through the most common and essential drumstick grips, enabling you to find the perfect fit for your playing style and musical genre.
There are several established ways to hold drumsticks, each with its own characteristics and suitability for different styles of music. We'll explore the American, German, French, and Traditional grips in detail, covering the nuances of each and providing practical tips to help you master them. By understanding these grips, you'll be well-equipped to develop a solid foundation for your drumming journey. Getting this right will save you from developing bad habits and potential injuries down the line.
Choosing the right grip is a personal decision, often based on comfort, the type of music you play, and the sound you want to achieve. Don't be afraid to experiment with different grips to discover what works best for you. Remember, there's no one-size-fits-all approach, and the most important thing is to find a grip that allows you to express yourself musically with confidence and ease. This guide will provide the knowledge to help you make those choices!
Step 1: Understanding the Balance Point
Before delving into specific grips, it's crucial to understand the balance point of your drumsticks. This is the point where the stick feels most balanced in your hand. Finding this point allows the stick to rebound naturally off the drumhead, requiring less effort from you. Locate the balance point by placing the stick on your extended index finger and moving it back and forth until it rests evenly. A good starting point is usually about two-thirds of the way back from the stick tip. Marking the balance point with a small piece of tape can be helpful when practicing. Expect to spend about 5-10 minutes experimenting to understand how it feels.
Step 2: The American Grip
Step 2.1: Forming the Fulcrum
The American grip is a versatile and popular choice for many drummers, offering a balance between power and control. To begin, form a "pocket" or fulcrum between your thumb and index finger. Extend your hand with your palm facing down at approximately a 45-degree angle. Then, gently curl your index finger, creating a space where the drumstick will rest. It should feel like you're about to pull a trigger. This pocket acts as the main pivot point for the stick.
Step 2.2: Positioning the Drumstick
Place the drumstick in the pocket created by your thumb and index finger. Ensure the stick rests comfortably and securely. The drumstick should lie along the fleshy part of your palm, not in the valley of your hand. Experiment with slightly adjusting the position of the stick until you find the optimal point where it feels balanced and responsive. Avoid gripping too tightly; the stick should be able to move freely within the fulcrum.
Step 2.3: Thumb Placement
Rest your thumb lightly on the side of the drumstick, opposite your index finger. Your thumb should provide support and control, but it shouldn't be applying excessive pressure. The thumb acts as a guide, helping to direct the stick's movement. Avoid placing your thumb directly on top of the stick as this can restrict its rebound and limit your control. The key here is gentle guidance.
Step 2.4: Finger Support
Curl your remaining three fingers (middle, ring, and pinky) around the drumstick, providing additional support and control. These fingers shouldn't grip tightly; instead, they should gently cradle the stick. These fingers can be used to subtly influence the stick's movement and add finesse to your playing. Focus on keeping these fingers relaxed and responsive.
Step 2.5: Striking Motion
Initiate the striking motion primarily from your wrist, using a controlled up-and-down movement. Keep your forearm and shoulder relaxed to avoid unnecessary tension. Your fingers can contribute to the motion, adding subtle nuances and control. The American grip allows for a fluid and natural striking motion, making it suitable for a wide range of musical styles. Practice striking a drum or practice pad to get a feel for the rebound and control. This is where you'll start to hear whether your grip is effective.
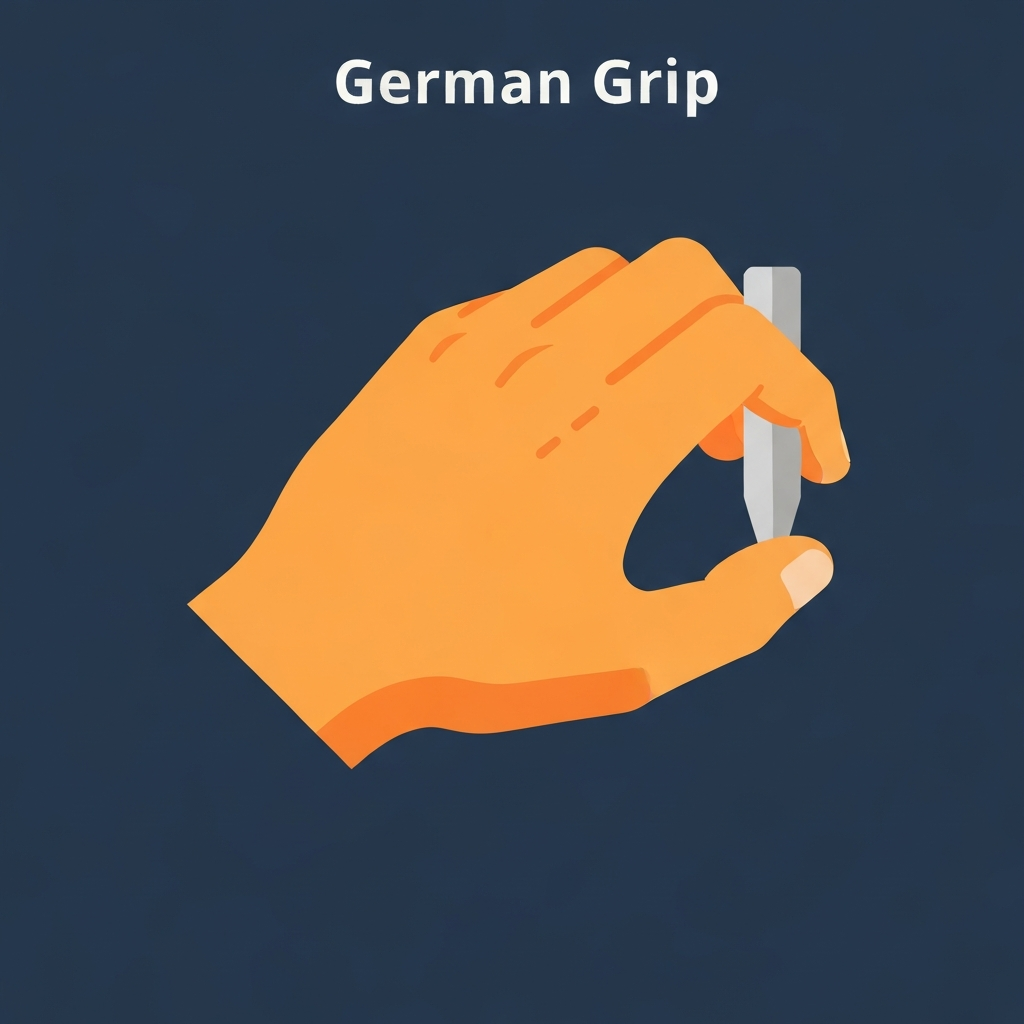
Step 3: The German Grip
Step 3.1: Initial Hand Position
The German grip is known for its power and volume, making it ideal for heavier styles of music. Start by holding the drumstick in a similar manner to the American grip, finding the balance point and forming the fulcrum between your thumb and index finger. The key difference lies in the hand position.
Step 3.2: Palm Orientation
Rotate your hands so that your palms face downwards, parallel to the drumhead. This hand position will naturally cause your elbows to flare out slightly. Don't force your elbows to stay close to your body; allow them to find a comfortable position. This palm-down orientation maximizes the power you can generate from your wrist motion.
Step 3.3: Finger Support
Your middle finger plays a crucial role in supporting the drumstick in the German grip. Curl your middle finger underneath the stick, providing a solid base. Your ring and pinky fingers can either be curled loosely underneath or wrapped around the stick for added support. Experiment to find the most comfortable and supportive finger arrangement.
Step 3.4: Striking Motion
The striking motion in the German grip is primarily driven by a downward wrist movement. Focus on generating power from your wrist, keeping your forearm and shoulder relaxed. The palm-down hand position allows you to transfer maximum force to the drumhead, resulting in a loud and impactful sound. Remember, the power comes from a relaxed but controlled wrist motion.
Step 4: The French Grip
Step 4.1: Initial Hand Position
The French grip emphasizes finesse and speed, making it a popular choice for jazz and other intricate drumming styles. Begin by holding the drumstick in a similar way to the American and German grips, locating the balance point and establishing the fulcrum between your thumb and index finger. The hand position is the defining characteristic of the French grip.
Step 4.2: Palm Orientation
Rotate your hands inwards so that your palms face each other, as if you're holding a steering wheel. Your elbows should naturally fall close to your sides. This hand position allows for greater finger control and dexterity. Keep your wrists relaxed and flexible.
Step 4.3: Finger Control
The French grip relies heavily on finger control to generate the striking motion. Curl your middle, ring, and pinky fingers underneath the drumstick, providing support and acting as levers to propel the stick. Use these fingers to subtly manipulate the stick, creating a quick and precise striking motion. Practice using your fingers to bounce the stick on a practice pad.
Step 4.4: Striking Motion
The striking motion in the French grip is primarily driven by the fingers, with minimal wrist movement. Use your fingers to "flick" the drumstick, generating a quick and controlled strike. Keep your wrists relaxed and flexible to allow for smooth and fluid motion. The French grip allows for exceptional speed and precision, making it ideal for complex rhythms and fills.
Step 5: The Traditional Grip
Step 5.1: Non-Dominant Hand Position
The traditional grip is unique in that it employs a different hand position for each hand. It's often used in jazz and marching band drumming. Start with your non-dominant hand (usually the left hand for right-handed drummers) facing upwards, palm towards the ceiling.
Step 5.2: Placing the Stick
Place the drumstick in the space between your thumb and index finger, resting it on the fleshy part of your hand. The stick should lie diagonally across your palm. Find the balance point of the stick and position your hand accordingly.
Step 5.3: Thumb and Index Finger
Curve your thumb over the top of the stick and gently lay the side of your index finger along the top of the stick. The pad of your thumb should be resting on or near the first knuckle of your index finger. These two fingers will act as the primary fulcrum for the stick. It should feel less natural initially, but with practice, will provide a solid grip.
Step 5.4: Middle Finger Support
Extend your middle finger and place it along the underside of the stick, near the second or third knuckle. This finger provides additional support and control. It might feel unnatural at first, but it's crucial for balancing the stick.
Step 5.5: Ring and Pinky Fingers
Curl your ring and pinky fingers underneath the stick, providing further support. These fingers should be relaxed and responsive, allowing for subtle adjustments to the stick's position.
Step 5.6: Dominant Hand Position
Grip the other drumstick in your dominant hand using one of the matched grips described above (American, German, or French). Most drummers find the American grip to be the most comfortable and versatile for their dominant hand when using the traditional grip.
Step 5.7: Striking Motion
The striking motion in the traditional grip involves a combination of wrist and finger movements. Use a downward wrist motion to strike the drum, and use your fingers to control the rebound and add finesse. The upward-facing grip requires a different wrist motion than the matched grips, so practice is essential to develop proficiency.
Tools or Materials Required
- Drumsticks (various sizes and weights to experiment with)
- Practice pad or drum set
- Mirror (to observe your technique)
- Metronome (to develop timing and consistency)
Common Mistakes to Avoid
- Gripping too tightly: This can lead to fatigue and restrict the stick's rebound. Focus on relaxing your hands and fingers.
- Using excessive arm or shoulder movement: The striking motion should primarily come from your wrists and fingers.
- Neglecting the balance point: Finding the balance point is crucial for maximizing control and minimizing effort.
- Ignoring tension: Regularly check for tension in your hands, wrists, forearms, and shoulders. Relax as needed.
- Not experimenting with different grips: Don't be afraid to try different grips to find what works best for you.
Pro Tips
- Practice regularly: Consistency is key to developing good technique. Even short, focused practice sessions can be highly effective.
- Record yourself: Recording yourself playing can help you identify areas for improvement.
- Seek feedback: Consider taking lessons from an experienced drum teacher who can provide personalized guidance.
- Warm up before playing: Warming up your hands and wrists can help prevent injuries.
- Listen to your body: If you experience pain or discomfort, stop playing and rest.
FAQ Section
- Which grip is best for beginners?
- The American grip is often recommended for beginners due to its versatility and balance between power and control.
- How do I know if I'm gripping the stick too tightly?
- If you experience fatigue or discomfort in your hands or wrists, you're likely gripping the stick too tightly. Focus on relaxing your grip and allowing the stick to rebound naturally.
- Can I switch between different grips while playing?
- Yes, some drummers switch between different grips to achieve different sounds or playing styles. However, it's important to master the fundamentals of each grip before attempting to switch between them.
- How long does it take to master a drumstick grip?
- Mastering a drumstick grip takes time and practice. It can take several months or even years to develop a solid and consistent technique.
Safety Considerations
- Always warm up your wrists and hands before playing.
- Take breaks to avoid fatigue and potential strain injuries.
- Use proper posture while drumming.
- If you experience pain, stop immediately and consult with a medical professional.
Conclusion
Mastering the art of holding a drumstick is a journey that requires patience, practice, and a willingness to experiment. By understanding the nuances of the American, German, French, and Traditional grips, you'll be well-equipped to develop a solid foundation for your drumming journey. Remember to prioritize relaxation, control, and a natural striking motion. The best grip is the one that feels most comfortable and allows you to express yourself musically with confidence and ease. So grab your sticks, practice diligently, and enjoy the process of becoming a skilled and expressive drummer!