The USB Selective Suspend setting is a feature in Windows operating systems designed to conserve power by placing USB devices into a low-power state when they are not actively in use. This can be particularly beneficial for laptop users, extending battery life by reducing unnecessary power drain. However, it can also sometimes cause unexpected issues, such as devices disconnecting or failing to be recognized properly.
This guide will walk you through understanding what USB Selective Suspend does, how to enable or disable it using both the Control Panel and Device Manager, and help you determine whether keeping this setting enabled is right for your specific needs and hardware configuration. We'll delve into the nuances of this setting and provide practical advice to help you troubleshoot potential problems.
By the end of this guide, you’ll be equipped with the knowledge to confidently manage your USB power settings and optimize your system's performance and power consumption.
Step 1: Understanding USB Selective Suspend
USB Selective Suspend is a power-saving mechanism that allows Windows to independently suspend individual USB devices when they are idle. Instead of keeping all USB ports and connected devices constantly powered at their maximum level, the operating system can intelligently reduce power to devices that are not currently being used. This is especially useful for devices like external hard drives, USB microphones, or even mice that may be connected but not actively receiving input. This feature is enabled by default on most Windows installations, particularly on laptops where battery life is a key concern.

Step 2: Accessing USB Selective Suspend Settings via Control Panel
The Control Panel offers a user-friendly interface for managing your power settings, including USB Selective Suspend. This is a straightforward method suitable for most users.
Navigating to Power Options
First, open the Control Panel. The simplest way to do this is by typing "Control Panel" into the Windows search bar and selecting the Control Panel app from the search results. Once the Control Panel is open, locate and click on "Power Options." If you don't see "Power Options" directly, ensure that the "View by" setting in the top-right corner is set to either "Large icons" or "Small icons." This will display all Control Panel items individually. You should then be able to find "Power Options".

Changing Advanced Power Settings
Within Power Options, you'll see your currently selected power plan (e.g., "Balanced," "Power saver," or "High performance"). Next to your selected plan, click on "Change plan settings." On the subsequent screen, click "Change advanced power settings." This will open a new window with a comprehensive list of customizable power settings. Scroll down this list until you find "USB settings," and expand it. Beneath "USB settings," you'll find "USB selective suspend setting." Pay close attention to which power plan you are modifying, as changes will only affect that specific plan.
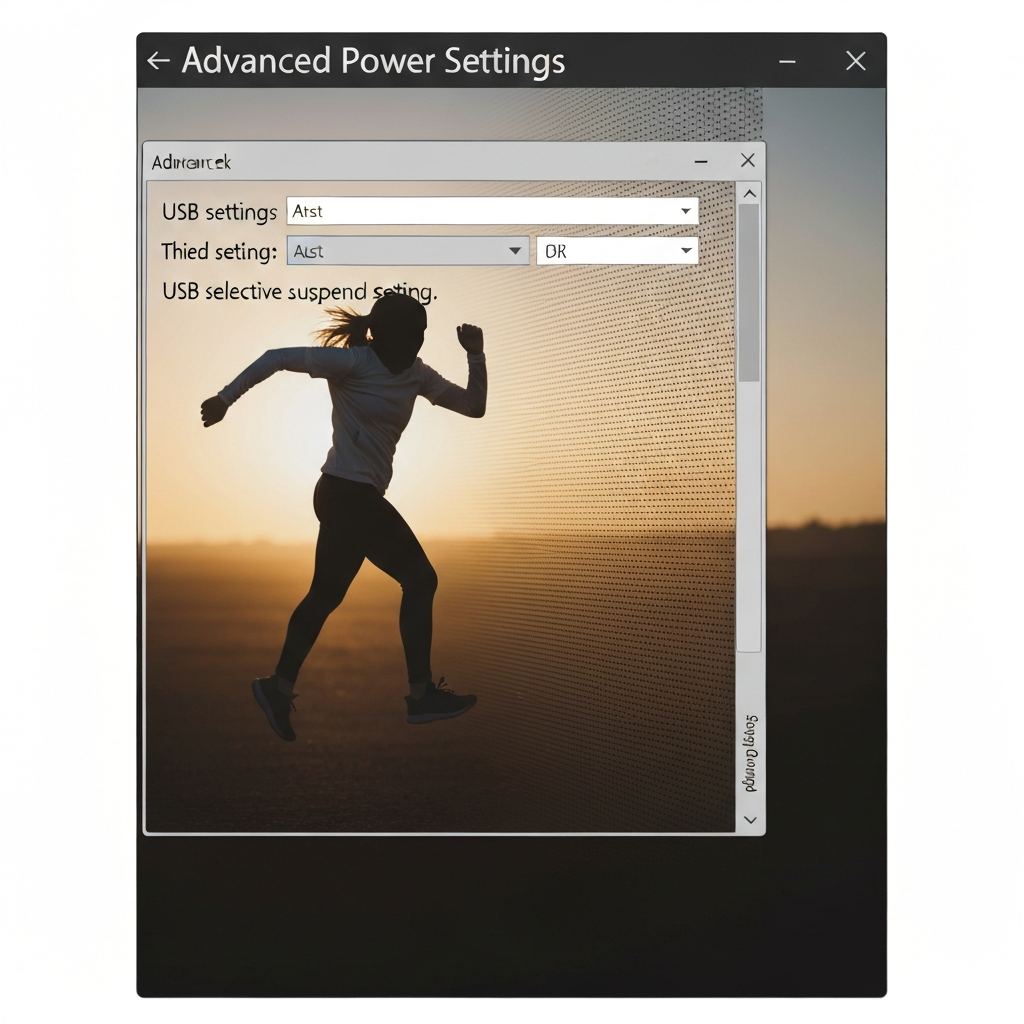
Enabling or Disabling USB Selective Suspend
Click on "Setting" under "USB selective suspend setting." This will reveal a dropdown menu where you can choose between "Enabled" or "Disabled." Select your preferred option. If you want the system to manage USB device power, choose "Enabled." If you prefer to keep USB devices constantly powered, select "Disabled." Finally, click "Apply" and then "OK" to save your changes and close the window. Remember to restart your computer after making these changes to ensure that the new settings are fully applied.

Step 3: Managing USB Selective Suspend via Device Manager
The Device Manager offers a more granular approach to managing USB Selective Suspend, allowing you to configure the setting for individual USB hubs and controllers.
Accessing Device Manager
The easiest way to open Device Manager is to right-click on the Windows icon in the taskbar (or press the Windows key + X) and select "Device Manager" from the context menu. This will open the Device Manager window, displaying a list of all hardware devices connected to your computer.

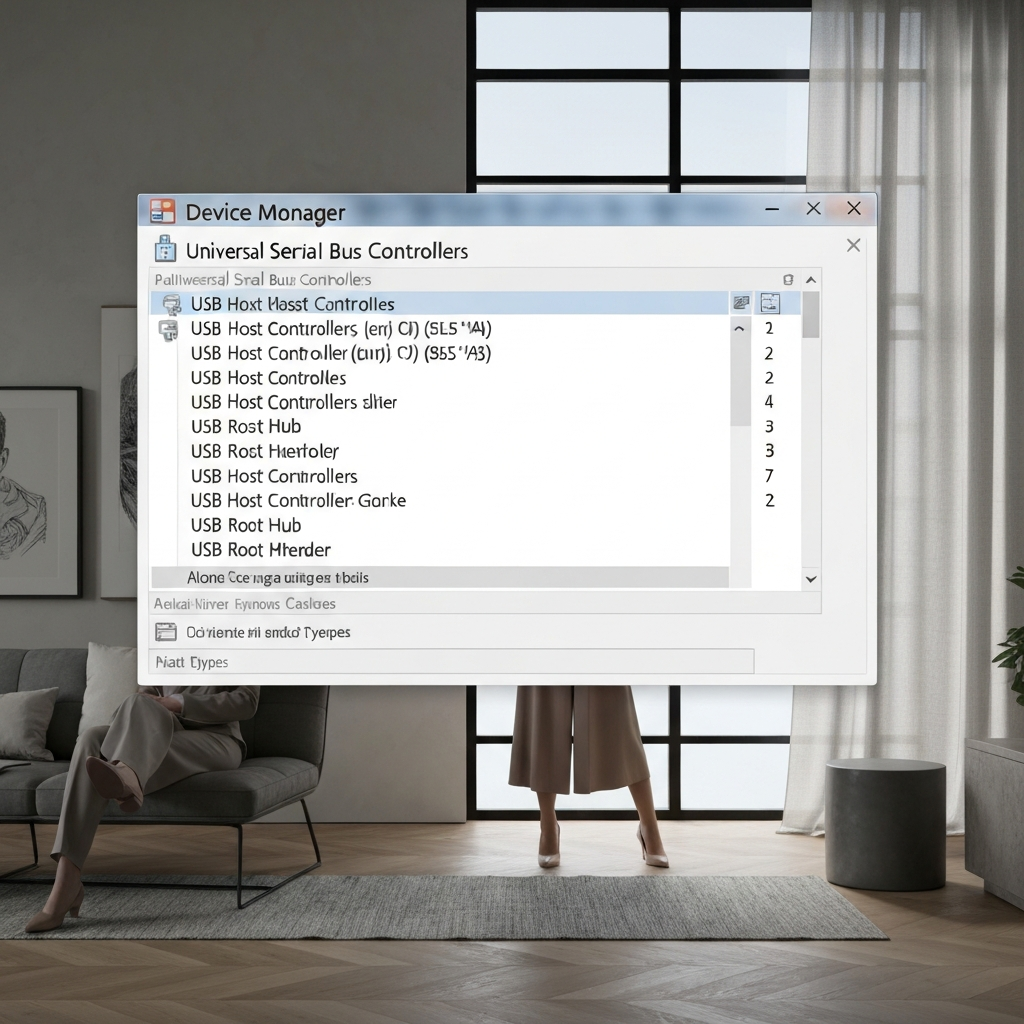
Locating USB Hubs and Controllers
In Device Manager, locate and expand the "Universal Serial Bus controllers" category. This will reveal a list of all USB Host Controllers and USB Root Hubs installed on your system. These are the hardware components responsible for managing USB connections. Each entry in this list represents a physical USB port or a group of ports.
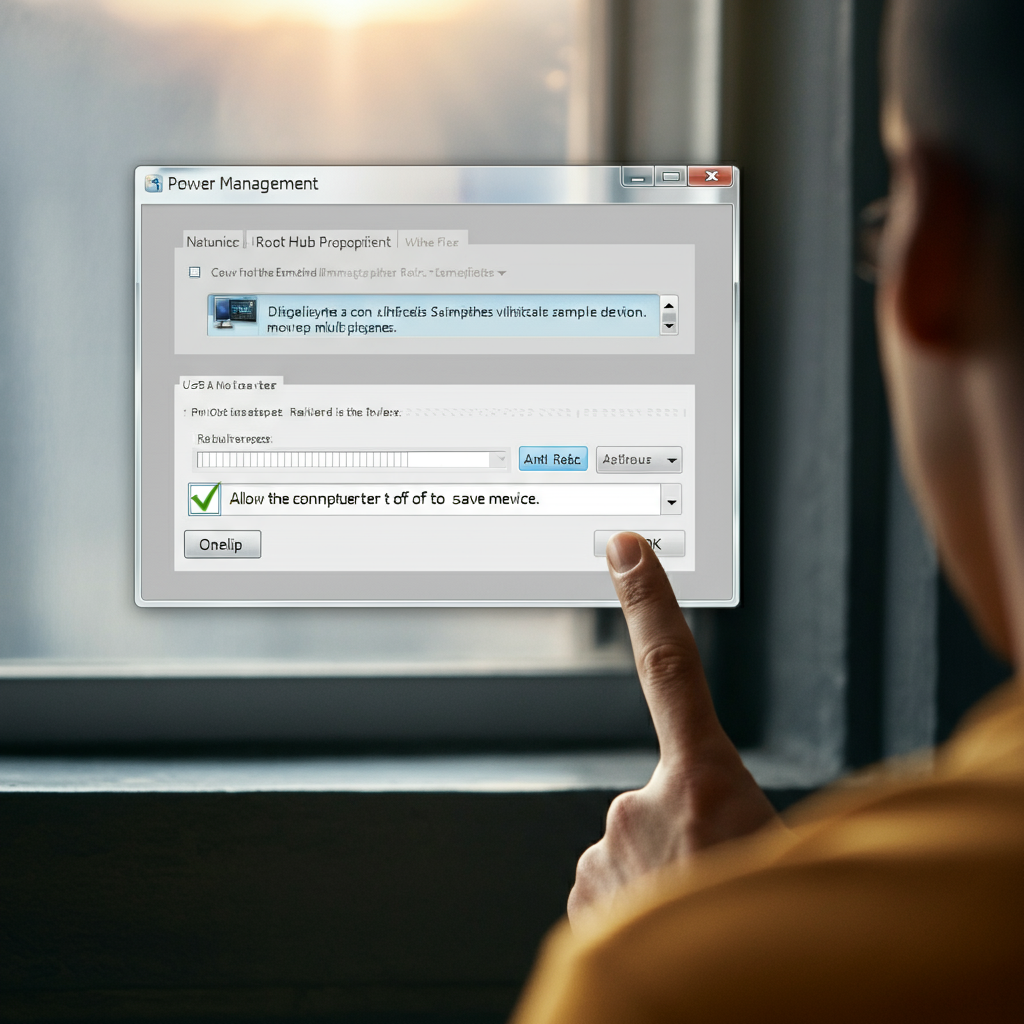
Configuring Power Management for Individual Hubs
Right-click on one of the "USB Root Hub" entries and select "Properties." In the Properties window, navigate to the "Power Management" tab. Here, you'll find a checkbox labeled "Allow the computer to turn off this device to save power." If this box is checked, USB Selective Suspend is enabled for that specific hub. If it's unchecked, the hub will remain constantly powered. Carefully consider the devices connected to each hub before changing this setting, as disabling it might increase power consumption, especially on laptops. Repeat this process for each USB Root Hub listed in Device Manager.
Step 4: Deciding Whether to Use USB Selective Suspend
The decision to enable or disable USB Selective Suspend depends on your specific needs and usage patterns. If you primarily use a laptop and value battery life, keeping USB Selective Suspend enabled is generally a good idea. It helps reduce power consumption when USB devices are idle, extending the time you can use your laptop unplugged.
However, if you're experiencing issues with USB devices disconnecting, malfunctioning, or not being recognized properly, try disabling USB Selective Suspend. Sometimes, older or less-compatible USB devices don't handle the power transitions well, leading to instability. Disabling the setting ensures a constant power supply to these devices, potentially resolving the issues. If you are a desktop user and do not have any issues with your USB devices, it is perfectly acceptable to leave the setting enabled.
Ultimately, the best approach is to experiment with the setting and observe how it affects your system's performance and battery life. If you encounter problems after enabling it, disable it. If you're happy with the performance and battery life, leave it enabled.
Common Mistakes to Avoid
- Forgetting to Restart: Changes to power settings often require a system restart to fully take effect.
- Not Testing Thoroughly: After changing the setting, thoroughly test your USB devices to ensure they are functioning correctly.
- Modifying the Wrong Power Plan: Be aware of which power plan you are modifying in the Control Panel, as changes only apply to that plan.
- Ignoring Device Compatibility: Older or less-compatible USB devices might not handle power transitions well. Be prepared to disable the setting if you encounter issues.
Pro Tips
- Monitor Battery Life: After enabling USB Selective Suspend, monitor your laptop's battery life to see if you notice an improvement.
- Check for Driver Updates: Ensure that your USB device drivers are up to date, as outdated drivers can sometimes cause compatibility issues with power management features.
- Use a USB Hub with Power Adapter: If you have many USB devices that require constant power, consider using a powered USB hub.
FAQ Section
- Q: Will disabling USB Selective Suspend significantly impact my laptop's battery life?
- A: It can have a noticeable impact, especially if you have multiple USB devices connected. The extent of the impact will depend on the power consumption of those devices.
- Q: Is USB Selective Suspend the same as completely disabling a USB port?
- A: No, it's not. USB Selective Suspend only puts the device into a low-power state when it's idle. The port remains active and can be reactivated when the device is needed.
- Q: I disabled USB Selective Suspend, but my USB device is still disconnecting. What else can I try?
- A: Check your USB device drivers, try a different USB port, or consider using a powered USB hub. There might be other underlying hardware or software issues causing the disconnections.
Conclusion
USB Selective Suspend is a valuable tool for managing power consumption, especially on laptops. Understanding how to enable or disable it, and when to do so, can help you optimize your system's performance and battery life. By following the steps outlined in this guide and considering the potential pitfalls, you can confidently manage your USB power settings and ensure a smooth and efficient computing experience. Remember to experiment and find the configuration that works best for your specific needs and hardware.