The HP Cloud Recovery Tool is a lifesaver when your HP computer encounters serious issues, such as operating system corruption or system instability. It allows you to download the necessary recovery software and create a bootable USB drive, enabling you to reinstall Windows and restore your computer to its original factory state. This method is specifically designed for HP consumer PCs running Windows 10 or Windows 11, purchased after 2016.
This guide provides a comprehensive, step-by-step walkthrough of using the HP Cloud Recovery Tool. We will cover everything from preparing your system to booting from the recovery USB drive and initiating the recovery process. Following these instructions carefully will help you successfully recover your computer and get it back up and running smoothly.
Before you begin, please understand that this process will erase all data on your computer's hard drive. Therefore, backing up your important files before proceeding is absolutely critical. Ensure you have a stable internet connection and a suitable USB drive ready. Now, let's dive into the details.
Step 1: Preparation is Key
Before you even think about downloading the tool, proper preparation is essential for a smooth recovery process. This involves backing up your data, ensuring you have the necessary hardware and software requirements, and understanding the time commitment involved. Failing to prepare adequately can lead to data loss or a failed recovery attempt.
First, and most importantly, back up all your important files to an external hard drive, cloud storage, or another secure location. Allocate at least 1 to 4 hours for the recovery, depending on your internet speed and the USB drive's performance. A wired Ethernet connection is strongly recommended for a more stable and faster download. Ensure your laptop is plugged into an AC power source to avoid interruptions due to battery drain. Finally, have a blank USB flash drive with a minimum of 32 GB of storage capacity ready. Also, confirm that you have at least 20 GB of free disk space on your Windows partition.

Step 2: Downloading and Installing the HP Cloud Recovery Tool
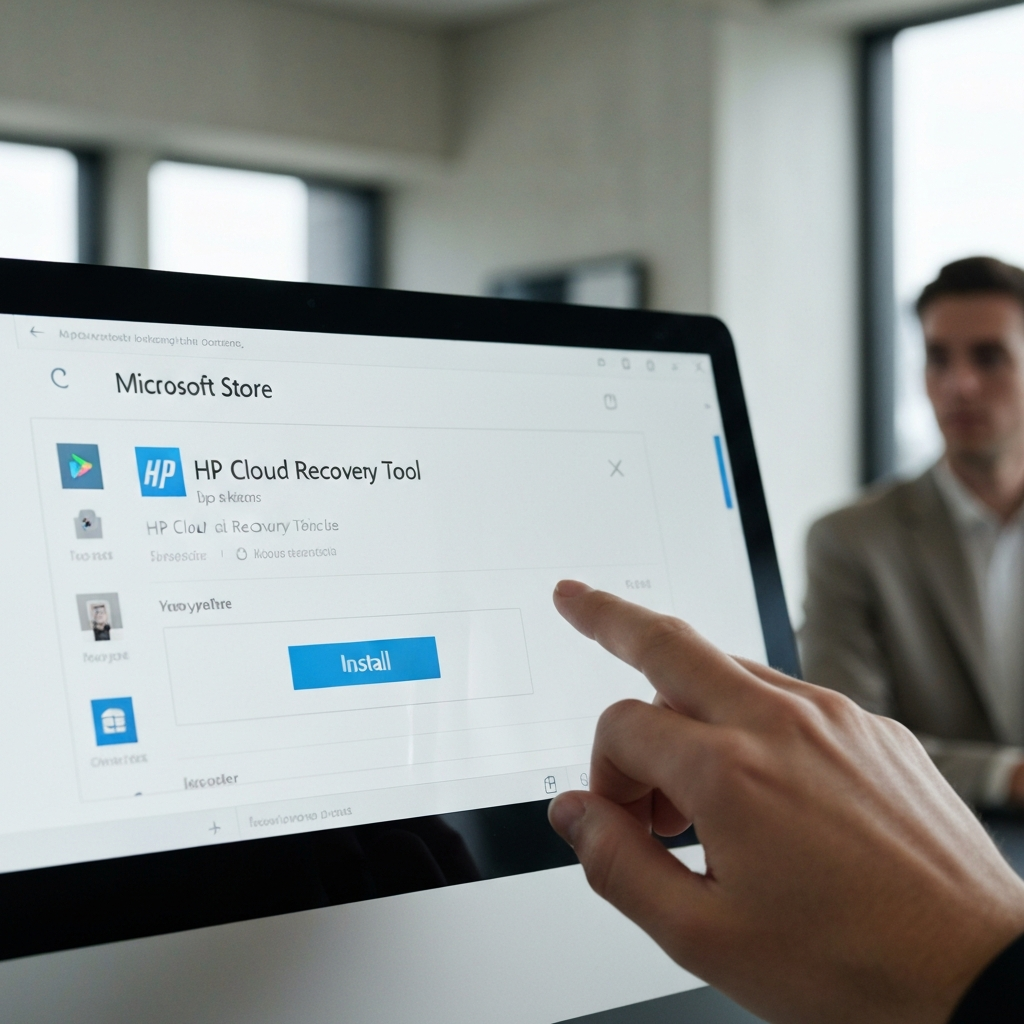
Now that you've prepped your system, it's time to acquire the HP Cloud Recovery Tool. The tool is readily available through the Microsoft Store, making the installation process relatively straightforward. However, it's crucial to download the tool directly from the official source to avoid any potential security risks.
Open the Microsoft Store app on your computer and search for "HP Cloud Recovery Tool." Be sure to select the official HP version. Download and install the tool. Note that the tool is designed for 64-bit versions of Windows. Once installed, ensure you have administrator privileges on the computer. This might require your username and password to be able to fully install the program. The installation is generally quick and easy.
Step 3: Launching and Configuring the HP Cloud Recovery Tool
With the tool installed, it's time to launch it and begin the process of creating your recovery media. This step involves running the application as an administrator, navigating through the initial setup screens, and potentially entering proxy information if you're on a secure network. Correctly configuring the tool at this stage is essential for a successful recovery image creation.
Plug your blank USB flash drive (minimum 32 GB) into your computer. Search for "Cloud Recovery" in the Windows search bar. Right-click on "HP Cloud Recovery Tool" and select "Run as administrator." If you see a message asking "Do you want to allow this app from an unknown publisher to make changes to your device?", click "Yes" to proceed. On the welcome screen, click "Next" to continue. If you are on a secure network, the tool will usually automatically detect and populate the proxy information. If not, or if you are not on a secured network, follow the instructions to enter the correct information or leave blank.
Step 4: Device Information and USB Drive Selection
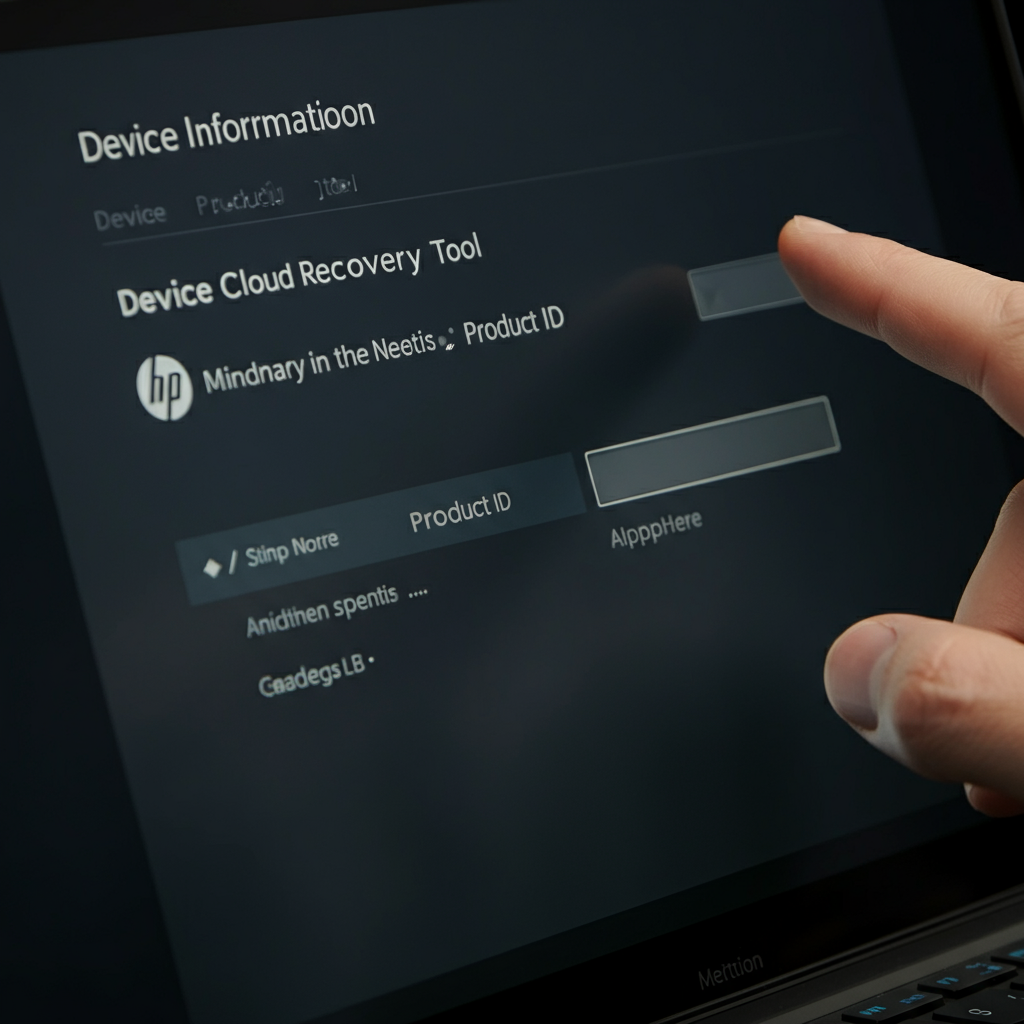
The next step focuses on identifying your specific computer model and selecting the appropriate USB drive for the recovery image. The tool automatically attempts to detect your device information, but you might need to manually enter the product ID in certain cases. Choosing the correct USB drive is also critical to avoid overwriting data on the wrong device.
The HP Cloud Recovery Tool should automatically detect your device information. Once detected, click "Next." If you are using a different computer from the one you want to recover, select the "I need to enter Product ID for my HP system" check box. Enter the correct product ID. If you encounter an error message like "Product ID is Not Match or Invalid," double-check the ID for accuracy. If your product ID contains "AV#", only enter the characters before "#". Select your USB flash drive from the drop-down menu and click "Next." Verify you are choosing the correct USB drive. Any data already on it will be erased.
Step 5: Confirmation and Download
Before the tool begins creating the recovery image, you'll be presented with a confirmation screen alerting you that all data on the selected USB drive will be permanently deleted. This is your last chance to ensure you've selected the correct drive and that you've backed up any important data. Once you confirm, the tool will begin downloading the necessary files and creating the bootable USB drive.
A warning message will appear, stating that all information on the USB flash drive will be permanently deleted. Confirm you understand the process and click "OK" to proceed. The HP Cloud Recovery Tool will then begin downloading the required files and creating the recovery image on your USB drive. This process can take a significant amount of time, depending on your internet speed. Do not interrupt the process. Once complete, the tool may display a message asking if you want to delete the downloaded temporary files to save space; click "Accept" to do so.

Step 6: Completing the Process
Once the download and image creation are complete, the HP Cloud Recovery Tool will display a final screen confirming the success of the operation. At this point, you can safely remove the USB drive and prepare to use it to recover your computer. Make sure you keep the USB drive in a safe place for future use.
After the tool has finished downloading and creating the recovery image, you will see a "Finish" button. Click "Finish." You can now safely remove the USB drive from your computer. Keep the USB drive in a safe place. The recovery USB drive is now ready to be used to recover your HP computer. Ensure you label the USB drive appropriately so you can find it easily in the future.

Step 7: Performing an HP System Recovery
With your recovery USB drive created, you can now proceed with recovering your HP system. This involves booting your computer from the USB drive and following the on-screen instructions to reinstall Windows and restore your system to its factory default settings. Remember that this process will erase all data on your hard drive.
Insert the USB recovery drive into your HP PC. Turn off the computer and disconnect all peripherals except for essential devices like your keyboard, mouse, and monitor. Power on the computer and use the boot options menu (usually accessed by pressing a specific key like F11 or ESC during startup) to boot from the USB drive. If you are unsure of which key to press, consult your computer's manual or HP's support website. Once the computer boots from the USB drive, follow the on-screen prompts to initiate and complete the recovery process. These prompts will guide you through the reinstallation of the operating system and drivers.

Tools or Materials Required
- HP Consumer PC (purchased after 2016) running Windows 10 or Windows 11.
- Stable internet connection (Ethernet recommended).
- Blank USB flash drive with at least 32 GB of storage capacity.
- AC power adapter for laptop.
- External hard drive or cloud storage for data backup (highly recommended).
Common Mistakes to Avoid
- Forgetting to back up important files before starting the recovery process.
- Using a USB drive with insufficient storage capacity.
- Interrupting the download or image creation process.
- Selecting the wrong USB drive, resulting in data loss on that drive.
- Entering an incorrect product ID, preventing the tool from identifying your system.
- Attempting to use the tool on a computer that is not supported.
- Downloading the HP Cloud Recovery Tool to an external hard drive.
FAQ Section
- Q: How long does the recovery process take?
- A: The recovery process can take anywhere from 1 to 4 hours, depending on your internet speed and the USB drive's performance.
- Q: What if the HP Cloud Recovery Tool doesn't recognize my product ID?
- A: Double-check the product ID for accuracy. If your product ID contains "AV#", only enter the characters before "#". If the issue persists, the HP Cloud Recovery Tool may not be available for your computer, or it may not be an HP device.
- Q: Can I use the HP Cloud Recovery Tool on a non-HP computer?
- A: No, the HP Cloud Recovery Tool is specifically designed for HP consumer PCs.
- Q: What happens if the recovery process fails?
- A: If the recovery process fails, try restarting the process from the beginning. Ensure you have a stable internet connection and that your USB drive is properly connected. If the issue persists, contact HP Support for assistance.
- Q: Will the HP Cloud Recovery Tool install the latest version of Windows?
- A: The HP Cloud Recovery Tool will install the version of Windows that was originally pre-installed on your computer. You may need to update Windows after the recovery process is complete.
Conclusion
The HP Cloud Recovery Tool is a valuable resource for restoring your HP computer to its original factory state. By following these step-by-step instructions and taking the necessary precautions, you can successfully recover your system and resolve various software-related issues. Remember to always back up your important data before initiating the recovery process. With a little patience and careful attention to detail, you can get your HP computer back up and running smoothly again.