Opening a can might seem like a trivial task, but the seemingly simple act can quickly turn frustrating if you lack the proper tools or technique. From preparing a quick lunch to stocking a survival kit, canned goods are a pantry staple. Mastering different can-opening methods ensures you're never left hungry or inconvenienced.
This guide provides a step-by-step approach to conquering any can-opening challenge, whether you have a state-of-the-art electric can opener or just a sturdy spoon. We'll explore the intricacies of using various can openers, and delve into resourceful methods for opening cans without any specialized tools at all. Prepare to become a can-opening virtuoso!
Remember to always prioritize safety and proceed with caution, especially when improvising. With a little practice and the right knowledge, you can confidently access the delicious contents within any can.
1. Using a Standard Manual Can Opener
The standard manual can opener is a ubiquitous kitchen tool. To start, firmly grasp the can with one hand and the can opener with the other. Position the cutting wheel – the sharp, toothed wheel – on the inside edge of the can's lid, nestled between the lid and the can's body. Ensure the can opener's arm (the part with the wheel) is resting securely on the can’s rim. A common mistake is positioning the wheel on top of the lid, which will only cause slippage and frustration. Squeeze the handles of the can opener together so the wheel pierces the metal of the lid. The piercing action creates the initial cut, allowing the opener to grip onto the lid.

2. Rotating the Can Opener
Once the cutting wheel is securely engaged, begin turning the crank handle (the key-like part) of the can opener with your free hand. As you turn the handle, the cutting wheel will slowly slice through the metal, progressing around the can's perimeter. Maintain a firm grip on both the can and the can opener to prevent slippage. Apply steady, even pressure while turning the crank for a smooth and continuous cut. If the opener slips, stop, reposition it slightly, and resume turning. Continue until you have made a full rotation around the lid.

3. Removing the Lid
After completing a full rotation, the lid should be almost completely detached. Before removing the lid, inspect the edge for any sharp or jagged points. Use the can opener’s built-in plier-like beak or a sturdy spoon to gently pry the lid up, taking care to avoid cutting yourself. Some can openers are designed to lift the lid automatically. Once lifted, dispose of the lid responsibly, as it can be very sharp. Be mindful not to drop the lid into the can's contents. A magnet can also be used to safely lift the lid if you have one available. Ensure all metal shards are removed before consuming the food inside.

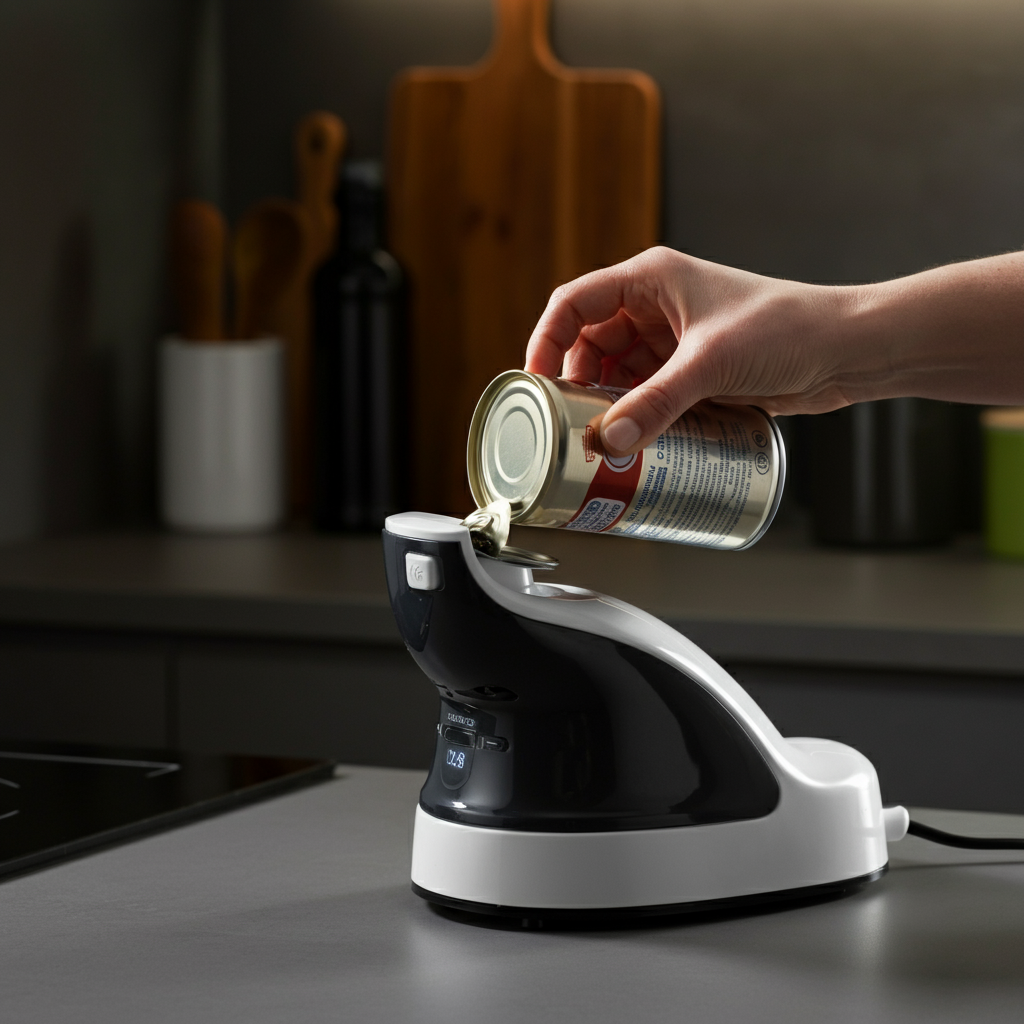
4. Using an Electric Can Opener
Electric can openers offer a convenient and automated alternative to manual versions. Begin by ensuring the can opener is plugged into a functioning power outlet. Locate the lever or button that activates the cutting mechanism. Lift the lever or press the button to expose the cutting wheel and magnet (if equipped). Place the can beneath the cutting wheel, aligning the rim of the can with the cutting blade. Gently press the can against the opener until it engages. Make sure the can sits flush against the guide for optimal performance. The electric opener will automatically rotate the can and slice through the lid.

5. Automated Lid Removal
Once the electric can opener completes its rotation, it will usually stop automatically. Most models are equipped with a magnet to hold the lid securely. If your opener lacks a magnet, be prepared for the lid to potentially fall. Carefully remove the opened can from the device. If the lid remains partially attached, gently wiggle the can until it detaches completely. As with manual openers, inspect the lid for sharp edges and dispose of it properly. Some electric openers also include a bottle opener or knife sharpener, adding versatility to the appliance.
6. Opening a Can Without a Can Opener: Concrete Method
In situations where a can opener isn't available, improvisation is key. A rough concrete surface can be used to weaken the can's seal. Find a flat, stable piece of concrete or rough rock. Turn the can upside down and firmly rub the rim against the concrete, applying consistent pressure. The goal is to wear down the crimped edge of the can. Be patient, as this method requires time and effort. Continue rubbing until you notice moisture seeping out from the rim, indicating a weakened seal. Once you see leakage, proceed to the next step.
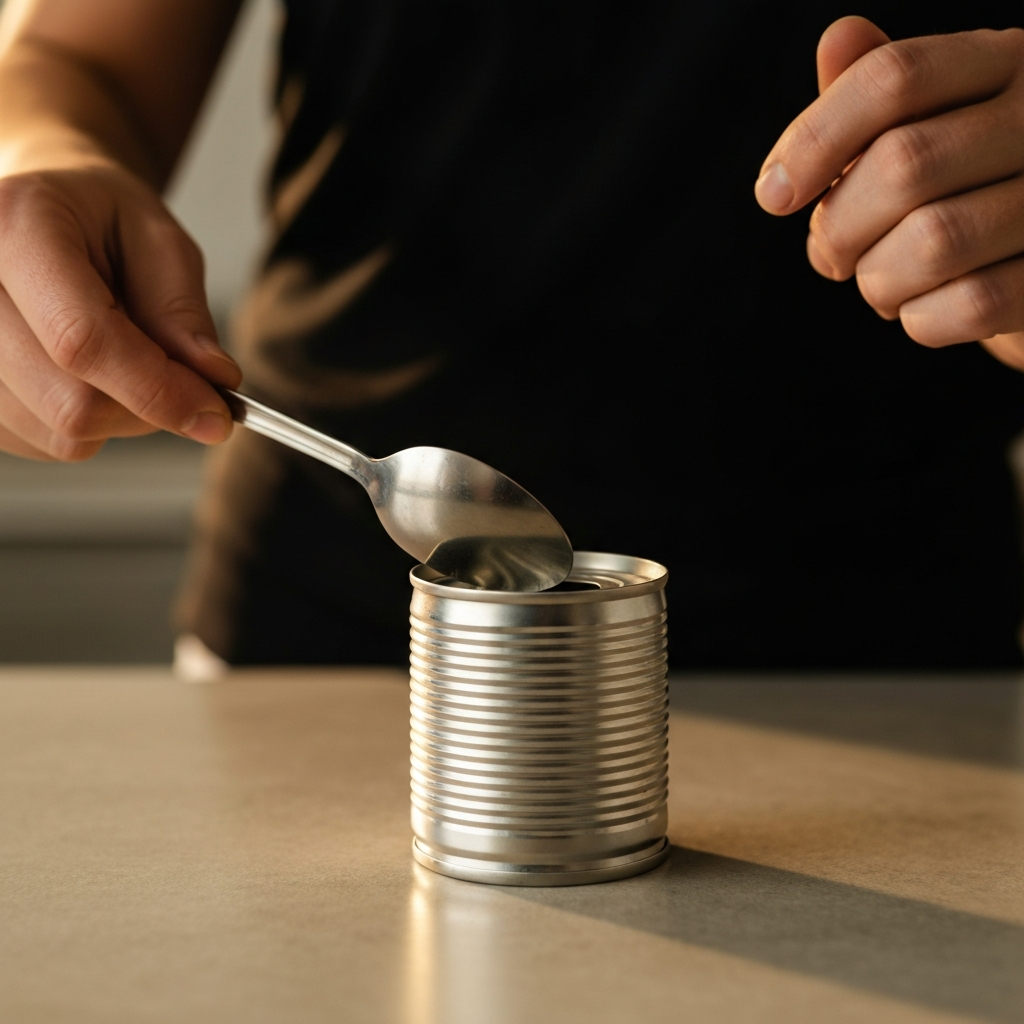
7. Creating an Opening: The Spoon Method
Another technique for emergency can opening involves the use of a sturdy metal spoon. Locate the indented groove along the top rim of the can. Hold the can firmly with one hand. Use the edge of the spoon's bowl to repeatedly press and rub against a small section of the groove. The goal is to create a small hole or weakened area in the can's lid. Apply consistent pressure and focus on one small area to effectively puncture the metal. This method requires considerable patience and can be physically demanding. Once a small hole is created, carefully pry the lid open using the spoon, working your way around the rim.
8. Opening with Your Bare Hands (Emergency Only!)
This should be used as a last resort, due to safety concerns. Modern cans have ridges in the middle which act as weak points. Press on these grooves to make a dent. Put one on each side of the can, pressing as hard as you can with your fingers, or on the ground with your heel. You should now have two opposing dents. Squeeze the can on both sides of the dents, then wiggle the two halves apart. Small metal fragments will likely end up in your food. Examine carefully and spoon out any food touching the sides of the can.

Tools or Materials Required
- Standard Manual Can Opener
- Electric Can Opener (Optional)
- Sturdy Metal Spoon (For emergency opening)
- Flat Concrete Surface or Rough Rock (For emergency opening)
- Clean Cloth or Paper Towels
Safety Considerations
- Always exercise caution when handling sharp metal edges.
- Dispose of can lids and any metal fragments responsibly to prevent injuries.
- Wash your hands thoroughly after opening a can, especially if you used an alternative method.
- Avoid using excessive force, which can cause slippage and potential cuts.
- Be especially careful when opening cans without a can opener, as these methods are inherently less safe.
Common Mistakes to Avoid
- Positioning the cutting wheel incorrectly on the can.
- Applying uneven pressure while turning the crank handle.
- Rushing the process and causing the can opener to slip.
- Dropping the lid into the can's contents.
- Neglecting to inspect the lid for sharp edges.
Pro Tips
- For manual can openers, try using a rocking motion as you turn the crank for easier cutting.
- If the can opener slips, try drying both the can and the cutting wheel.
- When using alternative methods, wear gloves to protect your hands.
- Practice opening cans with a standard can opener to improve your technique.
FAQ Section
- What if my can opener gets stuck?
- Try wiggling the can opener gently and applying more pressure to the handles. If it remains stuck, try turning the crank in the opposite direction to release the tension.
- How do I clean a can opener?
- Wash the can opener with soap and water, and use a brush to remove any food debris from the cutting wheel. Ensure it is completely dry before storing.
- Is it safe to eat food from a dented can?
- If the dent is minor and the can is not leaking, it is generally considered safe. However, if the dent is severe or the can is bulging, it is best to discard it.
Conclusion
Opening a can is a fundamental skill with numerous practical applications. By mastering the techniques outlined in this guide, you'll be well-equipped to tackle any can-opening challenge, regardless of the tools available. Remember to prioritize safety, practice regularly, and always inspect the lid for sharp edges. Whether you're using a classic manual opener, a modern electric model, or improvising with a spoon, you're now ready to confidently access the delicious contents within.