Tired of the same old generic air fresheners hanging from your rearview mirror? Want to add a personal touch and create a unique scent experience every time you step into your car? Then look no further! Making your own car freshies is a fun, easy, and surprisingly customizable DIY project that allows you to craft delightful aromas and eye-catching decorations that perfectly reflect your personality.
This comprehensive guide will walk you through each step of the process, from selecting the right materials to adding intricate details that will make your freshies stand out. We'll share expert tips and tricks to ensure your success and provide you with the knowledge to troubleshoot any issues that may arise. Prepare to unleash your creativity and transform your car into a fragrant oasis with these handcrafted car freshies!
Not only are these car freshies a great way to personalize your own ride, but they also make fantastic gifts for friends and family. Imagine the delight of receiving a custom-scented and beautifully decorated freshie, tailored specifically to their tastes! Get ready to embark on this exciting DIY adventure and discover the joy of creating your own signature car scents.
Tools or Materials Required
- Aroma Beads (unscented or pre-scented)
- Fragrance Oils (if using unscented beads)
- Pigment Powder (optional, for coloring)
- Metal Cookie Cutters (various shapes)
- Baking Sheet
- Aluminum Foil or Parchment Paper
- Glass Jar with Lid (for scenting beads)
- Heat-Resistant Gloves or Oven Mitts
- Cooling Rack
- Hot Glue Gun and Glue Sticks
- String, Twine, or Ribbon (for hanging)
- Optional Decorations: Glitter, Beads, Small Charms, Puff Paint
Safety Considerations
- Always use heat-resistant gloves or oven mitts when handling hot baking sheets and freshies.
- Work in a well-ventilated area when using fragrance oils.
- Keep hot glue guns away from children and pets.
- Be careful when using scissors to trim edges of the freshie.
Step 1: Scenting and Coloring Your Aroma Beads
Prepare Your Beads
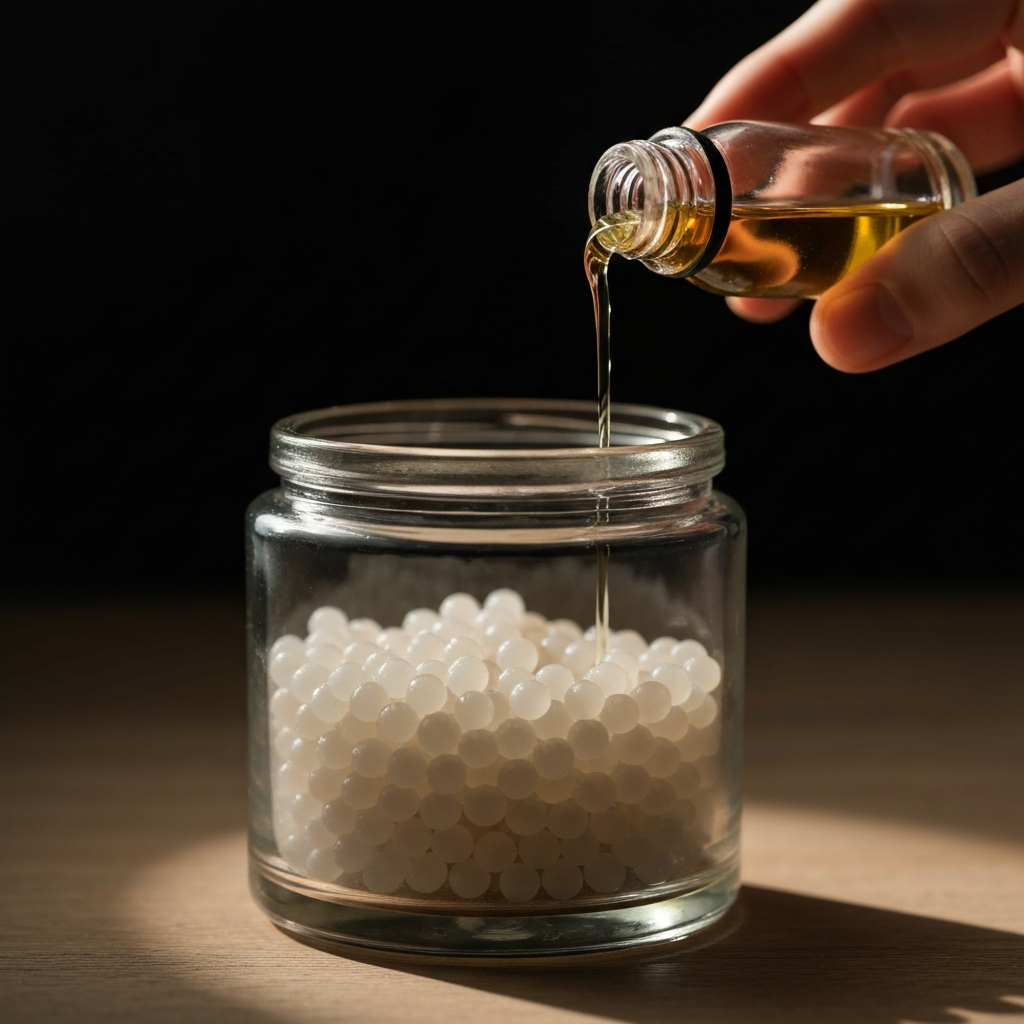
If you're starting with unscented aroma beads, now is the time to infuse them with your favorite fragrance. In a glass jar, combine approximately 4 ounces (about 1 cup) of aroma beads with 1 ounce (approximately 6 teaspoons) of fragrance oil. The key here is to ensure even distribution, so secure the lid tightly and shake vigorously for at least a minute. For optimal absorption, allow the beads to sit in the sealed jar for 24 hours, shaking occasionally. If you desire colored freshies, add about 0.5 teaspoons (6 grams) of pigment powder to 1 cup of aroma beads in a plastic cup. Mix thoroughly for about a minute and let sit for about 30 minutes.
Step 2: Preparing Your Baking Setup
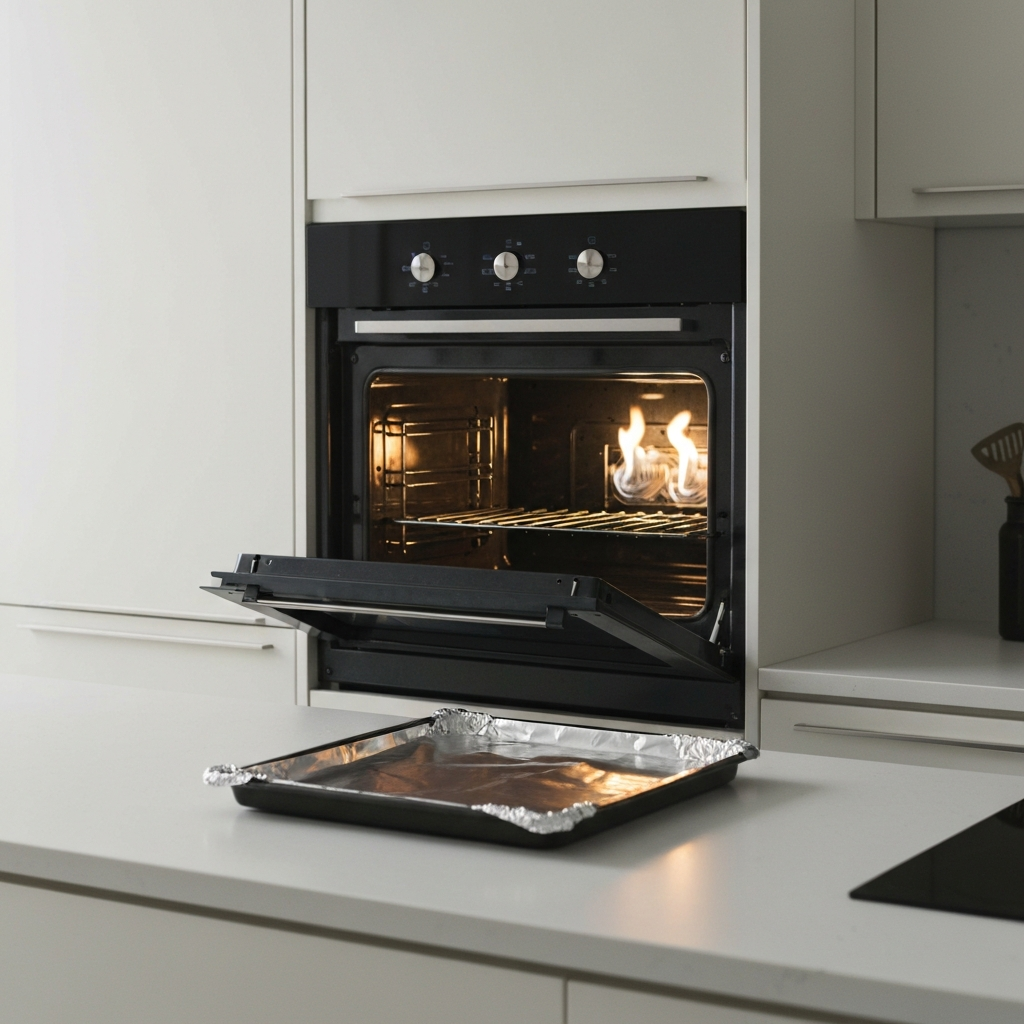
Preheat and Protect
Preheating your oven to 350°F (177°C) is a crucial step for achieving uniformly melted freshies. While the oven warms up, prepare your baking sheet by lining it with either aluminum foil or parchment paper. This prevents the beads from sticking and makes for easy cleanup. Ensure the foil is smooth and wrinkle-free to avoid any unwanted textures on the finished freshies.
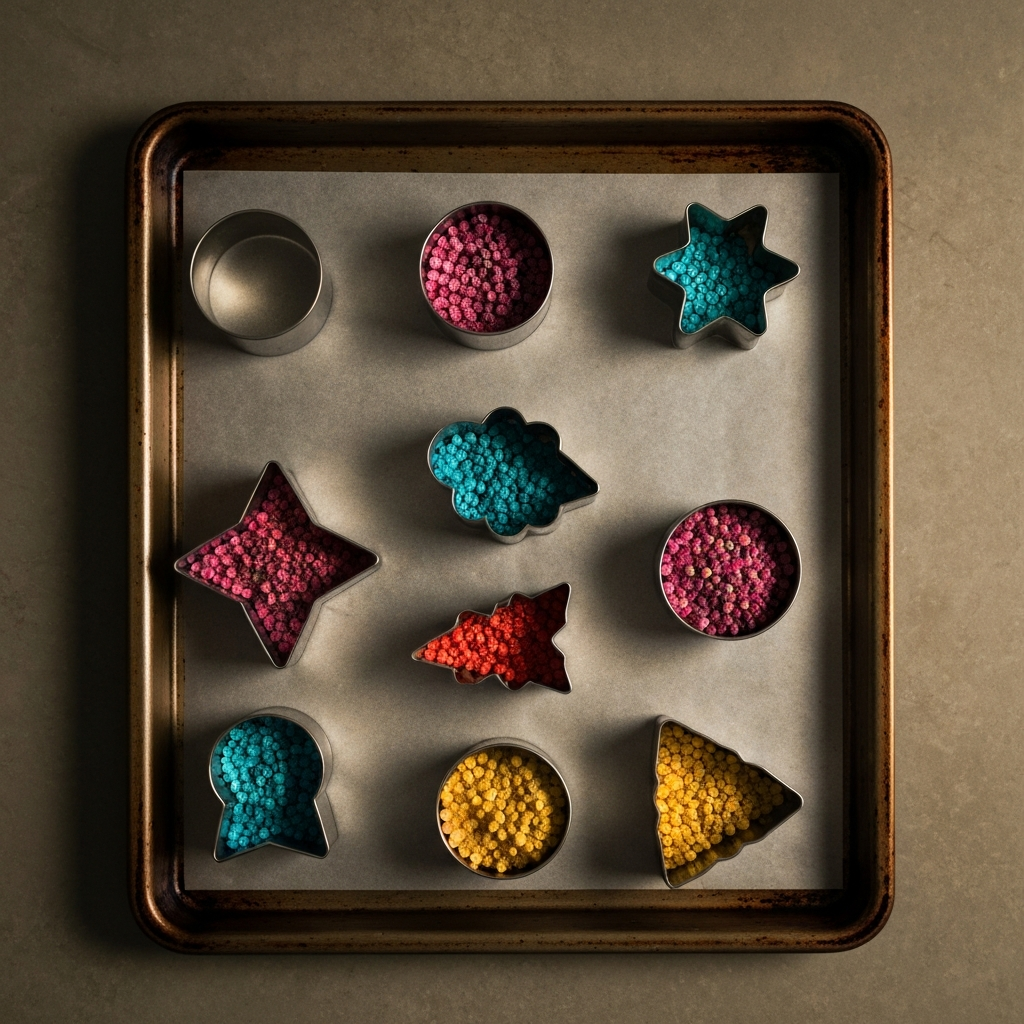
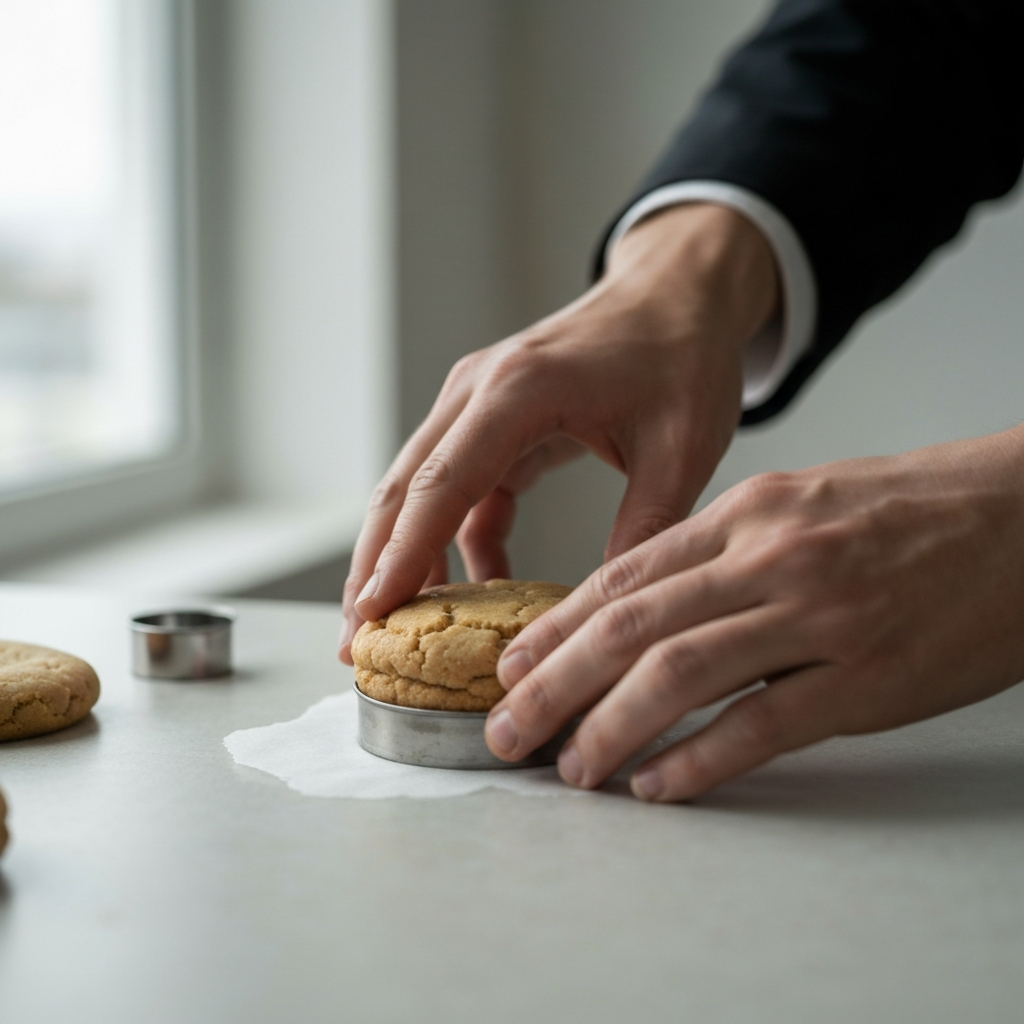
Step 3: Filling the Cookie Cutters
Molding Your Freshies
Select your desired metal cookie cutter shapes – the more intricate, the more unique your freshie will be! Place the cookie cutters flat on the prepared baking sheet. Carefully fill each cookie cutter about halfway with your scented and colored aroma beads. Avoid overfilling, as the beads will expand slightly during the baking process. Gently shake the cookie cutters to help the beads settle evenly into all the corners and crevices.
Step 4: Baking the Freshies
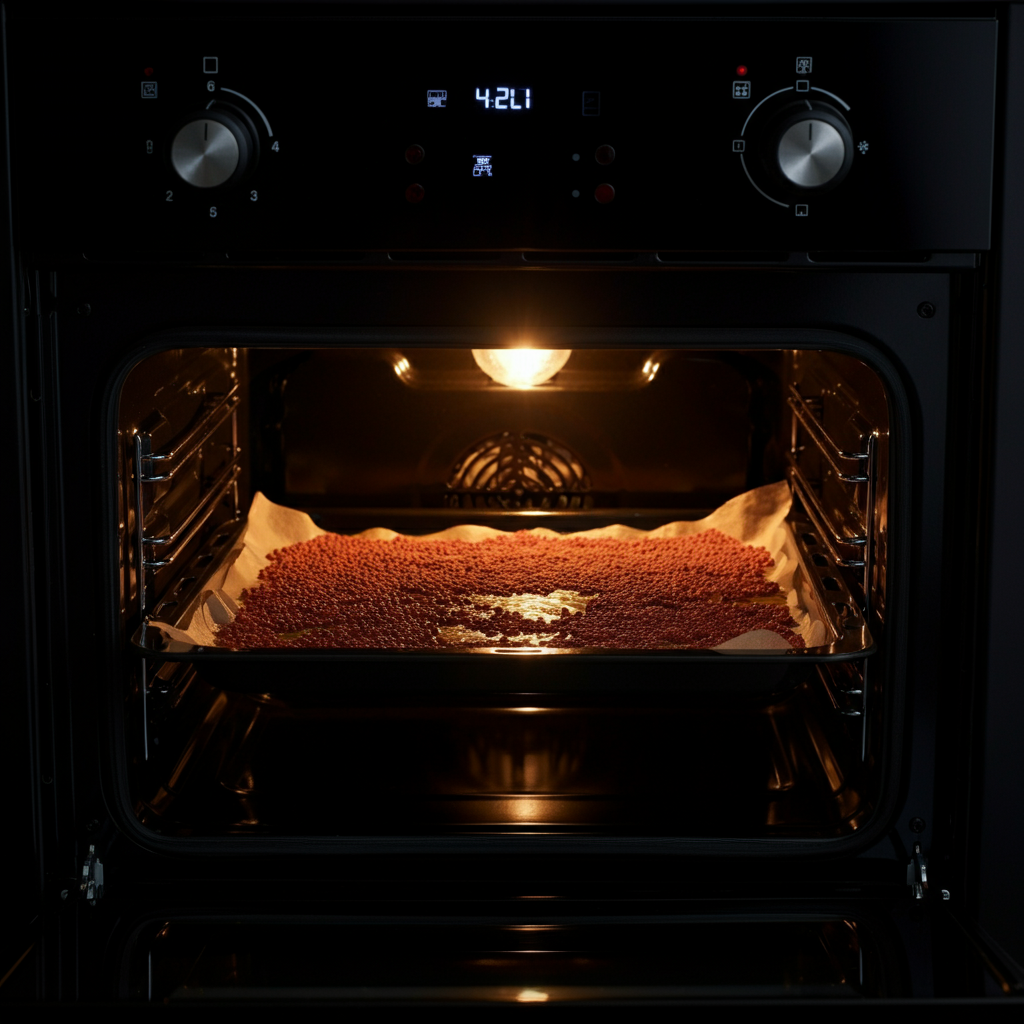
Melting Time
Carefully place the baking sheet in the center rack of your preheated oven. Set a timer for 8 minutes. After 8 minutes, check on the beads. They should be starting to melt together, but not completely liquified. If they haven’t begun to melt, return the pan to the oven for another 2-3 minutes, checking frequently. The goal is a slightly tacky consistency, where the beads are fused but still retain some of their individual shape.
Step 5: Cooling and Solidifying
Patience is Key
Once the beads have reached the desired consistency, carefully remove the baking sheet from the oven using heat-resistant gloves or oven mitts. Place the baking sheet on a cooling rack and allow the freshies to cool completely for at least one hour. Resist the urge to touch them during this process, as they will be very fragile and easily distorted while still warm.
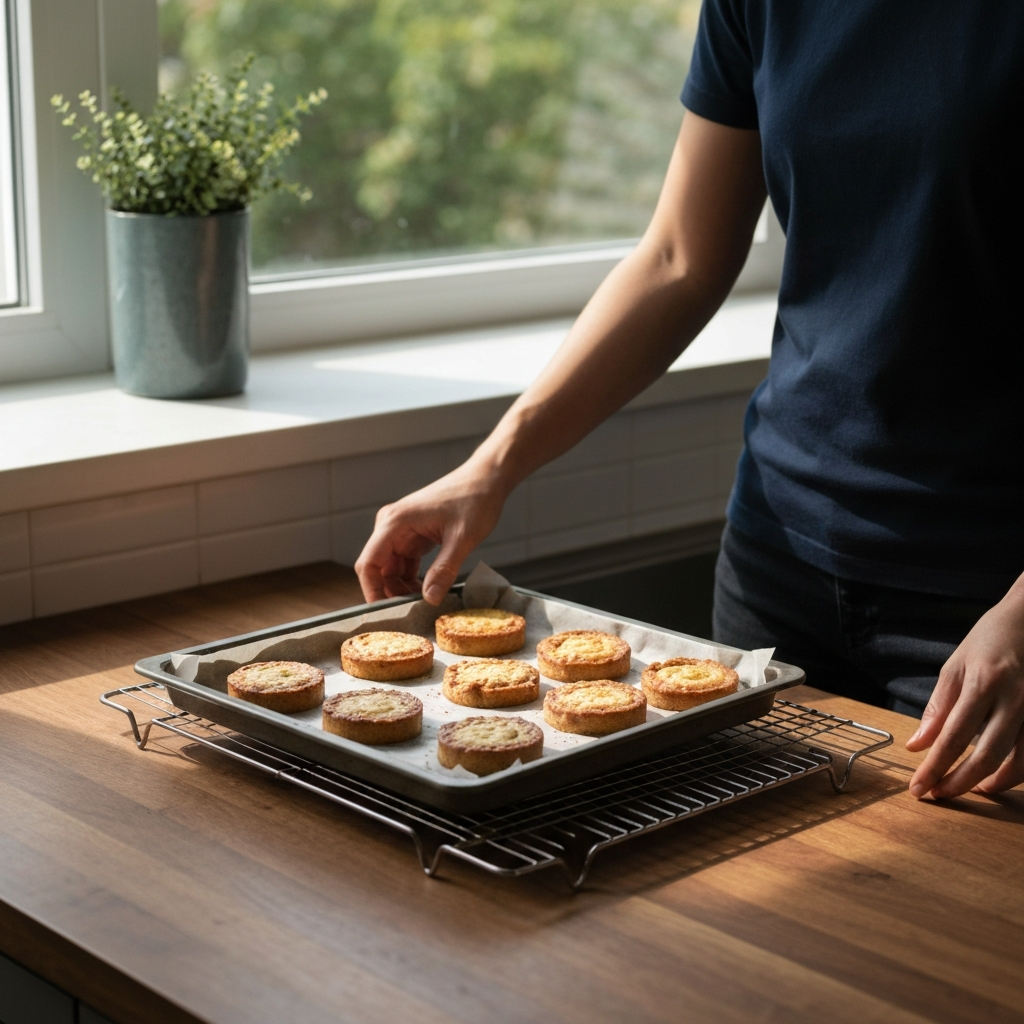
Step 6: Removing the Molds
Gentle Extraction
After the freshies have completely cooled, it's time to remove them from the cookie cutters. Gently turn the cookie cutter upside down and use your thumbs to carefully push the freshie out of the mold. Apply even pressure to avoid breaking or cracking the freshie. If the freshie is stuck, try gently pressing around the edges to loosen it before attempting to remove it entirely. If the edges are uneven, carefully trim them with scissors.
Step 7: Attaching the Hanger
Securing the Scent
Cut a length of string, twine, or ribbon approximately 8-10 inches long and tie the ends together to form a loop. Using a hot glue gun, apply a small dab of hot glue to the back of the freshie, near the top edge. Carefully press the knot of the loop into the hot glue and hold it in place until the glue has cooled and set. Ensure the glue is completely dry before hanging the freshie to prevent the loop from detaching.

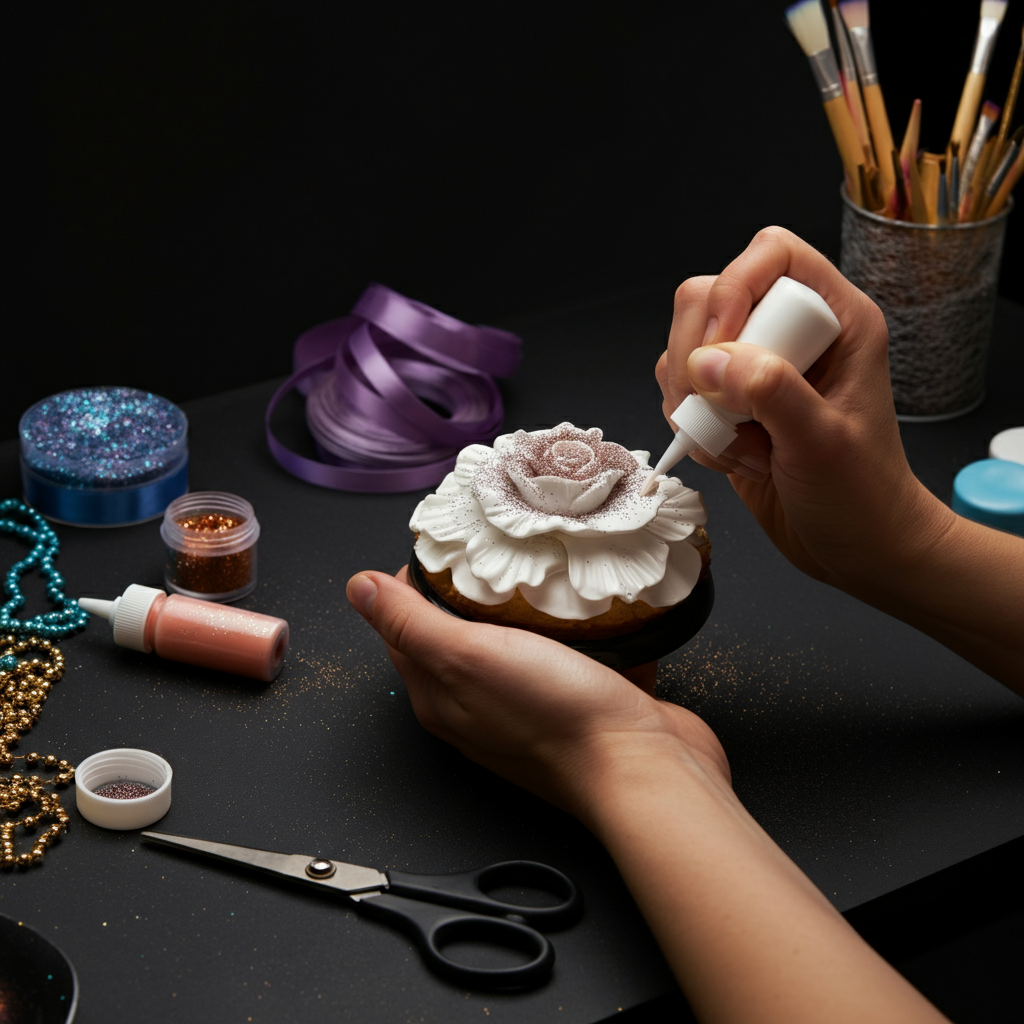
Step 8: Decoration & Personalization
Adding Flair
This is where your creativity can truly shine! Use puff paint to add intricate designs, glue on glitter for a touch of sparkle, or attach small beads or charms for added dimension. Remember that less is often more; avoid overcrowding the freshie with decorations. Let your decorations dry completely before hanging the freshie in your car.
Common Mistakes to Avoid
- Overheating the Beads: This can cause them to burn and release unpleasant odors. Closely monitor the baking process.
- Under-scenting the Beads: Not using enough fragrance oil will result in a weak or nonexistent scent.
- Uneven Cooling: Cooling the freshies unevenly can cause them to warp or crack.
- Rushing the Demolding Process: Trying to remove the freshies from the molds before they are completely cool can cause them to break.
Pro Tips
- Experiment with different fragrance oil blends to create unique and personalized scents.
- Use multiple colors of aroma beads to create layered or marbled effects.
- Add a small amount of shimmer powder to the beads for a subtle, eye-catching sparkle.
- To refresh the scent of your freshie, add a few drops of fragrance oil directly to the back.
FAQ Section
- How long will my car freshie last?
- The lifespan of your car freshie will depend on several factors, including the type of fragrance oil used and the ambient temperature. Generally, you can expect your freshie to last for several weeks to a few months.
- Can I use essential oils instead of fragrance oils?
- While you can use essential oils, be aware that they may not be as long-lasting as fragrance oils. Essential oils tend to dissipate more quickly in heat.
- My freshie broke when I tried to remove it from the mold. What should I do?
- Don't worry! You can try to re-melt the broken pieces in the oven, using the same baking process. Or, you can simply glue the pieces back together using hot glue.
Conclusion
Congratulations! You've successfully created your own unique and personalized car freshies. By following these simple steps, you can easily transform your car into a fragrant haven that reflects your individual style and preferences. Experiment with different scents, colors, and decorations to create a freshie collection that is as diverse and unique as you are. Enjoy the delightful aromas and the satisfaction of knowing you created something special with your own two hands!