Period pain, also known as dysmenorrhea, can be debilitating. While over-the-counter pain relievers can help, sometimes you need immediate comfort, and a heat pack is often the perfect solution. Applying heat to your abdomen can help relax the uterine muscles, reducing cramps and discomfort. If you don't have a commercially available heat pack on hand, don't worry! You can easily create one at home using simple materials.
This guide will walk you through a straightforward method for making a safe and effective DIY heat pack. We'll cover everything from the necessary materials to crucial safety precautions, ensuring you can find relief quickly and easily. It's important to note that while this is a great temporary solution, for chronic or severe pain, consulting with a healthcare professional is always recommended. Let’s get started!
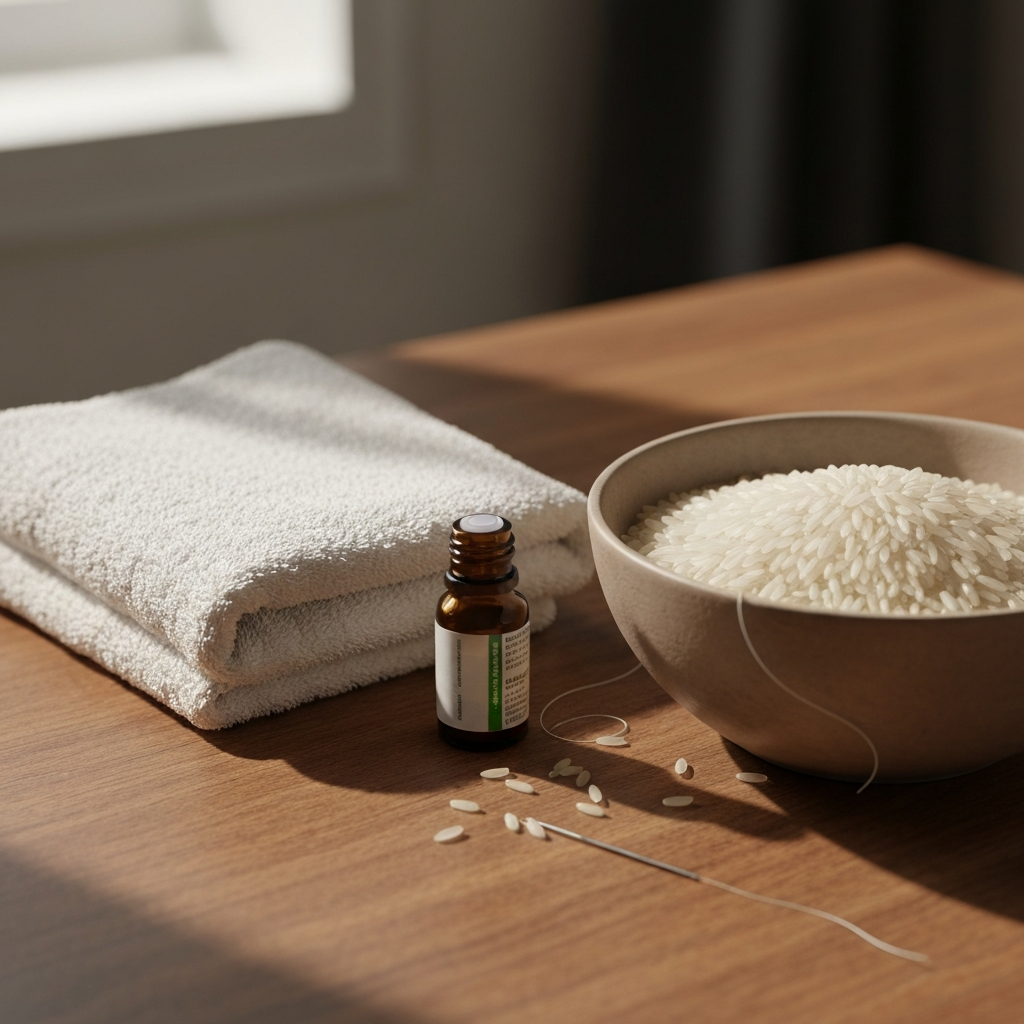
Step 1: Gather Your Supplies
Before you begin, gather all the necessary materials. This will streamline the process and prevent any last-minute scrambles. You'll need a clean hand towel (cotton is ideal), a microwave-safe bowl, uncooked rice (about 1-2 cups), essential oil (optional, for added aromatherapy), a microwave, and a needle and thread or sewing machine (for closing the pack). Ensure your bowl is large enough to comfortably hold the towel when folded.
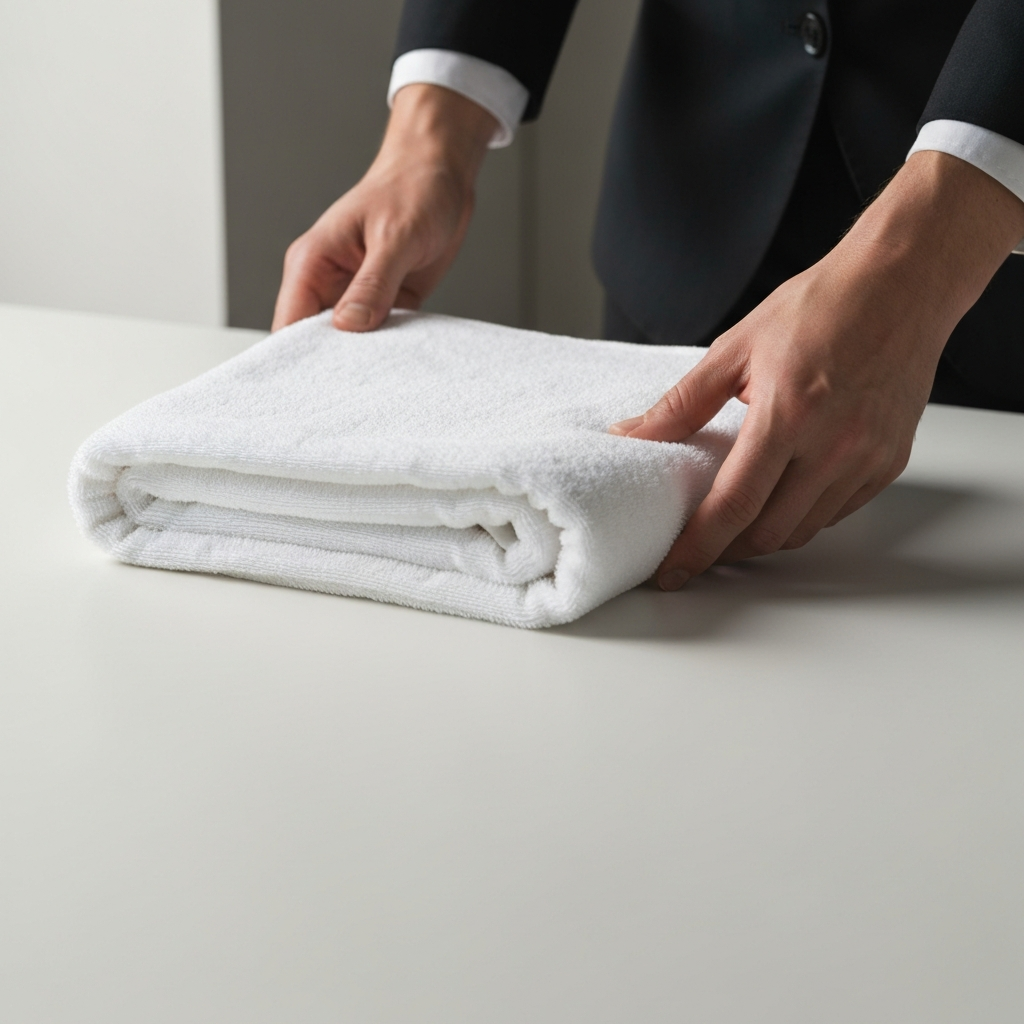
Step 2: Prepare the Towel
Fold the hand towel in half, then in half again to create a smaller square or rectangle. This will form the pouch for your rice. If you want a larger or differently shaped heat pack, adjust the folding accordingly. Consider the area you want to treat when deciding on the size and shape of your heat pack. A longer, thinner pack is ideal for across the lower back, while a smaller square works well for the lower abdomen.
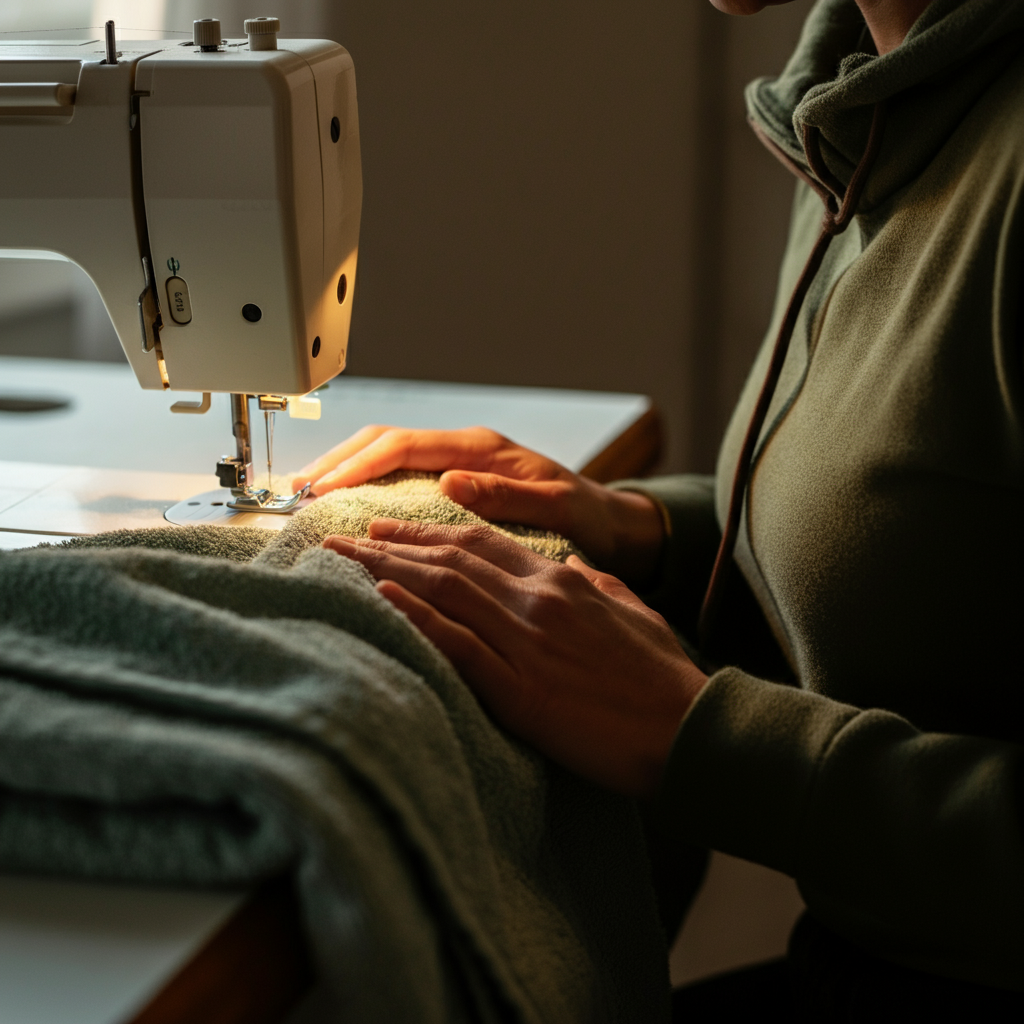
Step 3: Sew Three Sides of the Pouch
Using a needle and thread or a sewing machine, sew along three sides of the folded towel, creating a sealed pouch. Leave one side open to allow you to fill it with rice. If you're hand-sewing, use a backstitch for extra durability. Reinforce the corners of the sewn seams as these areas will be under stress. A sewing machine will offer a stronger and faster result.
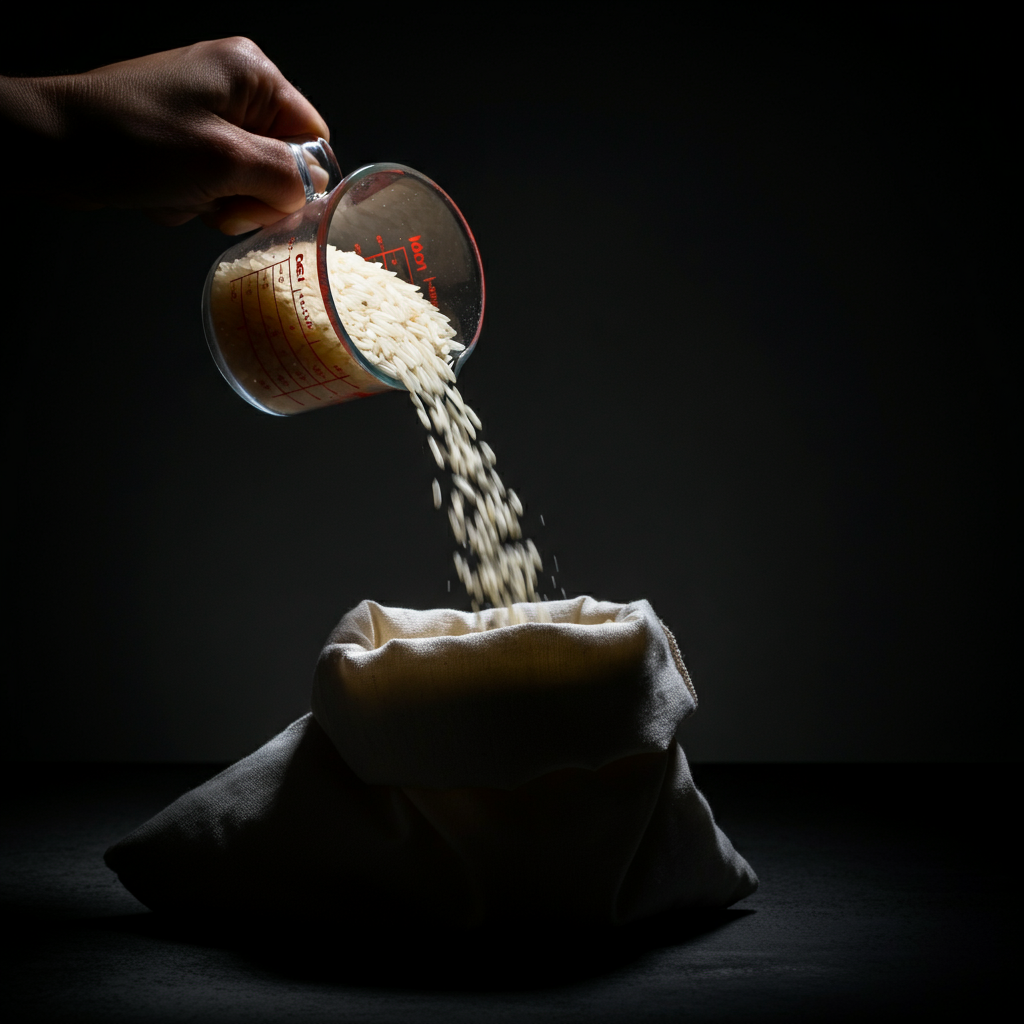
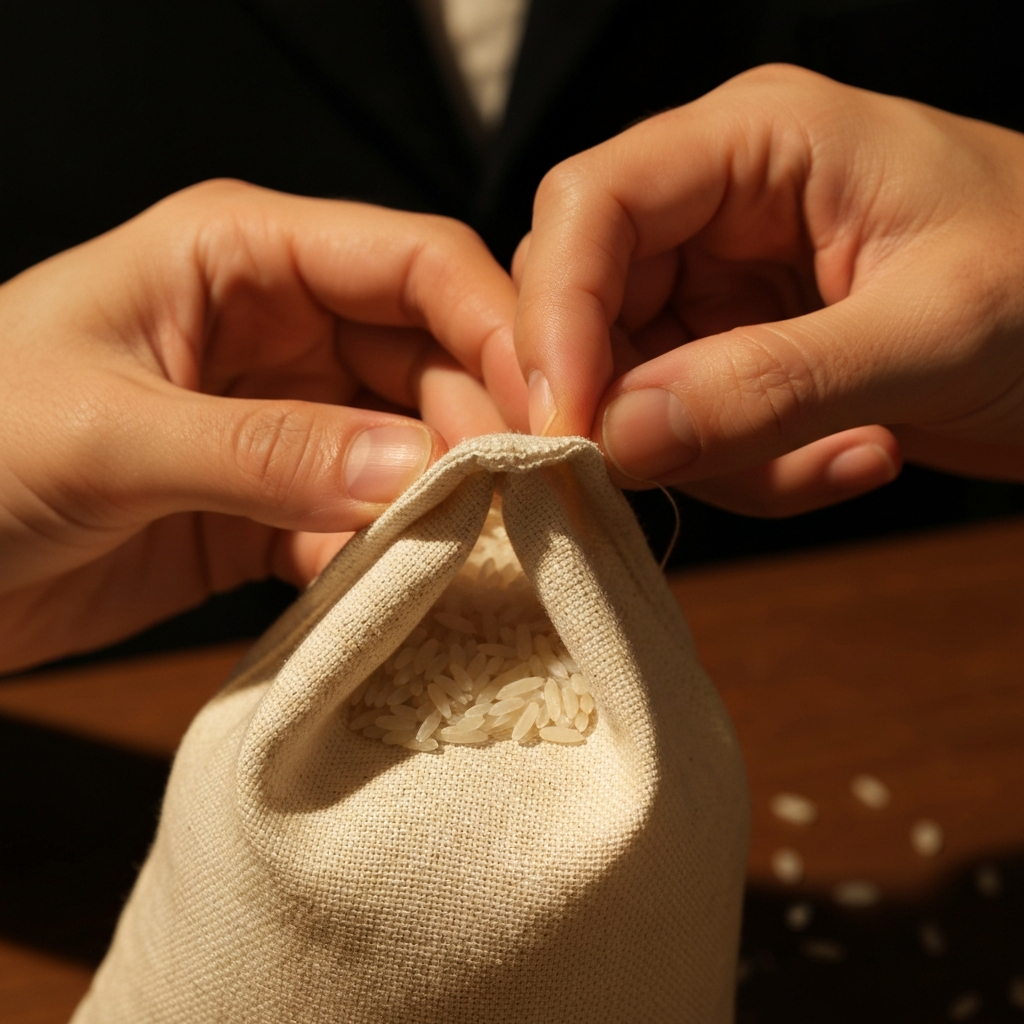
Step 4: Fill the Pouch with Rice
Carefully pour the uncooked rice into the open end of the towel pouch. Fill it about two-thirds full. Avoid overfilling the pouch, as this will make it too stiff and less comfortable to mold to your body. If you're using essential oils, add a few drops to the rice before closing the pouch. Lavender, chamomile, and clary sage are all known for their calming properties and are great options for period pain relief.
Step 5: Close the Pouch
Fold the open edge of the towel inward to create a clean seam and sew it closed, securely sealing the rice inside. Double-check that the seam is well-sealed to prevent any rice from escaping. If necessary, go over the seam a second time for extra reinforcement. This is the most vulnerable part of the pack.
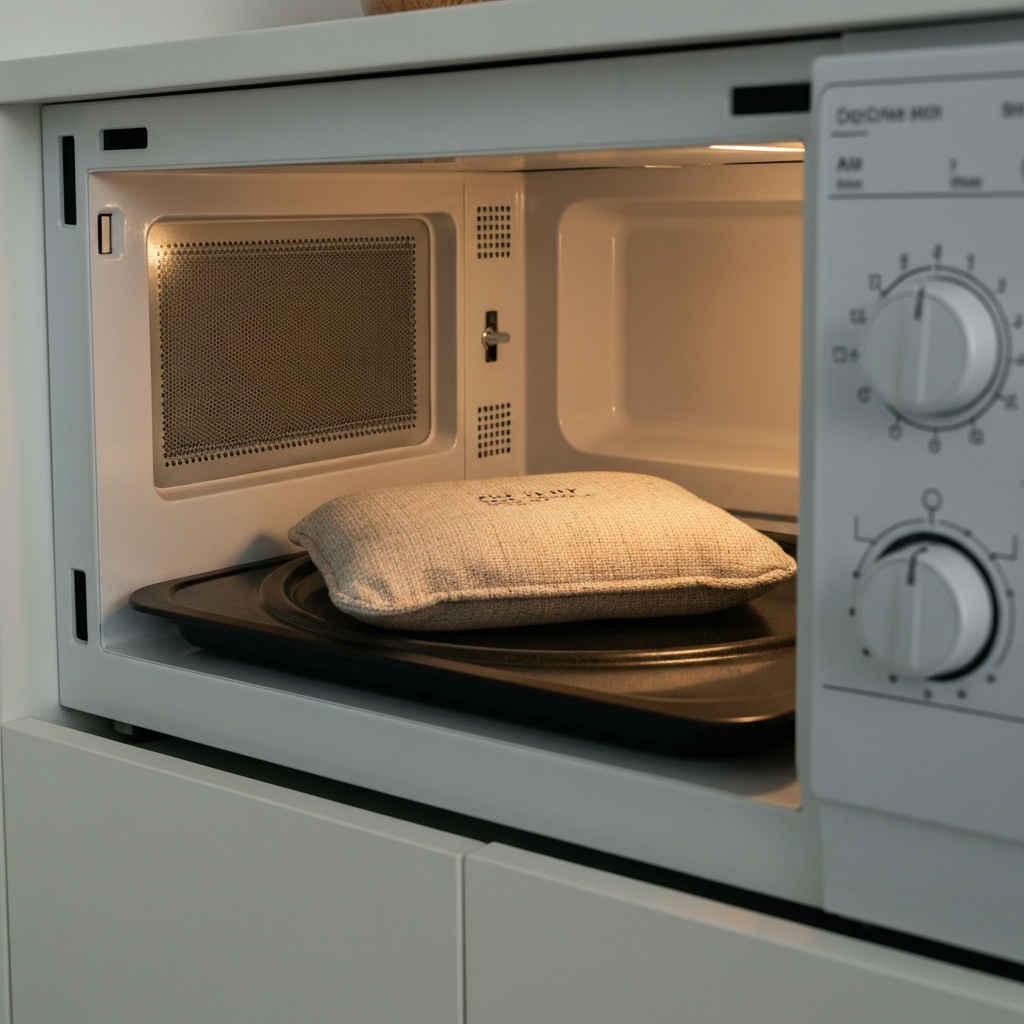
Step 6: Heat the Heat Pack
Place the heat pack in the microwave and heat it in 30-second intervals. Check the temperature after each interval to avoid overheating and burning yourself. Start with a lower time, like 30 seconds, and gradually increase it until you reach your desired warmth. Typically, 1-2 minutes is sufficient, but this may vary depending on your microwave's power. Be careful removing it; it can be surprisingly hot!
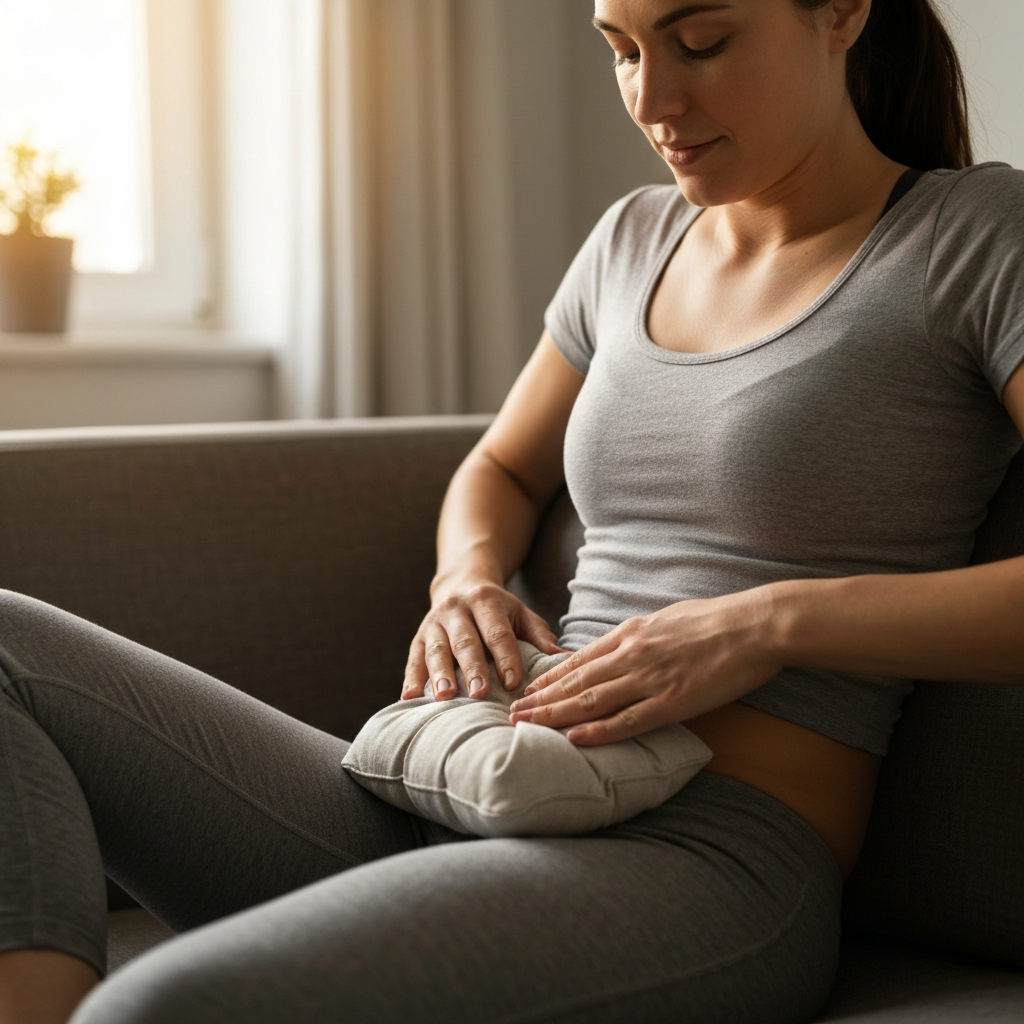
Step 7: Apply the Heat Pack
Carefully remove the heat pack from the microwave and test the temperature on your inner wrist before applying it to your abdomen or lower back. If it's too hot, allow it to cool slightly. Never apply a heat pack directly to bare skin; always use a layer of clothing or a towel to protect your skin from burns. Relax and let the warmth soothe your muscles and alleviate your pain.
Safety Considerations
Safety is paramount when using a homemade heat pack. Always monitor the temperature closely to prevent burns. Never leave a heating heat pack unattended in a microwave. Check the pack regularly for any signs of wear and tear, such as loose seams or escaping rice. If the pack is damaged, repair it immediately or discard it. People with sensory issues, diabetes, or circulation problems should consult a healthcare professional before using a heat pack.
Common Mistakes to Avoid
One of the most common mistakes is overheating the rice pack. This can cause burns and damage the fabric. Another mistake is overfilling the pack, which makes it too stiff and uncomfortable. Also, forgetting to properly seal the pouch is a recipe for a rice explosion in your microwave. Pay close attention to detail, especially when sewing the seams, to prevent these issues. Always err on the side of caution when determining the heating time in your microwave.
Pro Tips
For an enhanced experience, consider adding dried herbs like lavender or chamomile to the rice for added aromatherapy benefits. Using a flannel or fleece towel will create a softer, more luxurious heat pack. To prolong the life of your heat pack, store it in a cool, dry place when not in use. You can also place it in a freezer bag to prevent moisture absorption. Reheating instructions should also be included on a small tag attached to the pack for easy reference.
FAQ Section
How long will the heat pack stay warm?
A: The heat pack typically stays warm for 20-30 minutes.
Can I wash the heat pack?
A: It's not recommended to wash the entire heat pack, as the rice will get wet. Spot clean it with a damp cloth if necessary.
Can I use other grains besides rice?
A: Flaxseed and wheat are also good options, as they retain heat well. However, rice is readily available and cost-effective.
How often can I use the heat pack?
A: You can use the heat pack as often as needed to relieve your period pain.
Creating a DIY period pain heat pack is a simple and effective way to find relief from cramps and discomfort. By following these steps and taking necessary safety precautions, you can quickly and easily create a reusable heat pack that provides soothing warmth whenever you need it. Remember, while this is a great home remedy, consulting with a healthcare professional is always recommended for managing chronic or severe pain. Enjoy the comfort and relief this homemade heat pack provides!