Running out of space on your PlayStation 5? With modern games demanding larger and larger installation sizes, the internal storage can quickly become a bottleneck. Fortunately, Sony designed the PS5 with an upgradeable internal SSD slot, allowing you to expand your storage capacity and load games faster.
This guide provides a step-by-step walkthrough of the entire SSD installation process. We’ll cover everything from selecting the right SSD to formatting it for optimal performance on your PS5. We aim to help you perform this upgrade smoothly and safely, ensuring a seamless gaming experience.
Before you start, make sure to have a compatible M.2 NVMe SSD that meets Sony's specifications. Using an incompatible drive can lead to performance issues or even damage to your console. Let’s begin!
Step 1: Choosing the Right SSD
Selecting a compatible SSD is crucial. The PS5 requires a PCIe Gen4x4 NVMe M.2 SSD with a capacity between 250GB and 8TB. Pay close attention to the read speed, which must be at least 5500MB/s to meet Sony's recommended specifications. The form factor should be 2230, 2242, 2260, 2280, or 22110. Check the dimensions to ensure it fits within the PS5's internal expansion bay. Some SSDs come with a heatsink pre-installed. This is recommended but ensure it doesn't exceed the maximum height restriction (11.25mm total height, 8.0mm above the board, 2.45mm below). Buying an SSD that's too slow will limit your speeds and the games won't perform as well. Check the dimensions of the SSD before you buy it so you know it will fit.

Step 2: Updating Your PS5 System Software
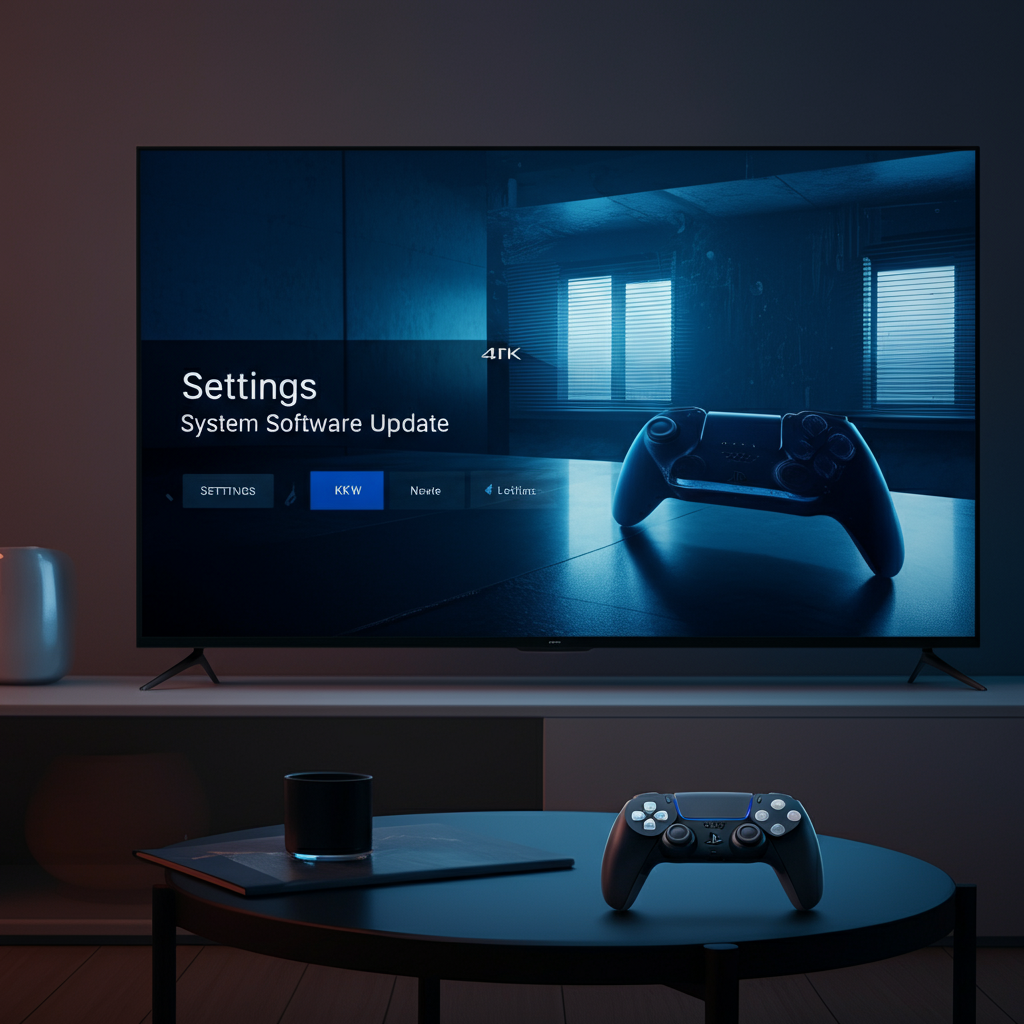
Before physically installing the SSD, ensure your PS5 is running the latest system software. Sony releases updates that improve compatibility and optimize performance with expanded storage. To check for updates, go to Settings > System > System Software > System Software Update and Settings > Update System Software. If an update is available, download and install it before proceeding. Skipping this step can lead to compatibility issues during the formatting process later on.
Step 3: Powering Down and Disconnecting Your PS5
Safety first! Completely power down your PS5 and disconnect all cables, including the power cord and HDMI cable. This prevents any potential electrical damage during the installation process. Wait a few minutes after powering down to ensure any residual power is discharged. Do not attempt this installation while the system is running or in rest mode.

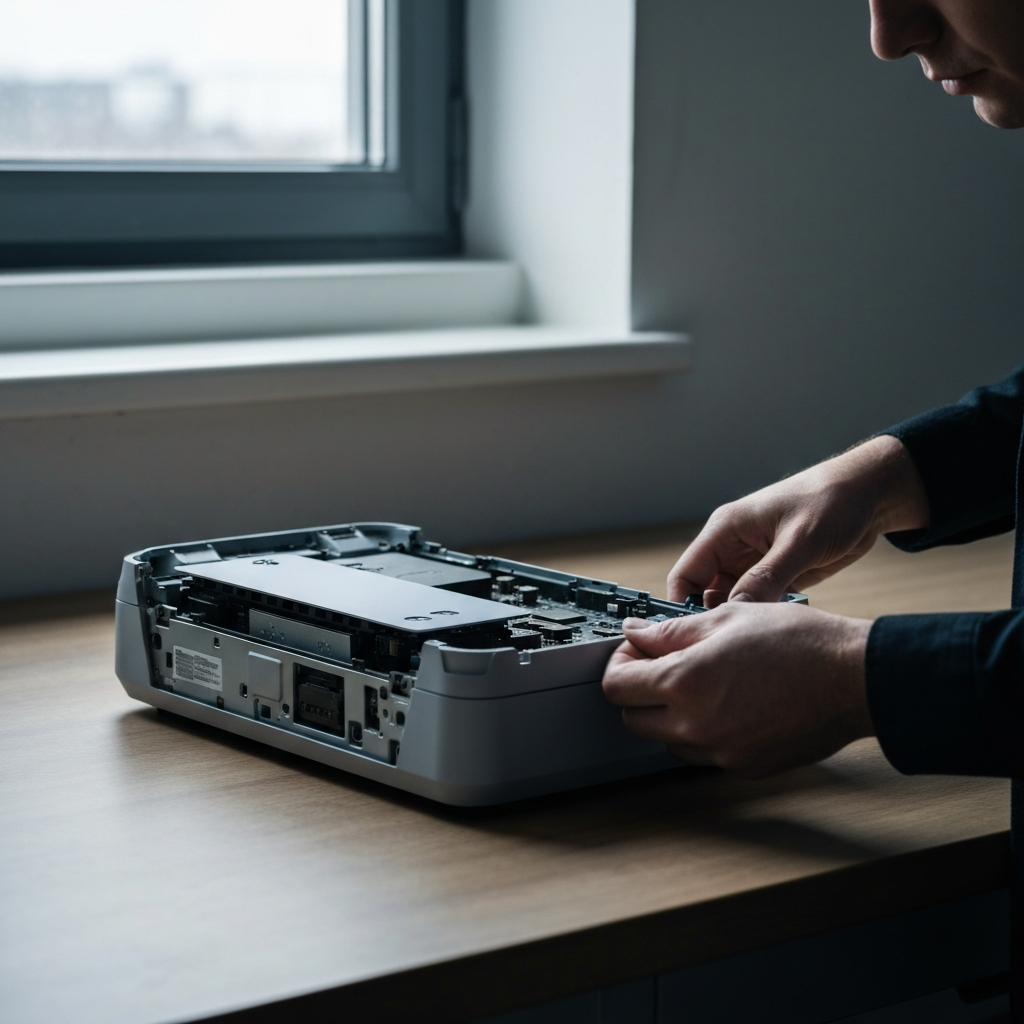
Step 4: Removing the PS5's Bottom Panel
Place the PS5 on a clean, flat surface with the PlayStation logo facing down and the power button facing away from you. Grip the bottom-right corner of the panel with your right hand and the top-right corner with your left hand. Gently lift the right edge while simultaneously sliding the panel towards you. The panel should slide off relatively easily with minimal force. If you encounter resistance, double-check your grip and try again. Forcing the panel can damage the clips that hold it in place. If you slide in the wrong direction, it will not work.
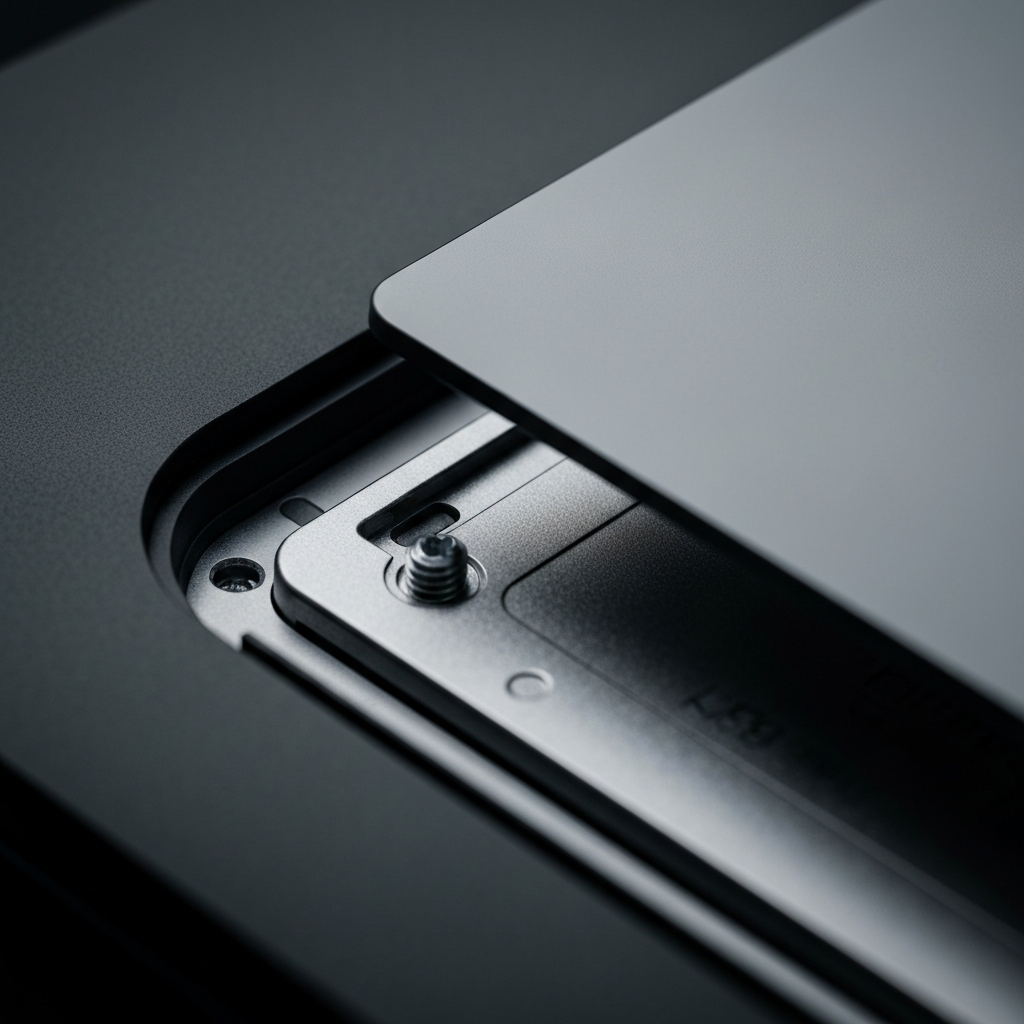
Step 5: Removing the SSD Expansion Slot Cover
Locate the SSD expansion slot cover. It's a small, rectangular metal plate secured by a single screw. Use a Phillips head screwdriver to remove the screw. Set the screw aside in a safe place, as it's easy to lose. Once the screw is removed, gently lift the expansion slot cover to remove it.
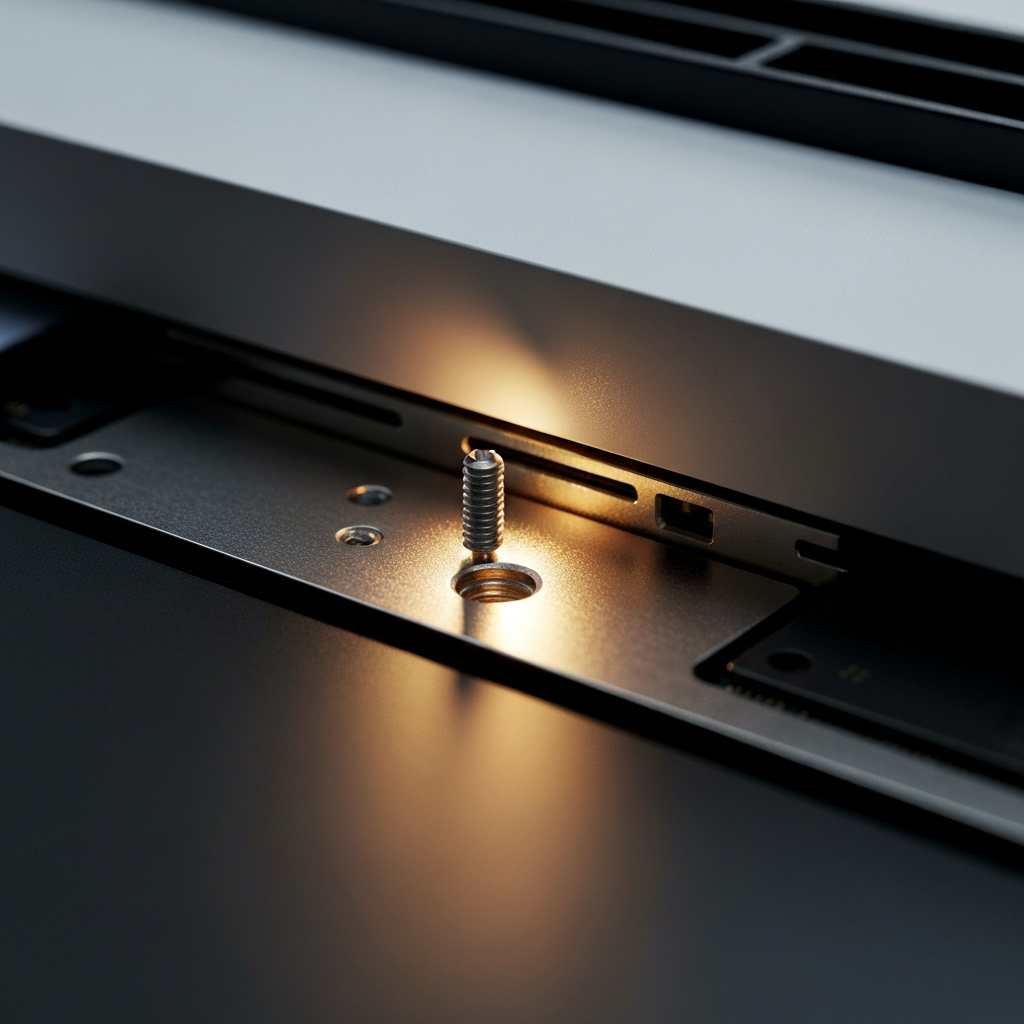
Step 6: Removing the Screw and Spacer
Inside the expansion slot, you'll find a screw and a metal spacer. These hold the SSD in place once installed. Use your Phillips head screwdriver to remove the screw securing the spacer. Note the position of the spacer, as you'll need to reposition it based on the length of your SSD. Place the screw and spacer aside in a safe location, preferably with the screw from the previous step to avoid mixing them up.
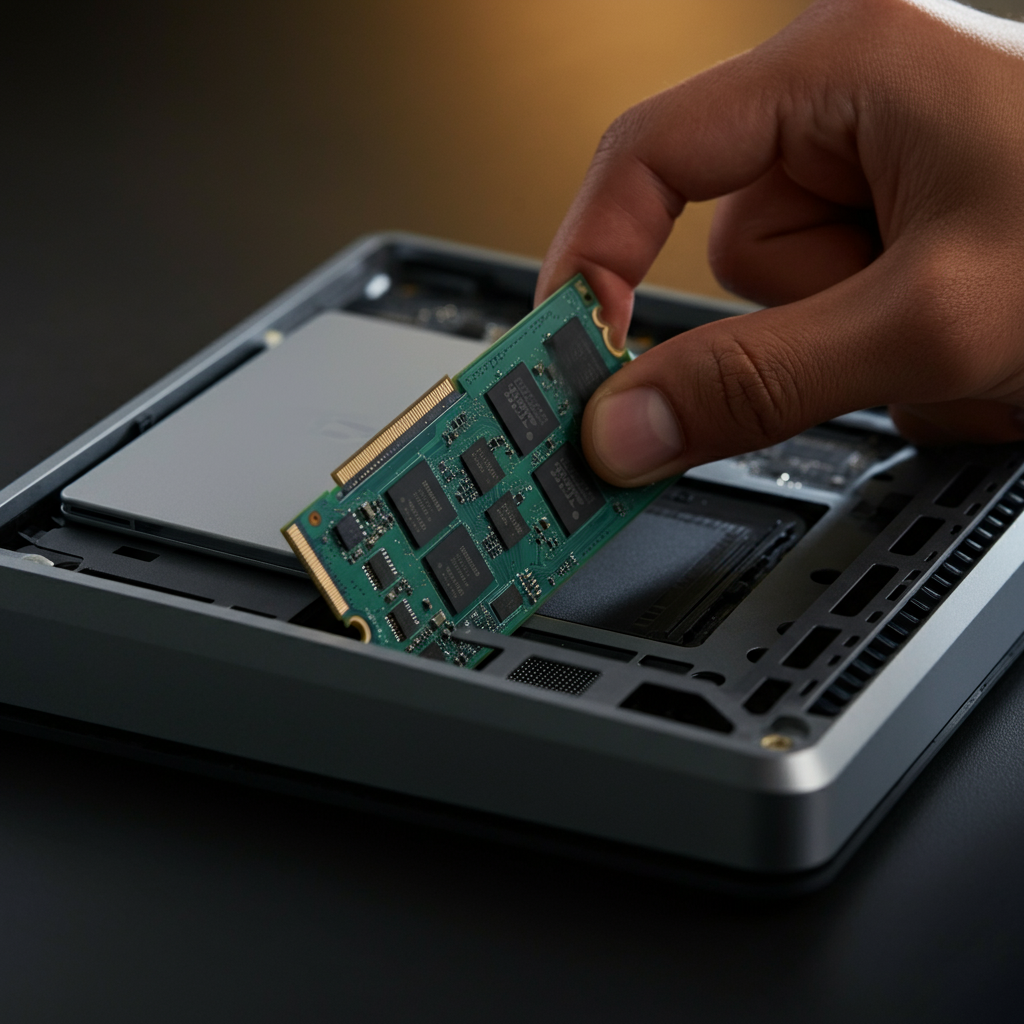
Step 7: Inserting the SSD
Align the notch on the SSD with the corresponding notch in the expansion slot. Gently insert the SSD at a slight upward angle (about 25 degrees). Once the connector is fully seated, press down on the other end of the SSD until it lies flat. Ensure the SSD is securely connected to the slot.
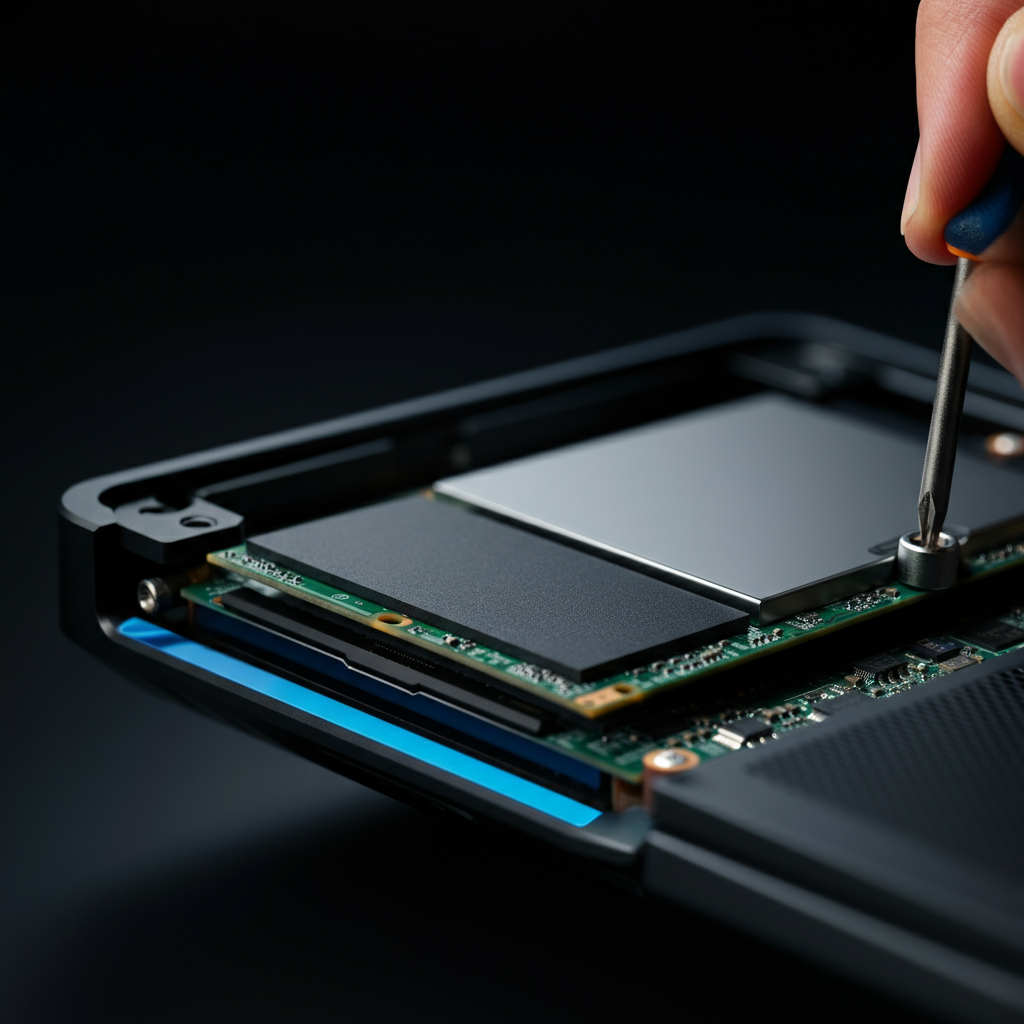
Step 8: Securing the SSD with the Spacer and Screw
Based on the length of your SSD (30mm, 42mm, 60mm, 80mm, or 110mm), reposition the metal spacer to the corresponding screw hole. Place the spacer in the correct hole, then align the screw and tighten it to secure the SSD. Do not overtighten the screw, as this could damage the SSD or the motherboard. The SSD should be held firmly in place without any wobble.
Step 9: Reinstalling the Expansion Slot Cover
Place the expansion slot cover back over the SSD and align the screw hole. Reinstall the screw and tighten it securely. Make sure the cover is flush with the console's side panel.
Step 10: Reattaching the Bottom Panel
Align the bottom panel with the console and slide it back into place. You should hear a click as the panel securely snaps into position. Ensure the panel is fully seated and flush with the rest of the console.
Step 11: Reconnecting and Powering On Your PS5
Reconnect the power cable, HDMI cable, and any other peripherals you disconnected earlier. Power on your PS5. The console should recognize the newly installed SSD and prompt you to format it.
Step 12: Formatting the SSD
Follow the on-screen instructions to format the SSD. This process prepares the SSD for use with your PS5. Do not interrupt the formatting process, as this could corrupt the drive. Once formatting is complete, your new SSD is ready to use. You can now move games and apps to the expanded storage.
Tools or Materials Required
- Compatible M.2 NVMe PCIe Gen4 SSD
- Phillips head screwdriver (size PH1 or PH0 recommended)
- Anti-static wrist strap (optional, but recommended)
- Clean, flat workspace
Safety Considerations
- Always disconnect the power cable before working on the console.
- Avoid static electricity by using an anti-static wrist strap.
- Do not force any components during installation.
- If you are not comfortable performing this upgrade, consult a professional.
Common Mistakes to Avoid
- Purchasing an incompatible SSD.
- Forgetting to update the PS5 system software.
- Overtightening screws.
- Interrupting the formatting process.
- Not properly aligning the SSD during insertion.
Pro Tips
- Research SSD reviews to find the best performance and reliability.
- Consider adding a heatsink to your SSD for optimal thermal management.
- Back up your PS5 data before performing any hardware upgrades.
FAQ Section
- Q: Will installing an SSD void my PS5 warranty?
- A: No, installing an SSD does not void your warranty, as long as you follow Sony's guidelines.
- Q: Can I use an external hard drive for PS5 games?
- A: You can store PS5 games on an external hard drive, but you cannot play them directly from it. You must transfer them to the internal SSD or the expanded M.2 SSD to play them.
- Q: How do I move games to the new SSD?
- A: Go to Settings > Storage > Console Storage > Games and Apps. Select the games you want to move, then select "Move to M.2 SSD Storage."
Expanding your PS5's storage with an SSD is a straightforward process that can significantly improve your gaming experience. By following these steps carefully, you can ensure a successful installation and enjoy faster load times and more storage space for your favorite games. Remember to choose a compatible SSD, update your system software, and take necessary safety precautions. Happy gaming!