In today's digital age, technology is interwoven into nearly every aspect of our lives. When our devices malfunction, it can be incredibly frustrating and disruptive. While professional repair services are an option, many common tech issues can be resolved with a little know-how and patience. This guide aims to empower you with the fundamental skills and strategies to troubleshoot your tech effectively, saving you time and money.
We'll walk you through a step-by-step process, covering everything from basic diagnostics to common fixes. Remember, troubleshooting is a process of elimination, so don't be discouraged if the first solution doesn't work. The key is to remain methodical and persistent. Before diving in, always back up your data to prevent accidental loss, and when in doubt, consult a professional.
This guide focuses on common problems that most users encounter. By understanding these basic principles, you'll be well-equipped to tackle a wide range of tech issues and become a more confident and self-sufficient technology user.
Step 1: Identify the Problem
Understanding the Symptoms
The first step in troubleshooting is accurately identifying the problem. This involves observing the device's behavior and noting any error messages, unusual sounds, or performance issues. Be as specific as possible when describing the problem. For example, instead of saying "My computer is slow," try "My computer takes a long time to boot up and programs respond slowly after opening them." Consider when the problem started and what actions you took leading up to it. The more information you gather, the easier it will be to pinpoint the root cause.

Step 2: Restart Your Device
The Universal Fix
It sounds cliché, but restarting your device is often the simplest and most effective solution. Restarting clears temporary files, resets system processes, and can resolve minor software glitches. This applies to computers, smartphones, tablets, and even some smart home devices. Before restarting, save any unsaved work to prevent data loss. For a computer, perform a proper shutdown through the operating system menu. For smartphones or tablets, hold down the power button and select the restart option. A "hard restart" (holding the power button until the device shuts off) should only be used as a last resort as it can potentially cause data corruption.

Step 3: Check Your Connections
Wired and Wireless
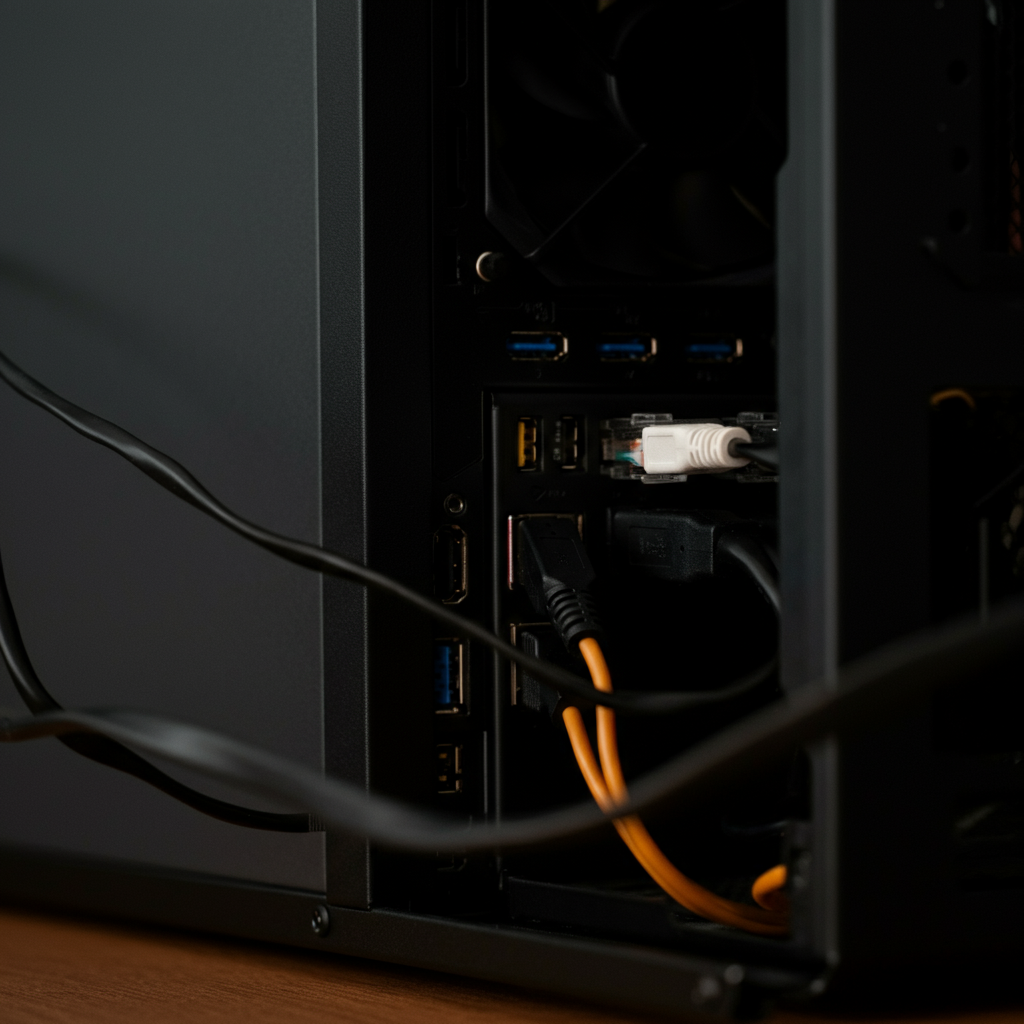
Many tech problems stem from loose or faulty connections. For wired connections, such as power cords, Ethernet cables, and USB cables, ensure they are securely plugged into both the device and the wall outlet or computer port. Try unplugging and replugging the cables to ensure a solid connection. For wireless connections, such as Wi-Fi and Bluetooth, verify that your device is connected to the correct network and that the network is functioning correctly. Check your router's status lights and try restarting your router if necessary. Pay close attention to the cable ends – look for bent pins or damage. Always replace damaged cables promptly.
Step 4: Update Your Software
Operating System and Applications
Outdated software can lead to compatibility issues, security vulnerabilities, and performance problems. Ensure that your operating system (Windows, macOS, Android, iOS) and applications are up to date. Most operating systems have built-in update mechanisms that automatically check for and install updates. You can also manually check for updates through the system settings. Similarly, many applications have their own update features, often found in the "About" or "Help" menu. Regular software updates are crucial for maintaining the stability and security of your device. Ignoring update prompts can lead to more significant issues down the line.

Step 5: Run a Virus Scan
Protecting Your System
Malware infections can cause a wide range of problems, including slow performance, system crashes, and data loss. If you suspect your device may be infected with a virus, run a full system scan using a reputable antivirus program. Ensure that your antivirus software is up to date with the latest virus definitions. If the scan detects any threats, follow the program's instructions to remove or quarantine them. Even if you don't suspect a virus, it's a good practice to run a scan periodically as a preventative measure. Consider using a firewall to further protect your system from unauthorized access.

Step 6: Check for Driver Updates (Windows)
Hardware Harmony
On Windows systems, drivers are essential software components that allow your operating system to communicate with your hardware (e.g., graphics card, printer, network adapter). Outdated or corrupted drivers can cause hardware malfunctions or performance issues. You can check for driver updates through the Device Manager. Right-click on the Start button and select "Device Manager." Look for devices with a yellow exclamation mark, which indicates a driver problem. You can update drivers automatically through Windows Update or manually by downloading the latest drivers from the manufacturer's website. Always download drivers from the official manufacturer website to avoid installing malware.
