Plastic ceiling panels are an increasingly popular choice for homeowners looking to renovate or upgrade their ceilings. They offer a cost-effective, moisture-resistant, and aesthetically versatile alternative to traditional ceiling materials like drywall. Whether you're aiming for a sleek, modern look or a more decorative finish, plastic ceiling panels provide a relatively simple and quick installation process suitable for DIY enthusiasts of varying skill levels.
This guide provides a detailed, step-by-step approach to fitting plastic ceiling panels. We'll cover everything from measuring your space and preparing the panels to securely attaching them and adding finishing touches. By following these instructions carefully, you can achieve a professional-looking ceiling that will enhance the beauty and functionality of your room for years to come. The time investment for an average-sized room (10ft x 12ft) is approximately 8-16 hours, depending on experience.
Before you begin, ensure you have all the necessary tools and materials readily available. This will streamline the process and prevent frustrating interruptions. Remember to prioritize safety and take your time to ensure a high-quality, long-lasting result.
Tools or Materials Required
- Plastic Ceiling Panels
- Measuring Tape
- Pencil
- Straight Edge or Level
- Fine-Toothed Saw (or Utility Knife for thinner panels)
- Safety Glasses
- Staple Gun (or Construction Adhesive)
- Staples (or appropriate adhesive)
- Ladder or Step Stool
- PVC Trim (optional, for a more finished look)
- Tin Snips (for cutting trim)
- Hole Saw Kit (if installing recessed lighting)
- Caulk (for sealing edges, optional)
- Emery cloth or fine sandpaper
Step 1: Measure the Ceiling Area
The first step is to accurately measure the area of your ceiling. This will determine the number of panels you need to purchase. Use a measuring tape to find the length and width of the room. Measure from the centers of each wall, not from corner to corner, to account for any irregularities. Multiply the length by the width to calculate the total ceiling area in square feet (or square meters). For irregular-shaped rooms, divide the ceiling into smaller, manageable rectangular sections, calculate the area of each section, and then add them together. It's always a good idea to purchase 10-15% extra material to account for waste from cuts and potential mistakes.
Step 2: Calculate the Number of Panels Needed
Once you have the total ceiling area, you need to determine how many panels are required to cover it. Find the dimensions of a single panel (length and width) and multiply them to calculate its area. Then, divide the total ceiling area by the area of one panel. The result will be the number of panels you need. Always round up to the nearest whole number and add a few extra panels to account for cuts and errors. Consider purchasing panels from the same batch to ensure consistent color and finish.
Step 3: Planning the Layout
Careful planning is essential for a professional-looking installation. Before cutting any panels, lay them out on the floor in a pattern that mimics how they will be installed on the ceiling. This will help you visualize the final result and identify any potential issues, such as awkward cuts or uneven spacing. Determine the best starting point for the installation, typically along the longest, straightest wall. Think about the placement of light fixtures and other ceiling-mounted objects and plan your cuts accordingly. Decorative tiles look more balanced and uniform if you have cut pieces along the outer edge. Calculate the depth of an outer border around your PVC tiles for a more seamless look.
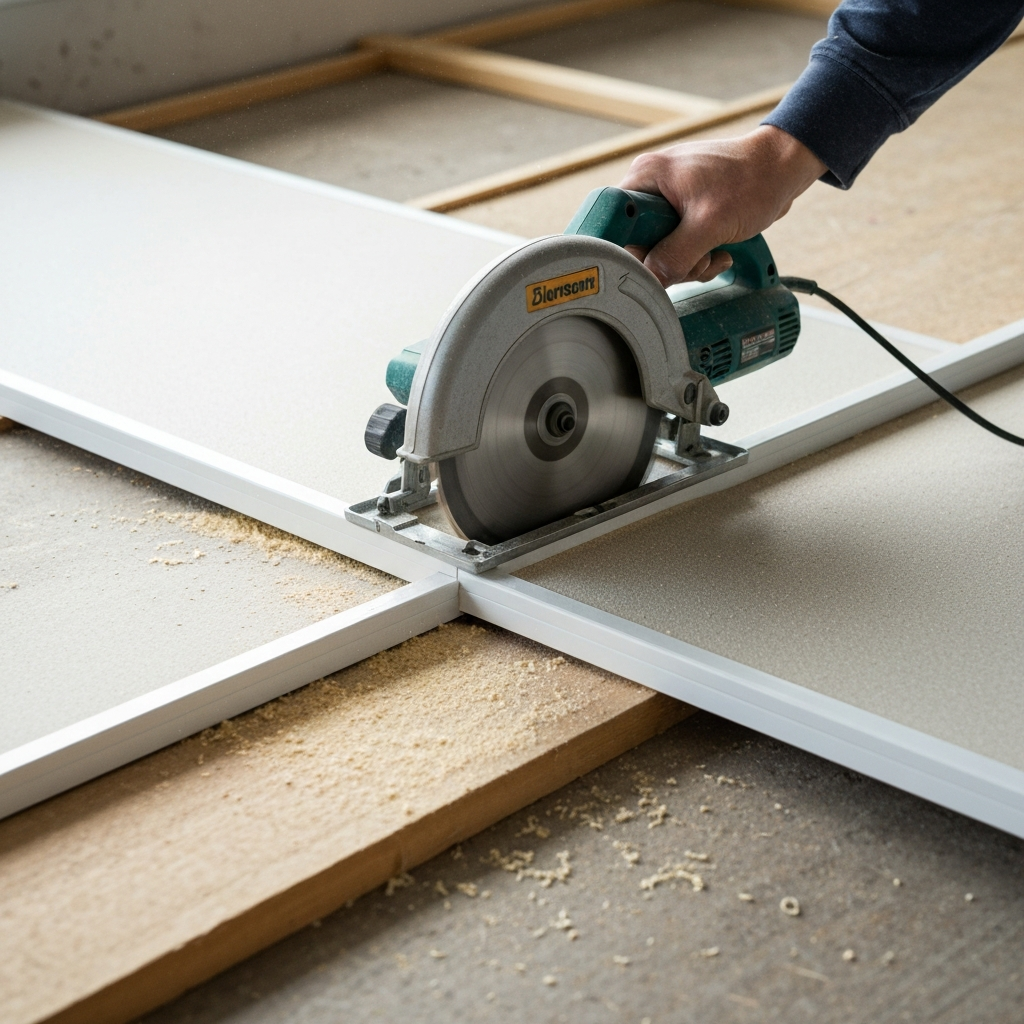
Step 4: Cutting the Panels
Accurate cutting is crucial for a seamless and professional finish. Measure and mark the panels according to your planned layout. Use a straight edge and a pencil for precise lines. For thicker PVC panels, a fine-toothed saw is recommended for clean cuts. Secure the panel to a work surface with clamps to prevent movement during cutting. For thinner, more flexible panels, a utility knife or heavy-duty scissors may suffice. After cutting, smooth out any rough edges with emery cloth or fine sandpaper. Remember to wear safety glasses to protect your eyes from debris.
Step 5: Installing Trim (Optional)
PVC trim can add a polished, professional look to your ceiling. It also helps to conceal any uneven edges or gaps between the panels and the walls. Measure and cut the trim pieces to fit along the perimeter of the ceiling, using tin snips. Attach the trim to the ceiling using nails or staples, ensuring it is securely fastened to the ceiling joists. The trim pieces usually have grooves that hold the edges of the cladding, which means they are less likely to fall or sag.
Step 6: Attaching the First Panel
Start by cutting off the protruding tongue off the first piece of panel with your saw. Position the first panel in the designated starting corner, ensuring it is aligned properly with the walls and trim (if installed). Secure the panel to the ceiling using a staple gun, stapling along the edges and in the center of the panel. If using construction adhesive, apply a generous amount to the back of the panel and press it firmly against the ceiling, holding it in place until the adhesive sets. The first panel sets the tone for the entire installation, so ensure it is perfectly aligned and securely attached.
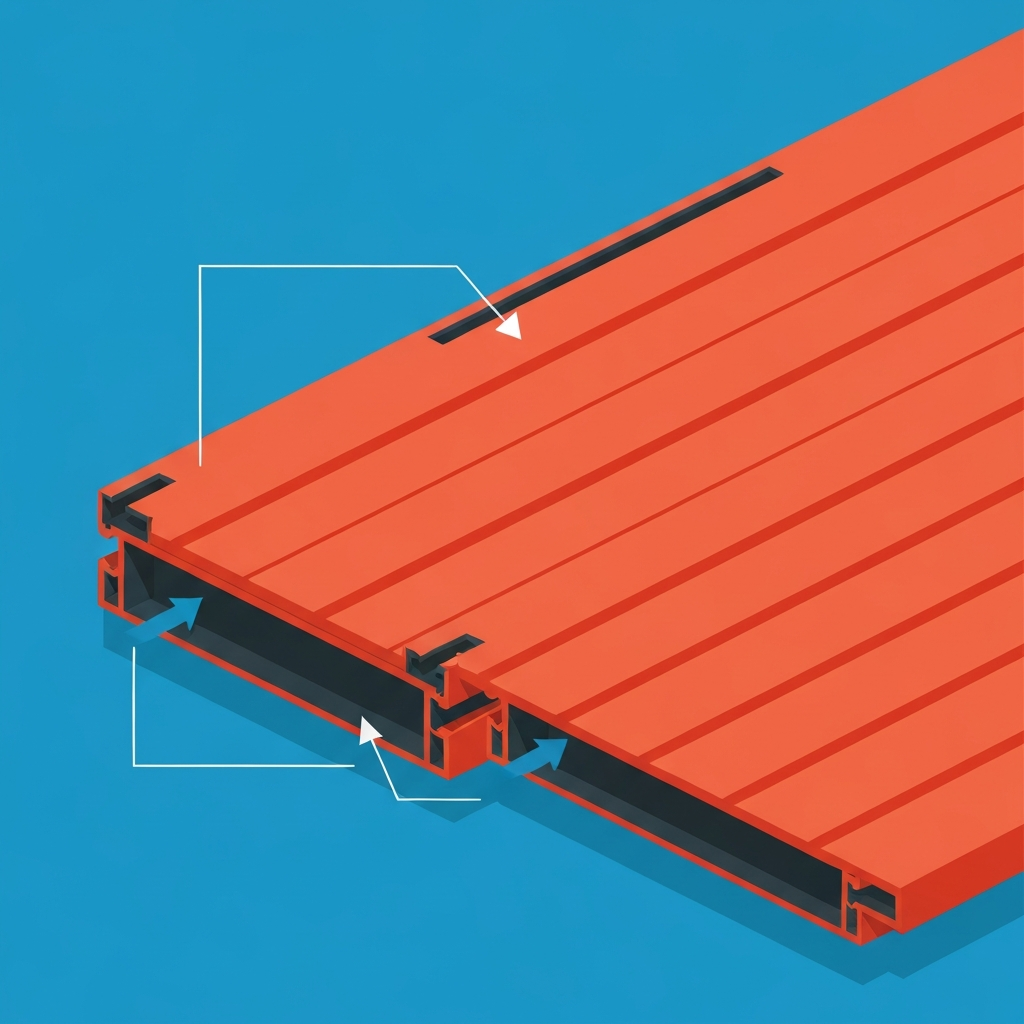
Step 7: Installing Subsequent Panels
Continue installing the remaining panels, working systematically across the ceiling. If using a tongue-and-groove system, ensure the panels interlock tightly, creating a seamless connection. Measure the width of the room just in front of the panel you just installed, since it may vary. Cut the next piece of panel to the right size and slide it into the end trim pieces. Push the new panel's tongue tightly against the previous panel's groove to give your ceiling a nice, seamless look. Always staple the panel to the joists before installing the next one. Secure each panel as you go, using either staples or construction adhesive. Pay close attention to alignment and spacing, making adjustments as needed to maintain a consistent and professional appearance.
Step 8: Cutting and Installing Panels Around Obstacles
When you encounter obstacles such as light fixtures, pipes, or vents, carefully measure and mark the panel accordingly. Use a hole saw or utility knife to cut out the necessary openings. Ensure the openings are slightly larger than the obstacle to allow for some wiggle room. After installing the panel, you can conceal any gaps with caulk or trim.
Step 9: Finishing Touches
Once all the panels are installed, inspect the ceiling for any imperfections or gaps. Apply caulk along the edges and around any obstacles to seal the seams and create a watertight barrier. Clean the panels with a damp cloth to remove any dust or debris. If desired, you can paint the panels to match your room's décor. With decorative panels, if you had to cut out any spots for vents or light fixtures, place a bead of adhesive around the cut edge so it doesn’t come loose later on.
Safety Considerations
- Always wear safety glasses to protect your eyes from debris when cutting panels.
- Use a sturdy ladder or step stool and ensure it is placed on a stable surface.
- Be careful when using sharp tools, such as saws and utility knives.
- If using construction adhesive, follow the manufacturer's instructions and provide adequate ventilation.
- Disconnect power to any electrical fixtures before working around them.
Common Mistakes to Avoid
- Inaccurate measurements leading to insufficient material.
- Rushing the cutting process, resulting in uneven or jagged edges.
- Improper alignment of panels, creating a crooked or unprofessional appearance.
- Using the wrong type of adhesive, leading to panels detaching from the ceiling.
- Forgetting to account for obstacles, requiring last-minute and potentially messy cuts.
FAQ Section
Q: Can I install plastic ceiling panels over an existing ceiling?
A: Yes, you can install plastic ceiling panels over an existing ceiling, provided the existing ceiling is structurally sound and relatively flat.
Q: Are plastic ceiling panels waterproof?
A: Yes, most plastic ceiling panels are waterproof, making them an ideal choice for bathrooms and kitchens.
Q: Can I paint plastic ceiling panels?
A: Yes, you can paint plastic ceiling panels using a long-handled roller. Choose a roller that has a 1 ½ inch nap so you can get into the grooves of the ceiling. Roll the paint in the same direction as your paneling so you don’t leave any marks on it. Apply 1–2 coats of paint so the panels have a uniform color.
Q: Are plastic ceiling panels fire-resistant?
A: PVC is fire-retardant, but it will still sag and melt if it has prolonged exposure to heat sources. Avoid putting PVC or plastic paneling anywhere that’s exposed to temperatures higher than 130 °F (54 °C).
Pro Tips
- When cutting panels, score the cutting line first with a utility knife to prevent chipping.
- Use a laser level to ensure the panels are perfectly aligned.
- For a more seamless look, consider using panels with hidden fasteners.
- If you're unsure about any step, consult a professional contractor.
Conclusion
Fitting plastic ceiling panels is a rewarding DIY project that can significantly enhance the appearance and value of your home. By following the steps outlined in this guide, you can achieve a professional-looking ceiling that is both aesthetically pleasing and highly functional. Remember to take your time, prioritize safety, and pay attention to detail. With careful planning and execution, you can transform your ceiling into a stunning focal point of your room.