Plastic ceiling panels, often made of PVC, offer a cost-effective and visually appealing alternative to traditional ceiling materials. They are lightweight, water-resistant, and relatively easy to install, making them a popular choice for both residential and commercial applications. This guide provides a comprehensive, step-by-step approach to successfully fitting plastic ceiling panels, ensuring a professional and long-lasting result.
Whether you're looking to renovate an existing space or create a fresh new look, understanding the proper techniques and considerations is crucial. This guide will walk you through everything from measuring and cutting the panels to securely attaching them to your ceiling structure. We'll also cover important safety precautions and pro tips to help you avoid common mistakes and achieve a flawless finish.
By following these instructions carefully, even DIY novices can transform their ceilings with durable and stylish plastic panels. Get ready to enhance your living space with this practical and informative guide!
Step 1: Planning and Measurement
Accurate Ceiling Measurement
Before you even think about picking up a panel, precise measurements are paramount. Use a reliable measuring tape to determine the length and width of your ceiling. Measure at multiple points along each wall, as walls are rarely perfectly straight or square. For irregular shaped rooms, break the ceiling into smaller, rectangular sections, measure each individually, and then add the areas together to get the total ceiling area. This ensures you purchase enough material and minimize waste. Remember to account for any existing fixtures, like light fittings or ventilation shafts, when calculating panel requirements.

Step 2: Material Calculation and Ordering
Determining Panel Quantity
Once you have the total ceiling area, determine the area of a single panel (length x width). Divide the total ceiling area by the area of a single panel to calculate the number of panels you’ll need. It's always wise to add an extra 10-15% to your order to account for cuts, waste, and potential mistakes. Nothing is more frustrating than running short of materials halfway through a project. Also, ensure you order any necessary trims or edge pieces at this stage to achieve a clean, professional finish.

Step 3: Panel Cutting
Precision Cutting Techniques
Cutting plastic ceiling panels requires precision to ensure a snug and aesthetically pleasing fit. Use a sharp utility knife with a fresh blade or a fine-toothed saw designed for plastics. Always measure twice and cut once. Score the panel along the cut line with the utility knife before making a deeper cut. For a saw, clamp the panel securely to a workbench to prevent movement and ensure a clean, straight cut. For circular cuts for light fixtures, use a hole saw of the appropriate diameter. Sand down any rough edges after cutting to prevent splinters or sharp points.

Step 4: Installing the Trim (If Applicable)
Securing Edge Trim
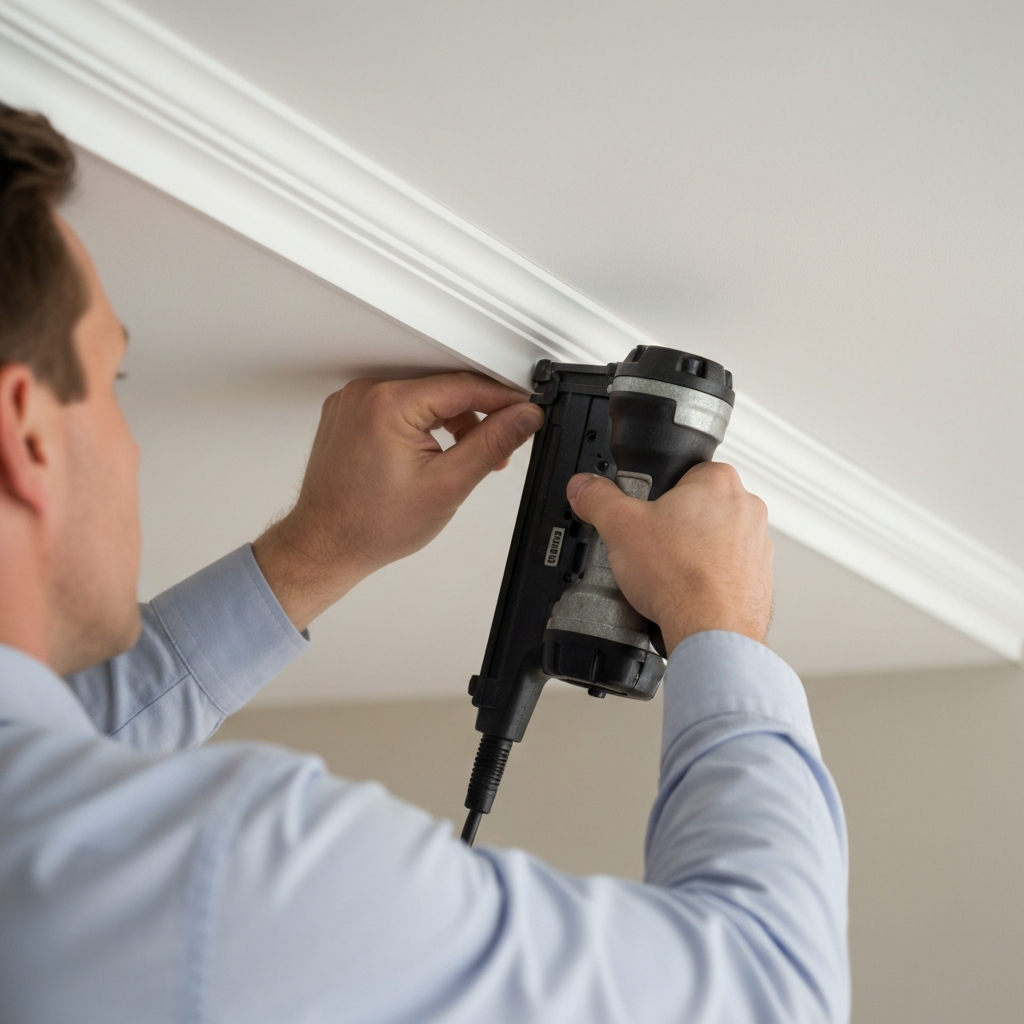
Many plastic ceiling panel systems utilize edge trim to create a neat and professional-looking border. This trim is typically installed around the perimeter of the ceiling before the panels are fitted. Measure the length of each wall and cut the trim pieces to the appropriate size. Use construction adhesive or small nails/staples to attach the trim to the ceiling joists or furring strips. Ensure the trim is level and securely fastened to provide a solid base for the panels. Properly installed trim not only enhances the appearance but also helps to secure the panels and prevent sagging.
Step 5: Panel Installation
Attaching the Panels
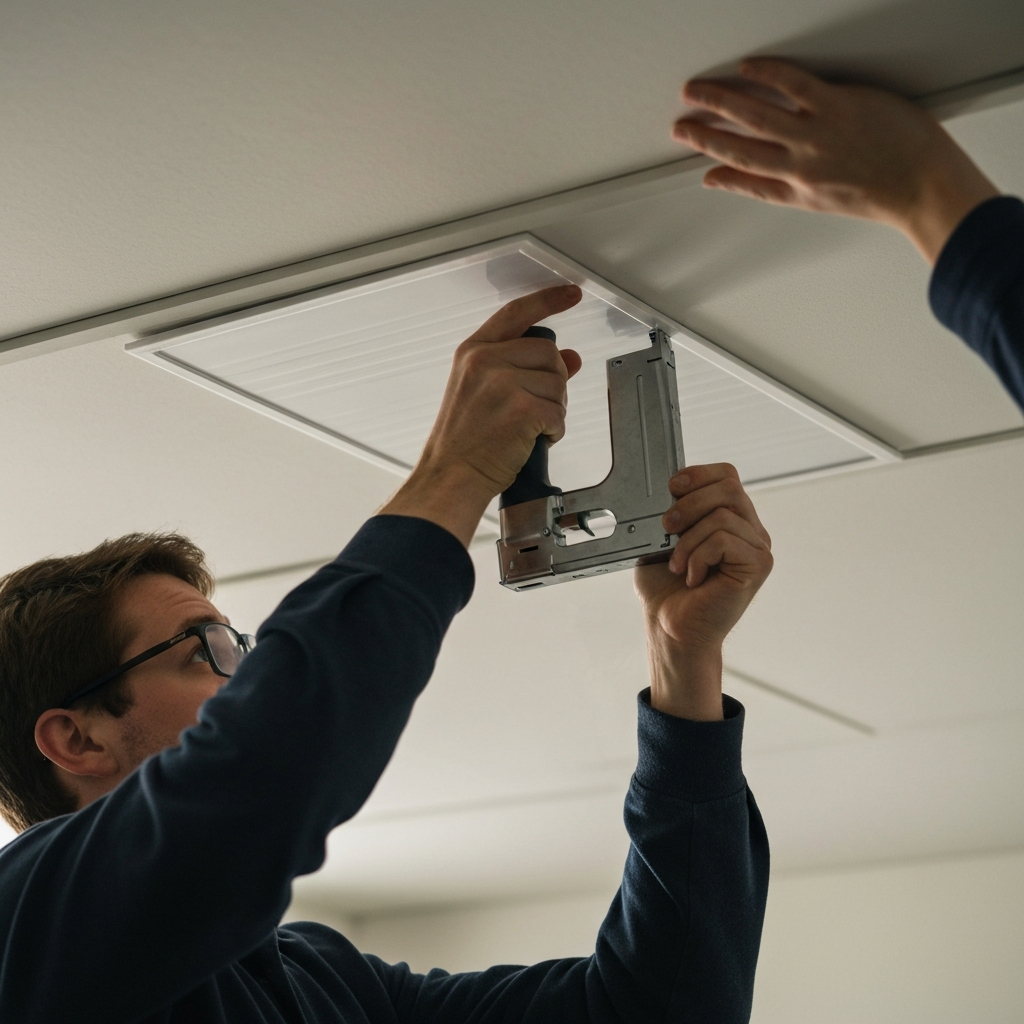
Begin installing the panels from one corner of the room, working your way across the ceiling. Depending on the panel system, you may use construction adhesive, staples, or screws to attach the panels to the ceiling joists or furring strips. Ensure each panel is level and securely fastened before moving on to the next. If using adhesive, apply it evenly to the back of the panel and press firmly against the ceiling for a few seconds to allow it to bond. With tongue-and-groove panels, make sure the tongues and grooves are properly aligned before securing them in place. For screw or staple installations, pre-drill pilot holes to prevent the plastic from cracking.
Step 6: Cutting Around Fixtures
Dealing with Obstructions
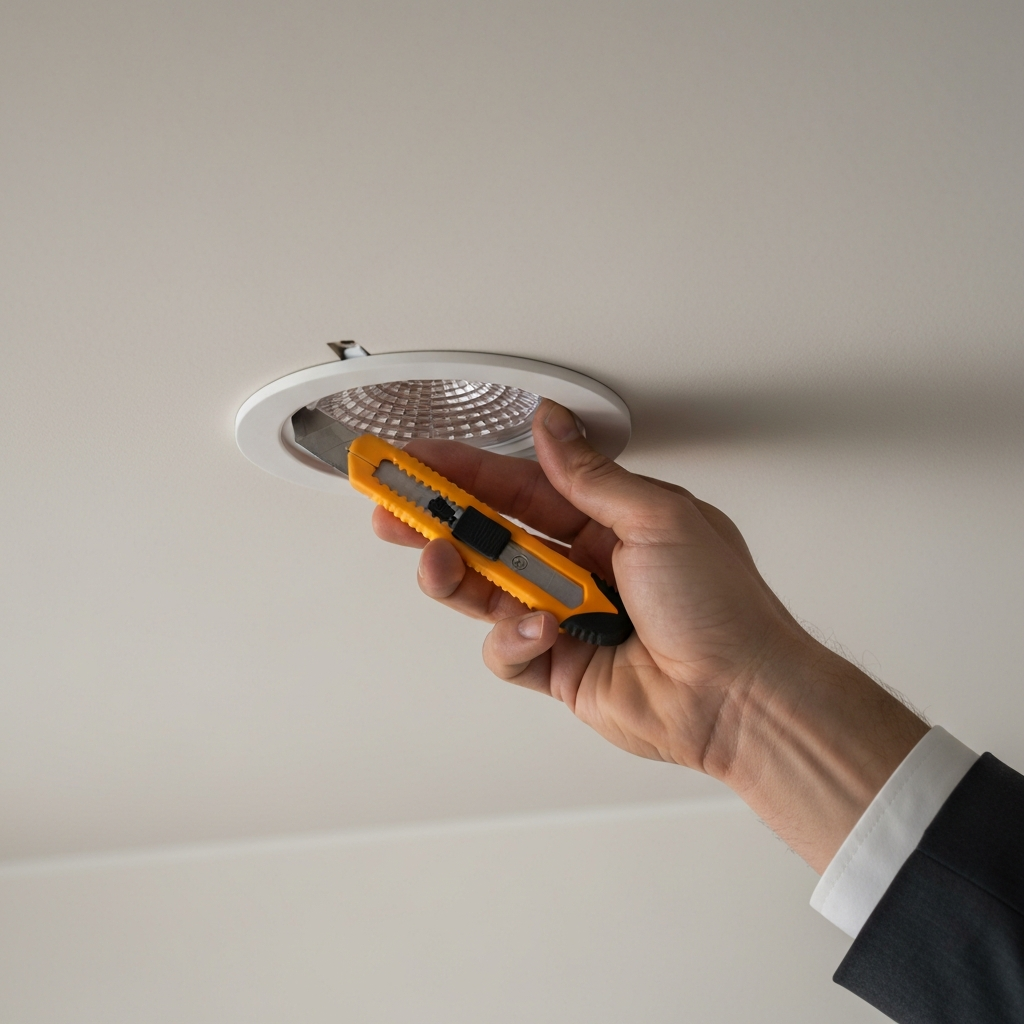
When you reach areas with light fixtures, ventilation shafts, or other obstructions, carefully measure and cut the panels to fit around them. Use a template or compass to create accurate cutouts. It's always better to make the cutout slightly larger than necessary and then cover any gaps with sealant or trim. For circular cutouts, a hole saw is the ideal tool. Remember to turn off the power to any electrical fixtures before working around them to avoid the risk of electric shock.
Step 7: Finishing Touches
Sealing and Cleaning
Once all the panels are installed, inspect the ceiling for any gaps or imperfections. Use caulk or sealant to fill any gaps along the edges or around fixtures. Wipe down the panels with a damp cloth to remove any dust or debris. Avoid using harsh chemicals or abrasive cleaners, as they can damage the plastic surface. With proper installation and care, your new plastic ceiling will provide years of durable and attractive service.

Tools or Materials Required
- Plastic Ceiling Panels
- Measuring Tape
- Utility Knife or Fine-Toothed Saw
- Safety Glasses
- Work Gloves
- Level
- Construction Adhesive, Staples, or Screws
- Caulk or Sealant
- Caulking Gun
- Hole Saw (if needed for fixtures)
- Pencil
- Straight Edge
- Clamps
Safety Considerations
- Always wear safety glasses to protect your eyes from debris.
- Use work gloves to protect your hands.
- Turn off the power to any electrical fixtures before working around them.
- Work in a well-ventilated area when using construction adhesive or sealant.
- Use a stable ladder or scaffolding to reach the ceiling.
- Follow the manufacturer's instructions for all tools and materials.
Common Mistakes to Avoid
- Inaccurate measurements leading to material shortages or wasted panels.
- Cutting panels incorrectly, resulting in gaps or uneven edges.
- Failing to secure the panels properly, causing them to sag or fall down.
- Using the wrong type of adhesive or fasteners.
- Damaging the panels with harsh chemicals or abrasive cleaners.
FAQ Section
- Can I install plastic ceiling panels over an existing ceiling?
- Yes, in many cases, you can install plastic ceiling panels over an existing ceiling, provided the existing ceiling is structurally sound and level. Furring strips may be required to create a level surface.
- Are plastic ceiling panels waterproof?
- Yes, most plastic ceiling panels are waterproof, making them ideal for bathrooms, kitchens, and other areas prone to moisture.
- Can I paint plastic ceiling panels?
- Yes, you can paint plastic ceiling panels with a paint specifically designed for plastics. Proper surface preparation is essential for good adhesion.
In conclusion, fitting plastic ceiling panels is a manageable DIY project that can significantly enhance the aesthetic appeal and functionality of a room. By carefully planning, taking accurate measurements, and following the step-by-step instructions outlined in this guide, you can achieve a professional-looking result. Remember to prioritize safety and avoid common mistakes to ensure a successful and long-lasting installation.